Setting up your Paid Memberships Pro (PMPro) plugin is crucial for managing member subscriptions effectively. The second step in the initial setup process involves managing the WordPress pages assigned to each required PMPro page under Memberships > Page Settings.
If you reach this setup stage and do not see the option to “let us generate them for you,” you may need to troubleshoot or opt for manual page creation.
Checking for Automatically Generated Pages
During the initial setup of Paid Memberships Pro, you have the option for the plugin to generate the required pages for you within the Setup Wizard. If you do not set up pages through the Setup Wizard, you will need to create the pages under Memberships > Page Settings.
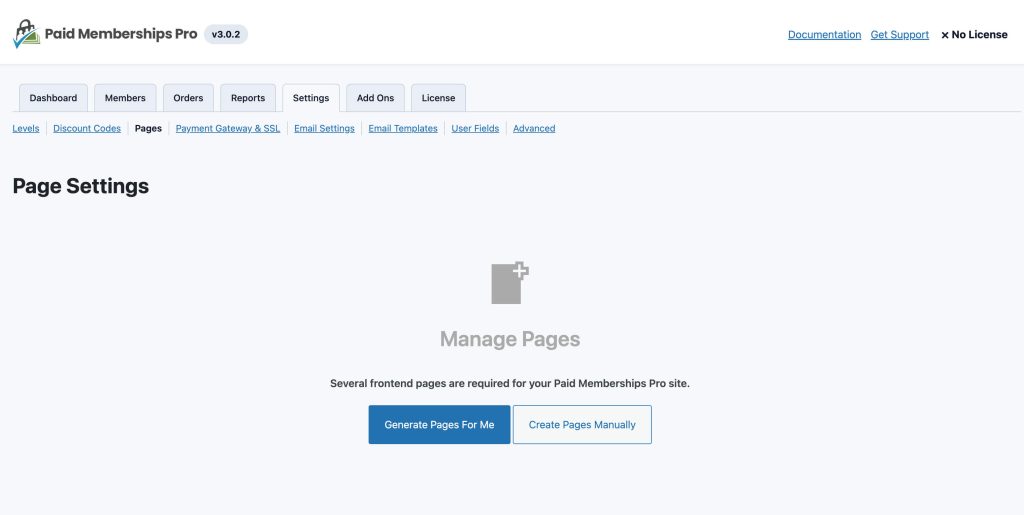
If the the automatic page generation option is missing, it could indicate that the pages were previously created and then deleted.
Troubleshooting Missing Membership Pages
To troubleshoot missing membership pages, follow these steps:
- Navigate to Pages > All Pages > Trash.
- Look for deleted membership pages such as “Membership Account,” “Membership Billing,” etc.

- If found in the trash, click “Restore” for each page to recover them.
- After restoration, these pages should reappear under Memberships > Page Settings and be assignable again.
If the pages are not in the trash, you’ll need to recreate them manually.
Manual Page Creation and Configuration
To manually set up the required PMPro pages, follow these steps:
- Navigate to Pages > Add New.
- Create the following pages, including the specified shortcodes or blocks in the page text. You can name these pages and set up their template or hierarchy as needed:
| Page Name (suggested) | Required Shortcode or Block |
|---|---|
| Membership Account | Account page shortcode or block |
| Membership Billing | Billing page shortcode or block |
| Membership Cancel | Cancel page shortcode or block |
| Membership Checkout | Checkout page shortcode or block |
| Membership Confirmation | Confirmation page shortcode or block |
| Membership Invoice | Invoice page shortcode or block |
| Membership Levels | Levels page shortcode or block |
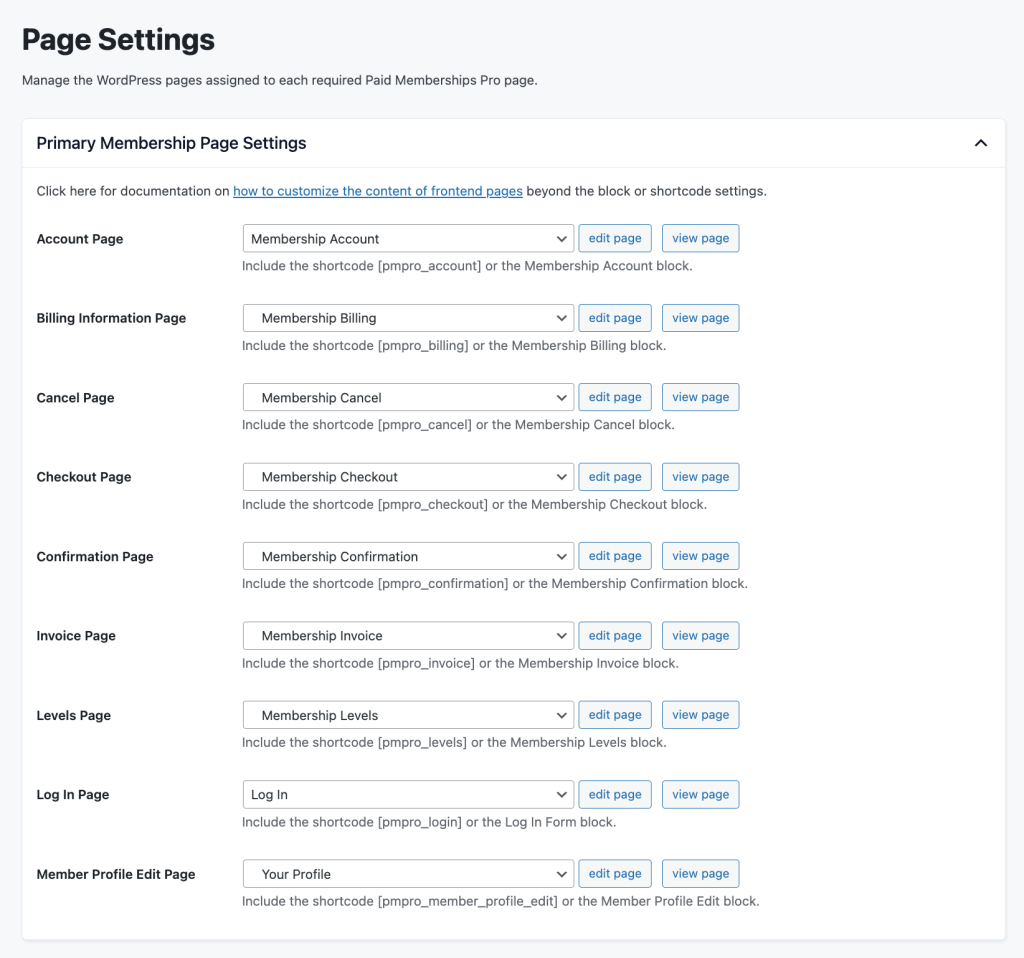
Assigning the Pages
- Navigate to Memberships > Settings > Pages.
- For each required Paid Memberships Pro page, select the page you created in the dropdown list.
- Save the settings.
Conclusion
By following these steps, you can ensure that all necessary Paid Memberships Pro pages are correctly set up and assigned, allowing you to manage your membership site efficiently. Whether you generate pages automatically or set them up manually, proper configuration is key to leveraging all functionalities of the PMPro plugin. If you’re having any trouble at all, our support team is ready to help.
Frequently Asked Questions
If the “let us generate them for you” option is not visible during the setup under Memberships > Page Settings, this usually means the pages were created and then deleted. You can check for these pages in the Trash section under Pages > All Pages. Restore any relevant pages and assign them appropriately.
After creating the pages, navigate to Memberships > Page Settings. Assign each newly created page from the dropdown list to its respective setting. Make sure to save your settings to apply the changes.
If you encounter issues after following the setup instructions, it is advisable to contact the Paid Memberships Pro support team. They are equipped to provide additional assistance and guidance to ensure your membership site functions optimally.