No matter what type of membership site you operate, analytics on what your visitors and members are consuming most can be a huge asset for your marketing and development efforts.
This article will show you how to track custom data like the user’s Membership Level, and other site related information like the post type, post category, and post author. We include two code recipes to track these custom dimensions in Google Analytics using three popular WordPress analytics plugins.
Once configured, you will be able to create a custom report in Universal Analytics (UA) to show top Content for non-members and for specific membership levels.
Configure a New Custom Dimension/Definition in Google Analytics
Custom dimensions and custom metrics are like default dimensions and metrics in your Analytics account, except you create them yourself. You can use them to collect and analyze data that Analytics doesn’t automatically track.
Custom Dimensions must be configured for the desired website property in your Analytics dashboard. To track Membership Level as a Custom Dimension, you will need to do the following:
Google Universal Analytics (UA): How to Set Up Custom Dimensions
- Log in to your Google Analytics Dashboard.
- Select the property that is using Universal Analytics (UA) you would like to manage.
- Navigate to the “Admin” management screen and select “Custom Definitions” then “Custom Dimensions” under the “Property” column (middle).
- Click “+ New Custom Dimension”.
- Name your dimension “membership_level”, and set the “Scope” to “Hit”.
- Save Settings.
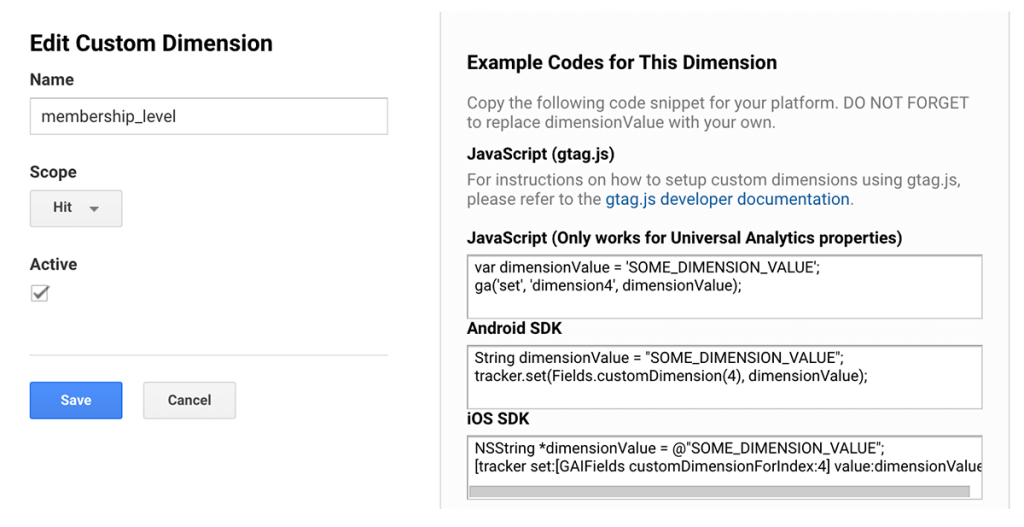
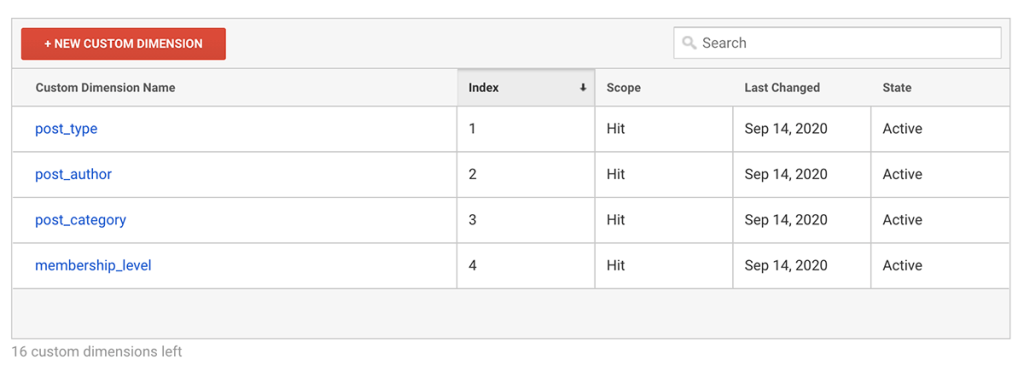
After the dimension has been created, take note of the “Index” (a numerical value that you will need for the later steps in this guide.
PMPro now offers a complete Google Analytics Integration plugin with custom membership data and full ecommerce tracking. Say goodbye to Monster Insights or Google Site Kit. This Add On is your all-in-one solution for Google Analytics integration.
Send Custom Dimensions to Google Universal Analytics (UA)
Option 1: Using GA Google Analytics by Jeff Starr
This popular WordPress plugin offers a very lightweight approach to adding the Google Analytics tracking code. Installation and setup instructions for this plugin are available in the repository listing here.
Once you have set up the plugin and created a custom dimension for Membership Level in your Analytics property, you must add the following code recipe to your site. This recipe uses the gap_custom_code filter hook to configure a new tracked dimension for “membership level” with the Index “4”. Your index may be different depending on how the dimension was set up in the web property. You will need to update line 23 of the recipe with your dimension’s appropriate index (i.e. dimension1).
Option 2: Using Google Analytics Dashboard for WP by ExactMetrics
Formerly known as GADWP, this WordPress plugin adds the Google Analytics tracking code and allows you to view key stats right in your site’s dashboard. The plugin offers additional features to customize tracking for your site’s needs, which is what this demo is all about. Installation and setup instructions for this plugin are available in the repository listing here.
Once you have setup the plugin and created the Custom Dimension in your Analytics property, you must add the following code recipe to your site. This recipe uses the exactmetrics_frontend_tracking_options_analytics_before_scripts filter hook to configure a new tracked dimension with the Index “1”. Your index may be different depending on how the dimension was set up in the web property. You will need to update line 16 of the recipe with your dimension’s appropriate index (i.e. dimension3).
Option 3: Using MonsterInsights Pro and the MonsterInsights – Dimensions Addon
When writing these tutorials, I always try to make the customization possible without the need for a premium plugin. If you are already using MonsterInsights or need any of the added features of this premium system, this second method is for you. You can explore current features and pricing of MonsterInsights at their site to help you decide if this plugin is a better fit than the option above.
As in option 1, you will need to configure the MonsterInsights plugin, create the Custom Dimension in your Analytics property, and also install and activate their Custom Dimensions Addon.
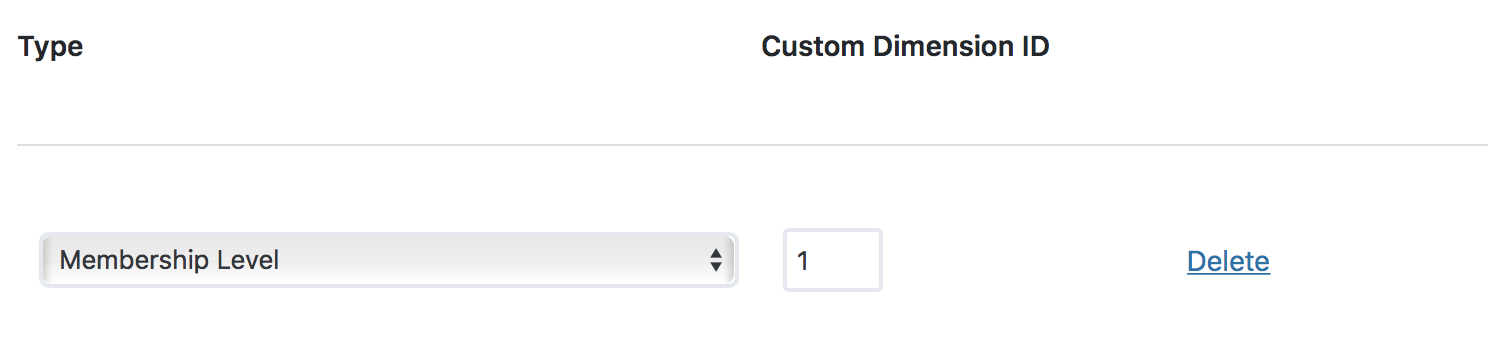
The following code recipe will add a new “Membership Level” dimension in the settings page of the MonsterInsights Pro plugin. Once the recipe has been added to your site using a plugin for PMPro Customizations, do the following:
- Navigate to “Insights” > “Settings” > “Conversions” > “Custom Dimensions”.
- Click “+ Add new custom dimension”.
- Select “Membership Level” from the dropdown.
- Enter the correct “Index” as it was configured within your web property in Google Analytics.
- Save Changes.
Adding the Recipe to Your Website
You can add this recipe to your site by creating a custom plugin or using the Code Snippets plugin available for free in the WordPress repository. Read this companion article for step-by-step directions on either method.
How to Set Up Saved Reports in UA
Now that have set up your Custom Dimension tracking, you can head over to your Analytics dashboard and create some saved reports to make it easy to access this data.
For my membership site, Paid Memberships Pro, I am primarily tracking the top content accessed by “Non-Members” (dimension value no_level) as well as a separate report of the top content accessed by members of our free level (dimension value 7 which is the Level ID of our Free membership).
These are the two reports that tell me the top post I can work on to increase conversion rates as well as the most popular members-only posts that free or non-members would like to have access to.
Here’s what I did once the dimension tracking was in place and I confirmed it was all set up properly:
- Log in to your Google Analytics Dashboard.
- Select the property you would like to manage.
- In the sidebar, select “Behavior” > “Site Content” > “All Pages”.
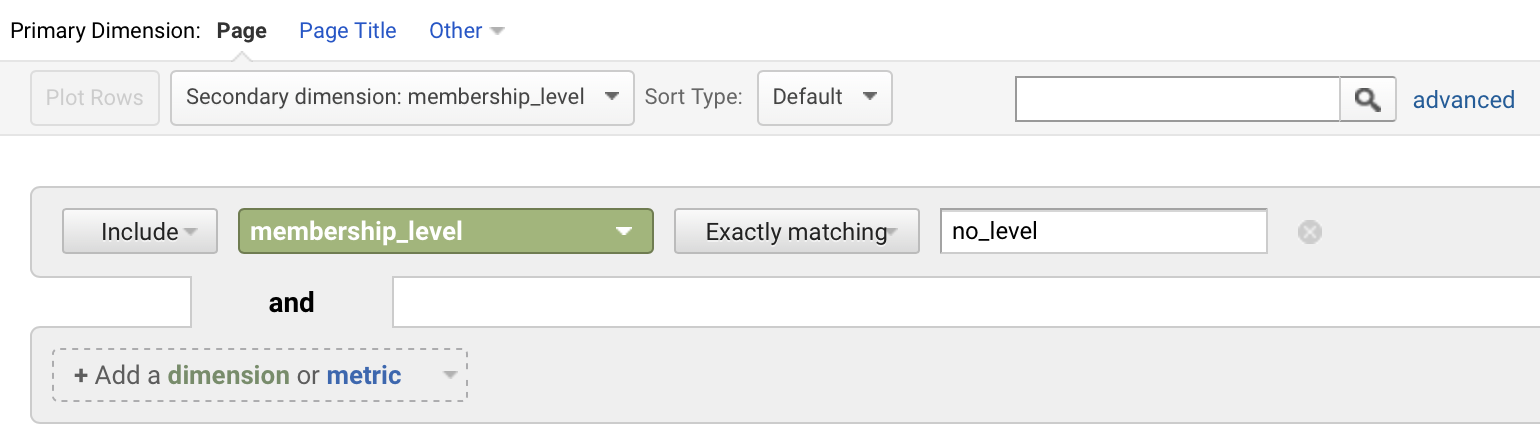
- In the filter and search area below the graph, there is a link to perform an “advanced” search. Click the work “advanced”.
- Select “include”, Custom Dimension: “membership_level”, “Exactly matching” the ID of your membership level OR the exact string
no_level. - This will generate a custom report for the selected level/non-members.
- Click “Save” in the upper right chart area to save this custom view for easy access.
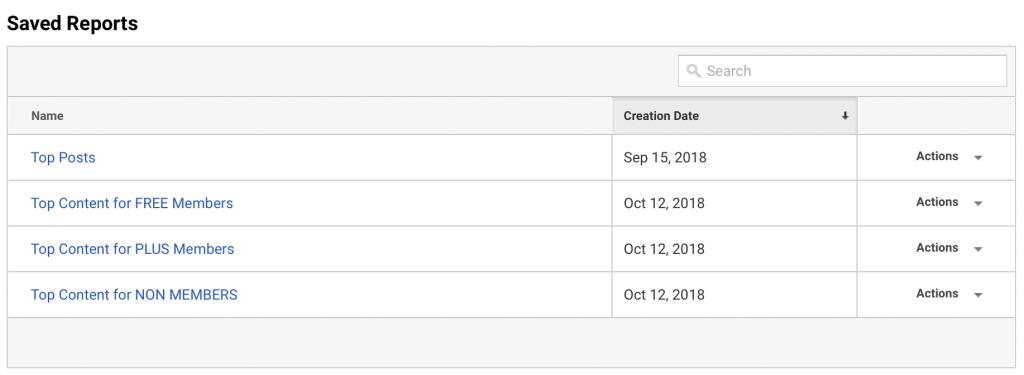
Saved reports can be accessed at a later time via the sidebar “Customization” > “Saved Reports” screen.
You can add additional saved reports for as many custom searches as you would like. Here are the four custom reports I have set up for our site:
Putting Google Analytics To Work For You
I hope you’ve enjoyed (and have been able to follow along with) this somewhat advanced tutorial. Google Analytics is a powerful but complex tool—and with the changes coming to Google Analytics 4 it can be hard to stay up to date with everything you need to do.
Whether you have a highly active membership site or are just getting started, it is very smart to get this tracking in place from the beginning. The data will only start tracking conversions from the point of set up and on, it can’t update existing data. The sooner you start this process, the more rich your data will be.
Free Course: Membership Site Development—The Basics
Develop a deeper understanding of membership site development in this beginner-level course. Learn how to make your site work better, save yourself time and money, and improve your site's performance.