Migrating from one membership platform to another can be intimidating—even for the most tech savvy among us. In this step-by-step guide, we’ve simplified the process as much as possible to help you successfully migrate your membership data from MemberPress to Paid Memberships Pro.
Note: This guide is specifically written to support someone migrating active subscriptions and members from MemberPress to Paid Memberships Pro.

IN THIS GUIDE
How to Migrate from MemberPress to Paid Memberships Pro
We’ve used a couple different membership plugins and hadn’t had great experience with either of them. When building our new website for CHIFOO.org, we wanted to move to another plugin and after much research decided on Paid Memberships Pro. The process of moving all of our existing data from MemberPress wasn’t documented, but the support team patiently answered my questions, gave me guidelines and stepped me through the process. I was able to do it myself successfully by following their detailed instructions.
Fellene
Due to the nature of eCommerce, your live site will continue to bring in new data—new orders, new members, new comments and posts in your forum, for example.
The goal is to interrupt your live money-making site as little as possible. 💰
That said, if you are operating a small membership site and you can afford it, take your site down for a day or two. This process can be infinitely simpler if you just close your site to the public.
If you cannot turn your site off, we included a guide on how to do this migration through the use of a staging environment.
There are two important parts to completing your migration from MemberPress to Paid Memberships Pro:
- Migrating your members and their subscriptions
- Migrating the content protections from the previous system to the new system
We’ll cover both of these processes. If you follow all of the advice and instructions in this guide, you’ll end up with seamless ongoing payments from past customers (if recurring) and new member payments powered by Paid Memberships Pro.
Let’s get to it!
Part 1: Migrating Members and Subscriptions
1. Backup Your WordPress Website
In our post Backup Your WordPress Site: The Complete Guide to Site Backups, we talk about the importance of regular site backups and how to create your own site backup. This is especially important for membership sites, since they deal with customer accounts and sensitive information.
👉 Don’t forget to create a backup of your site before continuing the migration process.
DOWNLOAD NOW
We have a downloadable version of this setup guide with the specific steps you need to convert MemberPress to PMPro members—without affecting 💰 current active subscriptions.
2. Pause Your Live Website
Data can get out of sync very quickly during a migration. You don’t want any new member data to be created or altered while you complete the process, so we recommend temporarily pausing your live website.
This means:
- Disconnecting your MemberPress payment gateway
- Turning off all new membership signups
- Putting your main website in “Coming Soon” or “Maintenance” mode
You can use a plugin like WP Maintenance Mode & Coming Soon to add a maintenance post to your blog, or a coming soon page to your website.
Note: If you have a very active site and simply cannot afford any downtime, skip to Prepare Your Import File. It’s normal to have a few remaining pieces of data to move right before the final import.
3. Install and Set Up Paid Memberships Pro
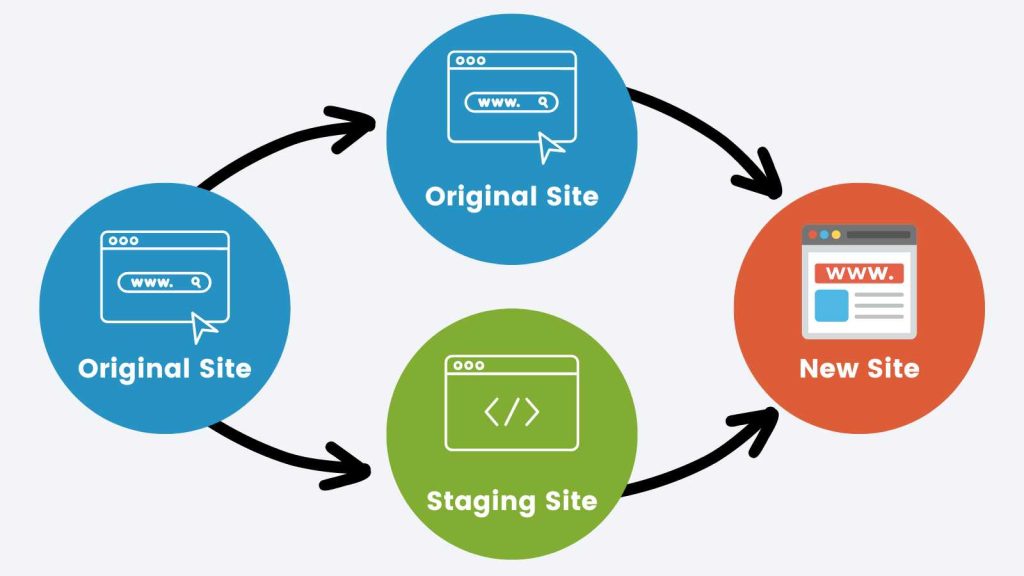
The next step is to install Paid Memberships Pro onto your website or staging site (what is this?).
Note: If you can’t turn off your main website, or you just want to test out PMPro to see how it works, we strongly recommend using a staging site or even a local development site.
However, when you create a staging site, your live site and development site become out of sync. If you go this route, note that there will be some data on your new site that you will need to migrate immediately before it goes live.
If You’re Installing PMPro on Your Main Website
In our Initial Setup guide, we talk about how to install PMPro, whether you’re doing it through the WordPress dashboard or by downloading a PMPro package.
Once you have PMPro installed, you’ll need to replicate your MemberPress memberships as membership levels in Paid Memberships Pro.
To do this, navigate to Memberships > Settings > Membership Levels in the WordPress admin. You can refer to the Initial Setup guide linked above for more information.
👉 Be sure to save your membership level IDs for later. Don’t connect your payment gateway just yet.
If You’re Installing PMPro on a Staging Site
Once you have your staging site up and running, make sure that it’s not connected to your payment gateway in both MemberPress and Paid Memberships Pro.
Note: It’s possible that certain actions you take on your staging site could trigger a system email from WordPress, MemberPress, or Paid Memberships Pro while you are going through the migration process. Our Developer’s Toolkit Add On has a feature to redirect all site emails to a specific address. You can also use a third-party plugin like Disable Emails to protect yourself from mistakenly sending messages from your staging site.
4. Set Up User Fields (If Applicable)
Does your membership have custom user fields configured in MemberPress? Do you want to add new user fields? Paid Memberships Pro includes custom user fields to collect additional checkout fields and user profile information for members and admins.
If you aren’t collecting custom fields, skip ahead to Export and Import Your Data.
User Fields
MemberPress fields are stored in user meta (just like custom fields in Paid Memberships Pro). This is the WordPress database table that stores all the custom user data not part of the user object itself.
When you create the new user fields in Paid Memberships Pro, you can choose to:
- Rename the user field variables from the MemberPress-prefixed keys (i.e. mepr_fieldname)
- Keep the field names as they are
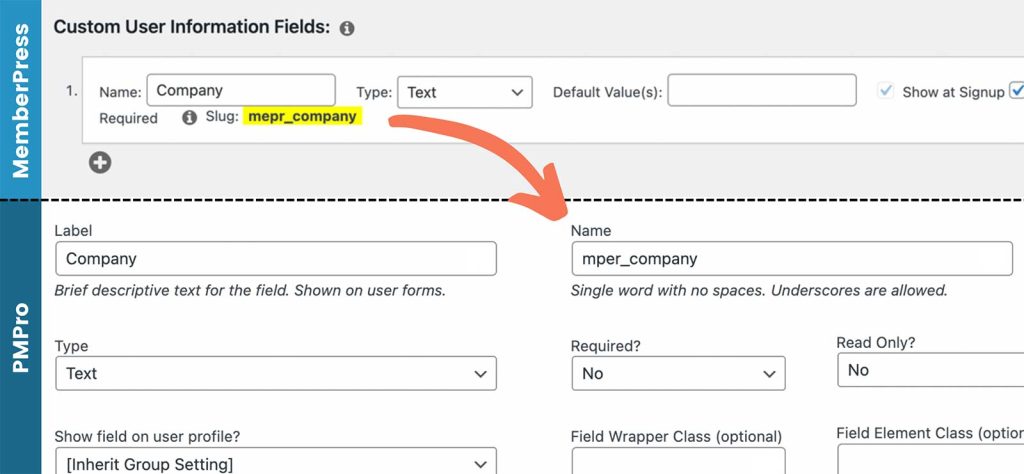
Check out the User Fields documentation for specific help setting up your custom fields.
Note: If you rename the fields, you’ll need to re-import them with the correct field names OR run a database script after all is said and done to remove the MemberPress prefix. If you keep the field names as they are, they will stay connected to the correct user account.
Whichever method you choose, your user field name must use the exact meta field keys (names) that are used in the database table: wp_usermeta.
5. Export and Import Your Data
Export Your MemberPress Data
Your MemberPress migration requires three separate CSV exports:
- Members
- Subscriptions
- Transactions
Most of the data you need will be included in the Members and Subscriptions data export. However, the Transactions data export includes the membership_subscription_transaction_id, which is required to connect your recurring payments to the relevant member.
Note that the Transactions export includes multiple rows of data for each member. These rows track the historic payments made (similar to the Orders export in PMPro) for their one-time payments or recurring subscription payments.
You only want to include the last transaction for each member. The rest should be ignored.
Prepare Your Import File
Now that you have your MemberPress data exported, you are ready to create a file that PMPro can use to import your members and subscriptions.
You will need the PMPro Import Members From CSV Add On.
The plugin includes a starter import template file. Navigate to Users > Import Members in your WordPress admin. You’ll see a link to download the example CSV file from this page.
The table below shows the MemberPress data fields you should map to the required PMPro Import fields:
Export the file to CSV and Test the Import
We recommend testing the import with a subset of your data (the first 10 records) to ensure that everything works as expected.
- Export only the first few rows of the .CSV file. With this file, adjust the rows to only include the first 5 or 10 records.
- Run the import by following the directions on the Import Users from CSV Add On documentation page.
- Double check the data to be sure everything looks correct. You can check your Members List under Memberships > Members and the Orders list under Memberships > Orders.
When running the import, check the box to “Update user when a username or email exists”. Every person in your import CSV is already a user in your WordPress site. You want to update and extend their user information, not create new records.
If everything looks correct, you are ready to do the full and final import. To do this, repeat the process from your test above using the full set of data (minus those test members already imported). Again, be sure to check the box to “Update user when a username or email exists”.
6. Resume Your Live Website
You’re almost done! Now it’s time to connect your payment gateway in PMPro.
First, deactivate MemberPress. Once you are sure everything is working properly, you can delete the MemberPress plugin files and follow their guide on resetting MemberPress data to remove all traces of the plugin from your site.
PMPro has only one settings page to configure the payment gateway for all memberships. Just navigate to Memberships > Settings > Payment Settings. The process of setting up a payment gateway is also outlined in the Initial Setup guide we mentioned earlier.
Your subscription site relies on messages from the payment gateway to confirm that recurring payments have been received. Stripe refers to this as a “Webhook.” PayPal calls it an “IPN.”
As part of the gateway setup, be sure to update your Stripe Webhook or PayPal IPN within your merchant account. Instructions on how to configure this are available for both gateways in the documentation area: Stripe Webhook Setup and PayPal IPN Setup.
If you need more help with webhooks or IPN, please open a ticket in our members support area so that our team can make sure you’re properly set up to receive the recurring payment messages from your connected gateways.
Your MemberPress data should now be completely migrated to Paid Memberships Pro. Yay! 🙂
Next, you’ll need to set up content protections in Paid Memberships Pro.
Part 2: Configuring Content Protection
Every membership plugin handles content restrictions in a different way. With Paid Memberships Pro, you can restrict individual pages, posts, or entire categories of posts.
Browse our documentation on restricting content to learn more about the various ways you can protect your content with PMPro.
This includes:
- Pages
- Posts and Categories
- Other content types including CPTs
- Courses
- Community features like bbPress and BuddyPress
You’ll need to manually update every piece of content that was protected through the MemberPress methods to now use the Paid Memberships Pro methods. If you have a very large membership site, there are some developer-level methods to bulk apply content restrictions. Here are a two primary resources:
- Methods to Restrict Access by Membership Level in Bulk
- Developer’s Toolkit: Add On to duplicate content restrictions for newly added levels.
It’s Time to Celebrate 🎉
You did it! You’ve successfully migrated your active subscriptions and members from MemberPress to Paid Memberships Pro, and configured your content protection so that your membership site is officially ready for action.
If you’re still in need of additional help, be sure to check the Frequently Asked Questions section below, or contact our support team if you’re a premium member.
We’re excited that you’ve made the switch to the best membership plugin for WordPress, and we’re right here by your side to help you take your membership business to new heights. 🚀
Frequently Asked Questions
What is a Staging Site?
A staging site is essentially a duplicate of your website, where you can test out new features and make changes without affecting your live website.
Creating a staging site allows you to get all of your membership data in place before merging it with your live site.
Do I Need a Staging Site?
A staging site is a non-public version of your site’s code that powers your live membership site. Your membership’s staging site, if set up properly, will allow you to add and test all kinds of things before releasing them on your live site.
With a staging site, you can test things like:
- Code recipes
- New features
- New plugins
- Plugin updates
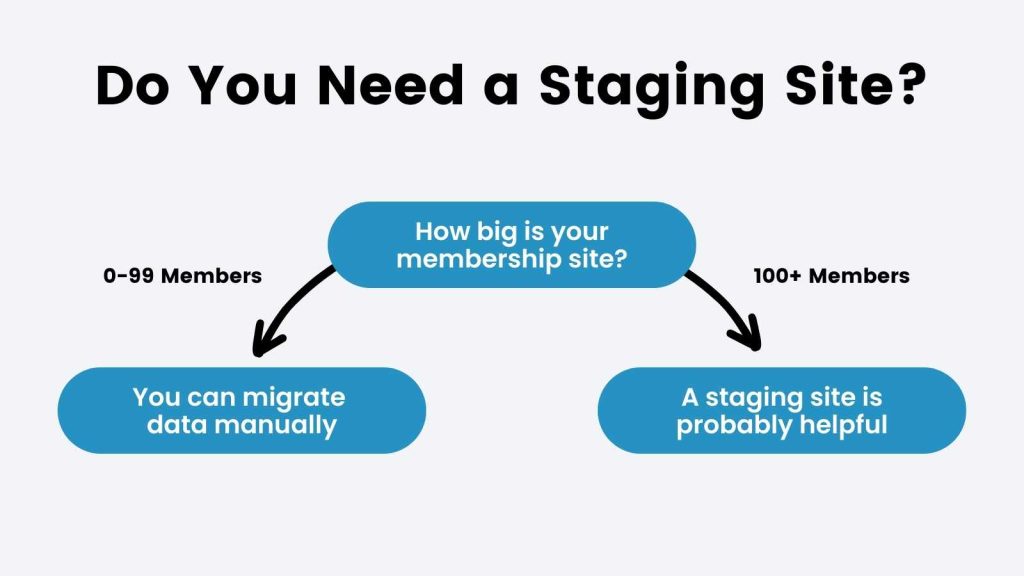
To determine whether or not you need a staging site, here are a few questions to consider:
- How big is your membership site and how often are people logging in to use it? If you have a very active membership site that receives a lot of traffic, using a staging site may be a wise choice.
- How many new subscribers do you get per day? If it’s less than 10, you can probably migrate your data without using a staging site.
- If you temporarily paused your site, could you put up a contact form and still gather responses? If so, you might not need a staging site.
- Do you have minimal development experience? A staging site can help to avoid issues that you can’t fix.
- Do you just want to experiment? A staging site is a safer bet if you want to play around without killing your live site.
This seems really complicated.
If this is all too overwhelming or confusing for you, you should consider hiring a developer. We recommend working with one of our Codeable freelancers or agency partners to make sure your migration goes as smoothly as possible.
If you’re a premium member, you can always reach out to our support team for help as well.

Download the free ebook: Get 29 insights and ‘aha moments’ for new or veteran membership site business owners. Use these nuggets of wisdom to inspire or challenge you.