Navigate to Memberships > Settings > User Fields in your WordPress site’s admin to create and manage custom user fields.
This documentation explains every setting for a User Field so that you can make the most of this robust feature.
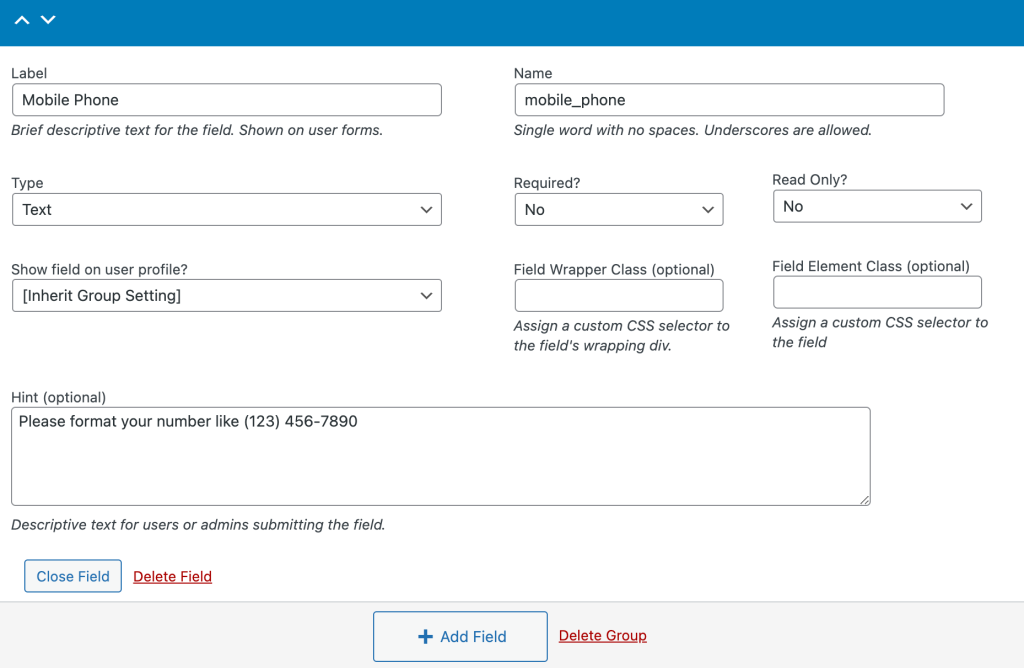
Table of contents
Create and Manage User Fields
User Fields inherit some settings from the field group and have some unique settings of their own. You can add the same field (use the same Field Name) to two groups to show it in different groups with different rules.
- Navigate to Memberships > Settings > User Fields in the WordPress admin.
- Create or edit fields in the default field group or use the documentation above to create a new field group for your user fields.
- Click the “+ Add Field” button to insert a new field. Or, toggle to expand an existing field to modify settings.
- Click “Save All Changes” to save your progress.
User Field Settings
- Label: A brief descriptive text label for the field.
- The field label is visible to users or admins.
- Note: If you need to add rich text to your label, we allow most of the basic HTML tags that are also allowed in WordPress post content.
- Name: A unique key that identifies the field. Use a single word with no spaces or replace spaces with underscores. This field does not allow any special characters or hyphens (dashes).
- Type: Select the field type. Additional field settings appear based on the type of field you choose. User Fields supports additional field types that can only be added via custom code. Field types you can add via settings include:
- Text
- Text Area
- Checkbox
- Radio
- Select
- Multi Select
- File
- Number
- Date
- Read-Only
- Hidden
- Required: Select whether to require this field.
- Read Only: Select whether this field is a read-only field. For example, consider adding a field with the same name on the membership checkout page, then duplicate the field for the user profile only to make it read-only. This would restrict a member from changing their initial response.
- Show field on user profile? Select to show this user field on the Frontend User Profile or Edit User page in the WordPress admin. Options include:
[Inherit Group Setting],Yes,No, orYes (only admins). - Field Wrapper Class: Use this optional field to assign a custom CSS selector to the field’s wrapping div (e.g.
my-field-wrapper-class). - Field Element Class: Use this optional field to assign a custom CSS selector to the field HTML element (e.g.
my-field-element-class). - Hint: Use this optional field to add descriptive text for users or admins submitting the field.
- Note: If you need to add rich text for this hint field, we allow most of the basic HTML tags that are also allowed in WordPress post content.
Delete a User Field
If you no longer want a specific user field, you can delete the single field in one step. This action does not delete user data. This action only removes the user field from frontend or admin forms.
- Navigate to Memberships > Settings > User Fields in the WordPress admin.
- Select the Field Group that your field is nested within.
- Select the User Field to be deleted.
- Click “Delete Field“.
- Confirm the action in the modal window.
Get Support From Our Team of Experts
For more help with this PMPro feature, check out our Support Page with three ways to get support as a free or premium member.
Last updated on April 14, 2026

