Loco Translate is a free and open source WordPress plugin for translating any text from within your WordPress admin.
This guide shows you how to use Loco Translate to easily translate or change the wording of text on your individual site.
We’re going to focus on text generated by Paid Memberships Pro’s core plugin and our (translation-ready) Add Ons. But you can use the instructions below to help you translate or change any wording on your WordPress site.
Preparing Translations
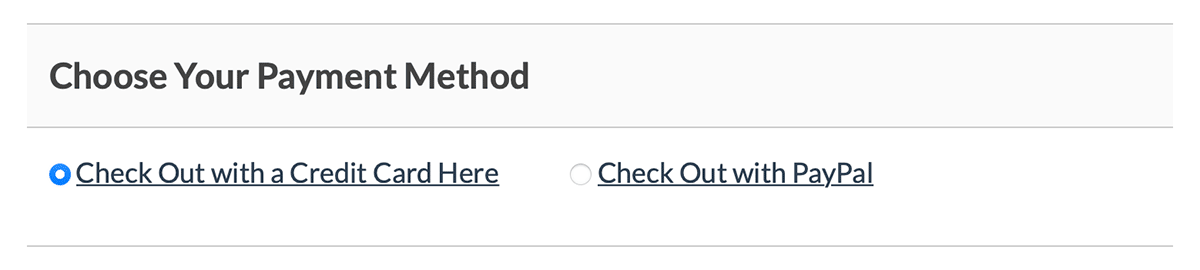
For this tutorial, we will translate the “Choose Your Payment Method” box that is added to the membership checkout page for sites using the Add PayPal Express Option at Checkout Add On.
Setting Up the Loco Translate Plugin
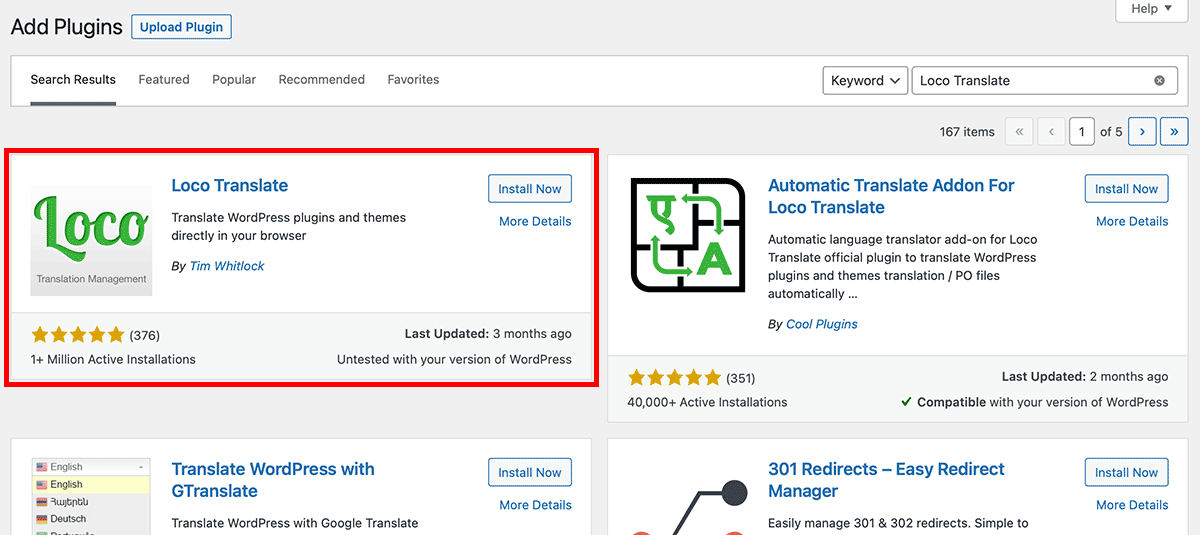
If you do not already have the Loco Translate plugin installed on your site, navigate to Plugins > Add New in the WordPress admin. Search for the term “Loco Translate“, then click “Install Now“, and then “Activate“.
Select the Plugin
Once Loco Translate is installed, you can begin a new translation. In order to translate a particular sentence (or in technical jargon a string), it is important to know exactly which plugin is creating that text. If you are not sure, please open a ticket in the members-only support area and we would be happy to help you figure out which plugin needs to be translated.
- Navigate to Loco Translate > Plugins.
- Select the “Paid Memberships Pro – Add PayPal Express” plugin. This is the Add On we are using in this tutorial. You should select the Add On that you would like to translate.
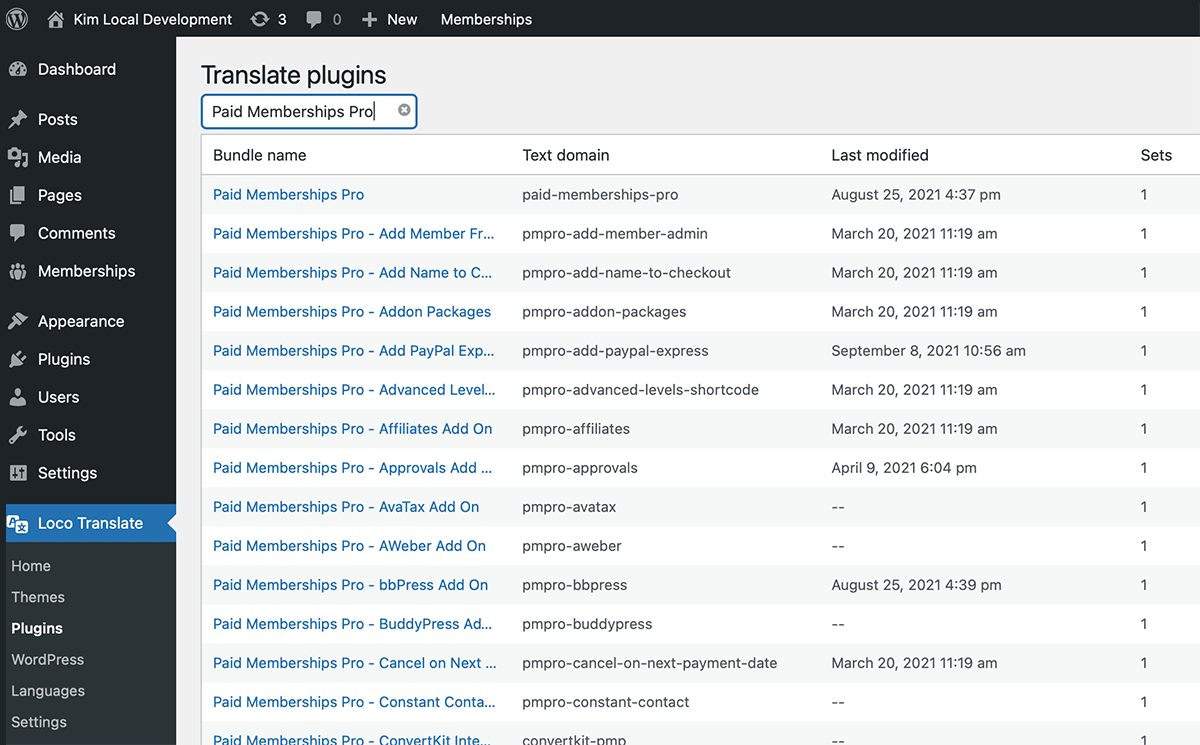
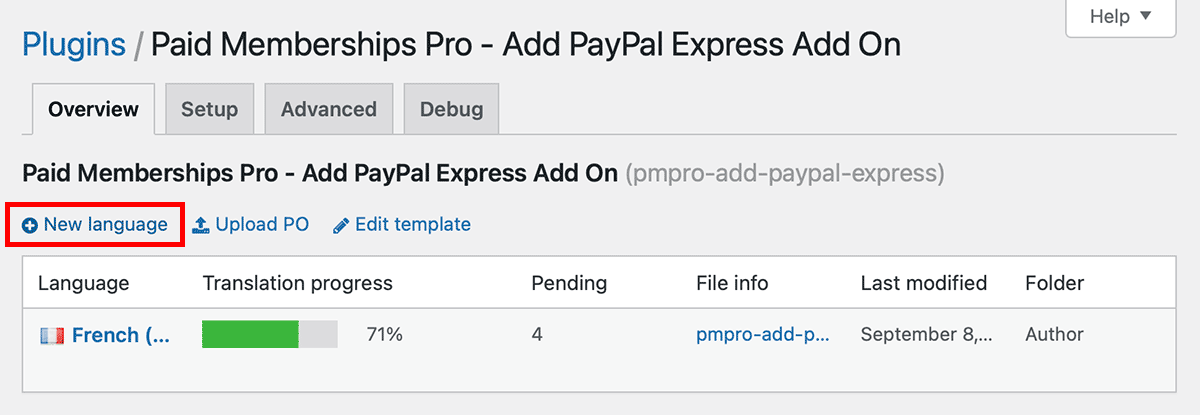
After selecting the plugin to translate, Loco Translate displays a list of all existing translations.
- If you see your desired language on the list, select it.
- If you do not see your desired language on the list, click the “New language” button to create translations for a different language.
Note: You can also use Loco Translate to change the wording of strings. For example, if you want to change the wording from “Choose Your Payment Method” to “How do you want to pay?”, you should complete these steps as if you were translating into “English (United States).”
Protecting Your Translation Files
If you selected an existing language you may receive a notification that the files may be overwritten or deleted when you update. That’s bad.
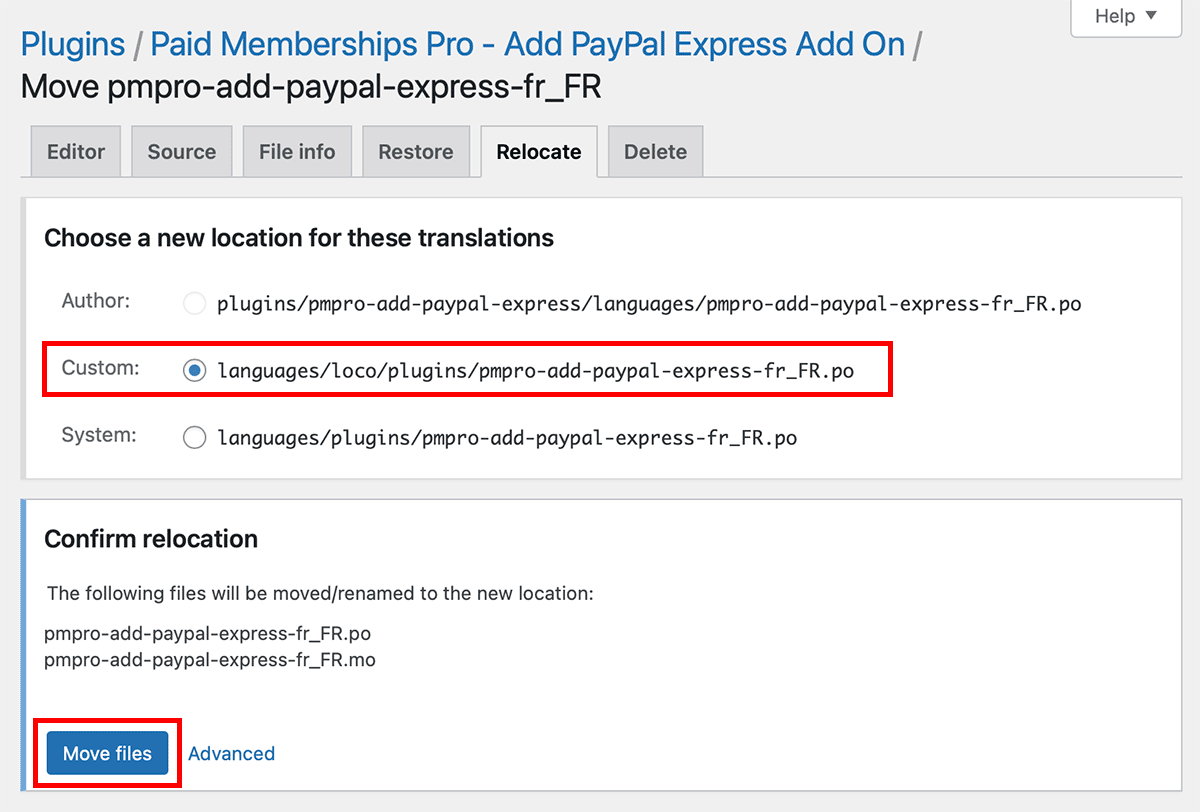
To avoid this we recommend you relocate the language files. To relocate:
- Select “Move” in the language list. This will redirect you to the “Relocate” tab.
- Select “Custom” to move the files to Loco Translate’s custom localization.
- Select “Move files“. This will ensure the changes you make are not affected by updates.
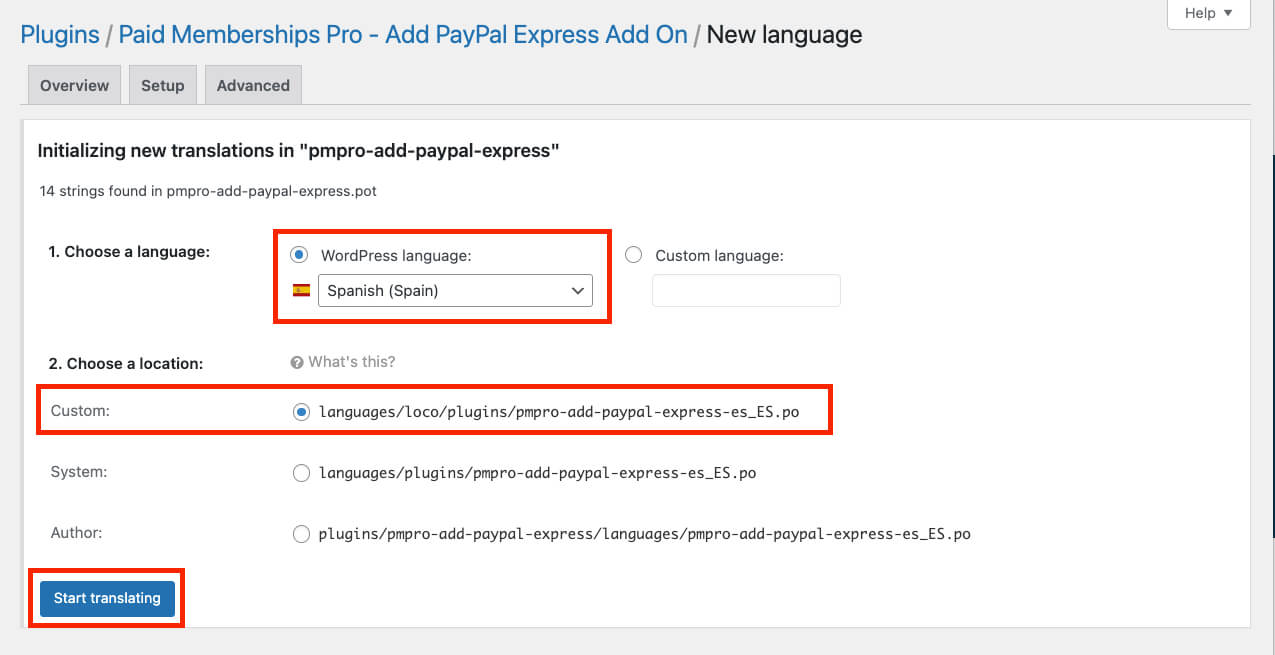
If you selected to create a new langauge, the next screen prompts you to choose the language and location.
- If you only want to change the wording of text on your site, not translate text, select “English (United States)“.
- To protect your files from updates, select “Custom” for the location.
Once you have selected the language you would like to translate into, click “Start translating“.
Sync for Latest Text Strings
It is important to ensure that your language file has the latest text strings. After you click “Start translating“, click “Sync” in the editor tab before creating the translations. This button updates text strings in your language file by synchronizing them with the master language file (*.pot).

Creating Translations
It’s (finally) time to create translations!
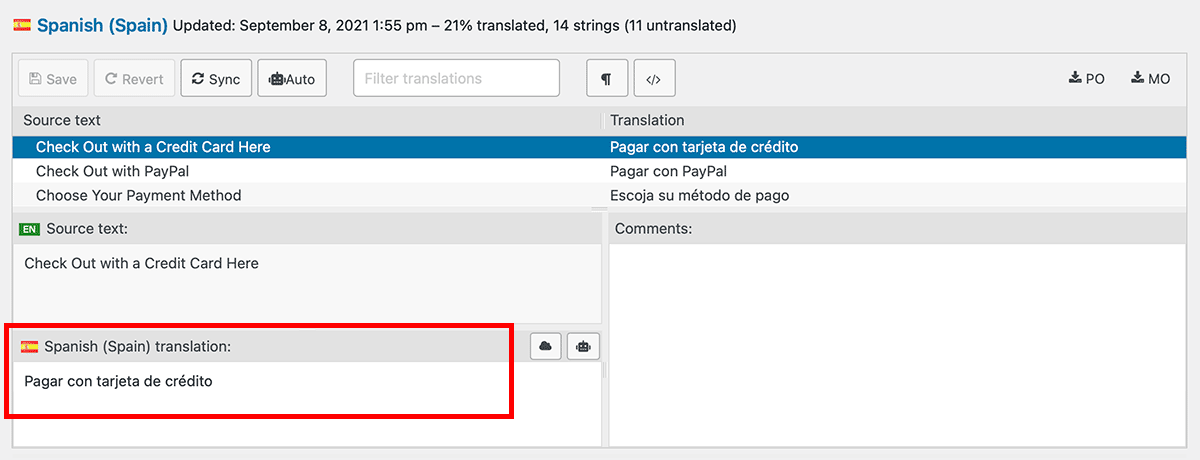
- Select each string to translate in the “Source text” column.
- Enter the translated text (changed wording) in the “[your language] translation:” box.
- Once you have updated all of the strings, click “Save” to publish your changes.
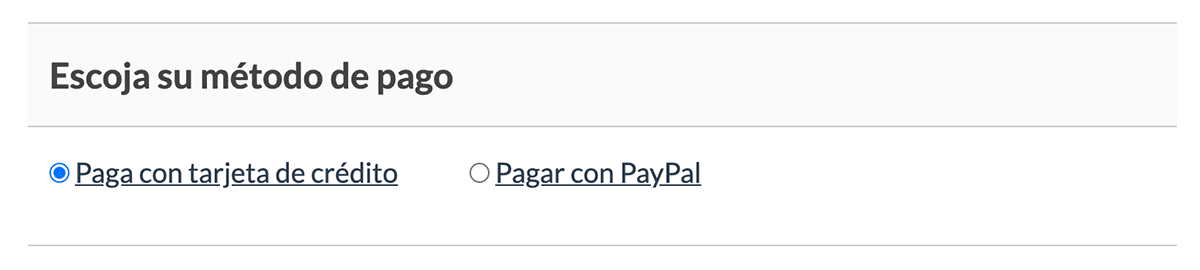
Test Your Translation
The newly translated text should now show in place of the original text that was present. For this tutorial, the Membership Checkout page shows that the “Choose Your Payment Method” box are updated.
Translating Strings Containing Variables
%s and %d are variable placeholders for values that will be replaced by plugin code, whether for a text string or numeric string. These placeholders are very important for cases where the displayed text changes based on membership level, price, date, order history, user fields, and more.
For example, the core Paid Memberships Pro plugin uses the following translatable string when a customer checks out for a level that has a trial period:
Your first %d payments will cost %s.
In that string, %d will be replaced with the number of recurring payments that will be charged using the trial price, and %s will be replaced with the formatted price for the amount that will be charged during the trial period.
Do not remove these variables from your translation strings. Instead, translate this string into another language and keep the same placeholders in the translated string as in the original. For example, the Spanish translation of that string would look like this:
Tus primeros %d pagos costarán %s.
Reach a Global Audience With an Inclusive User Experience
Translating your website’s content is crucial for reaching a global audience and providing an inclusive user experience. Using the Loco Translate plugin makes the process of translating text strings, including those with variable placeholders, a simple task.
By following the steps outlined in this guide, you can easily translate text in your membership site with no code tools. With these tips, you can make your website accessible to a wider audience and increase your reach.
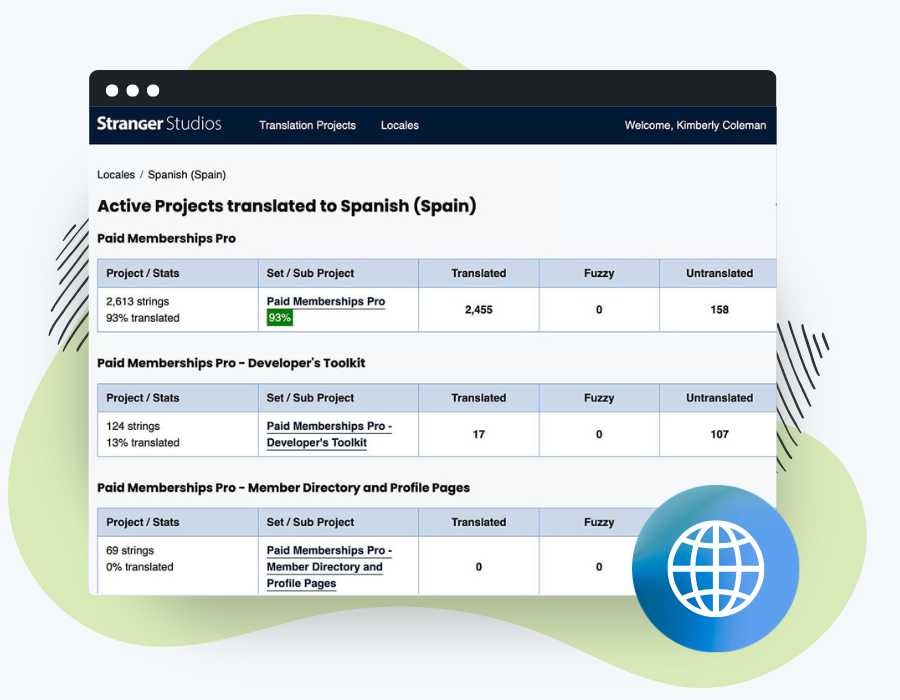
Help Translate Paid Memberships Pro
We’re looking for contributors to help translate Paid Memberships Pro and our related projects into more languages.
Your contributions will make membership sites more accessible to a global audience. Whether you’re fluent in one language or many, your help is invaluable.