If you’re new to website building, you may not be totally familiar with the login best practices. But, you are a person that uses the internet for all kinds of things. And as such, you may not even realize how well you’ve been trained on these best practice patterns.
Membership sites rely on optimized member login and logout functionality.
- Your members need to be able to log in to access their member benefits and account information.
- Likewise, your members need to be able to log out when using shared devices or to just close their site session.
In this post, we will cover the best practices for member login and logout links on your membership site. Learn how to enhance your login page’s appearance and a few other pro tips to improve member navigation.
Frontend Login and Logout Features in PMPro
The WordPress built-in login screen is primarily used by site administrators or editors that are trying to maintain the WordPress site’s backend.
However, any membership site will have login activity for a lot of different users. For this reason, Paid Memberships Pro includes native frontend login and user profile editing features. It’s a best practice to use this frontend login page. You do not want your members to be confused by the WordPress admin area login. Even if it functions properly for them, it’s not designed for the best user experience.
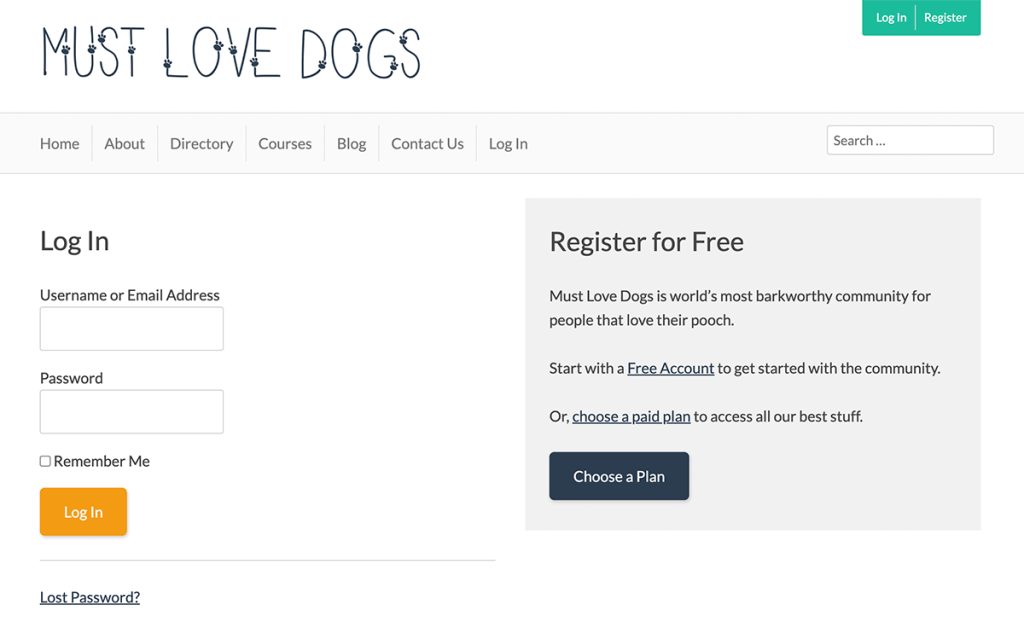
With Paid Memberships Pro, you get a themed login page that matches the chroma of your website, including password recovery and reset. Members don’t need to use the WordPress login screen, which is off-brand and may confuse them.

I’ve been designing interactive websites for over 20 years, and using the internet for many more years than that. If I get to your site and don’t see a login link at the upper right section of your screen, you’re doing something wrong.
Same goes for a log out link. Please don’t make me think.
—Kim Coleman, Co-Founder, Paid Memberships Pro
Where Users Expect to See a Login Link
The modern web user has certain expectations about your site’s login link. Here are some login best practices to consider:
- Always include a login link in the upper right corner of the page.
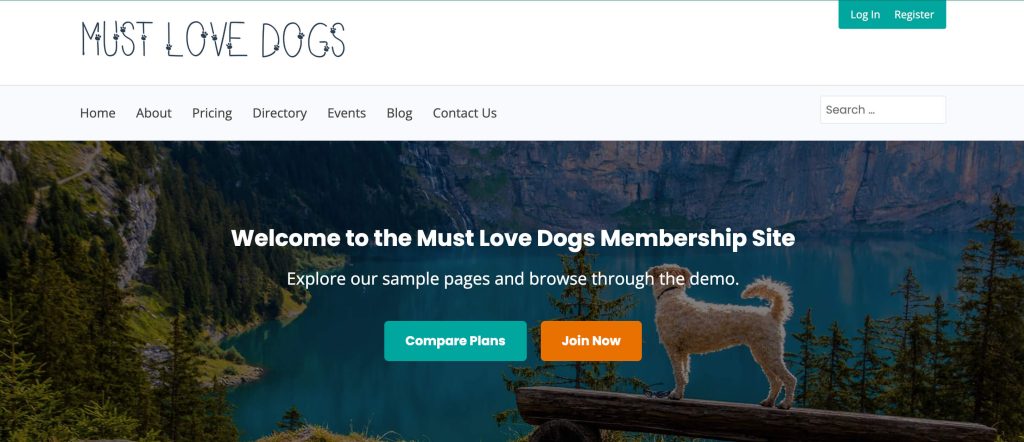
- Consider placing a signup, join, or register link in the same area.
- These links should be present across all pages on your site.
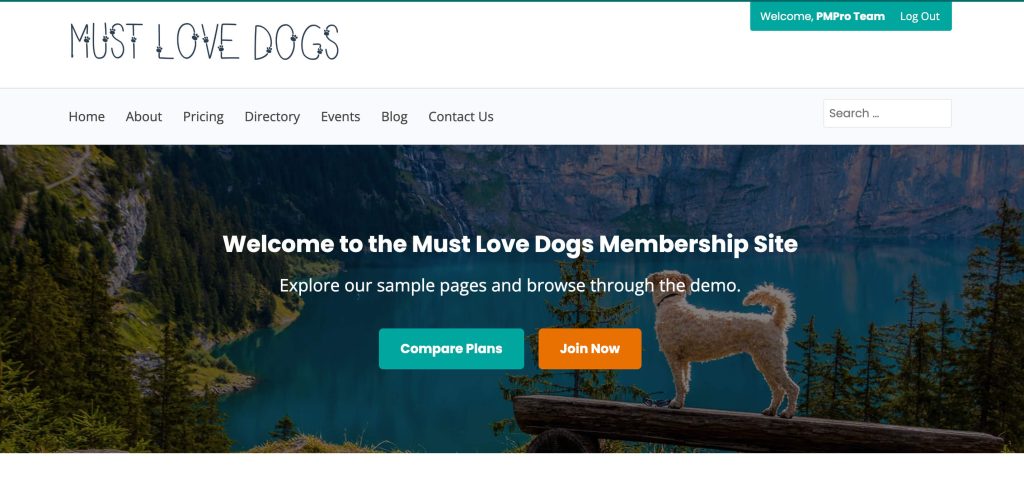
- Change your login link to say “Log Out” once the member has logged in.
- Along with the login link, there should be a link with the logged-in member’s name that takes them to their account details or profile. If your theme doesn’t allow this, you can use the
pmpro_membershortcode.
- If your site is responsive, make sure that your login and logout links are displaying correctly on different devices. For small devices, the best options are either at the very top of the screen or within your mobile-responsive menu.

Login and Logout Best Practices for Membership Sites
1. Put a Login Form in Widget Areas
Many membership sites also use a sidebar or footer widget area to show the full login form. With PMPro, our Log In – PMPro widget changes to a welcome message and menu for logged-in users.
This is a great approach to give your members quick links to the most important content as part of their membership. Some examples of good menu items to put here are:
- The membership account page or profile edit page
- The category of content you use for premium posts
- Your main archive view of members-only courses or events
- The category of WooCommerce products that users can purchase at a discount
If your theme does not have a widget, menu area, or hook in place to add a login feature in the upper right, open a topic in our support area and we will help you find the best way to add this to your site.
2. Put a Login Link on Protected Content
When a visitor (someone who is not logged in to your site) hits a paywall or a restricted piece of content, they will also need access to a login link. With PMPro, the default “Content Restricted” message for visitors includes a login link.
You can customize this link to redirect back to protected content using the !!referrer!! Quicktag. This message has to be customized with a code recipe.
3. Style Your Login Page
When Paid Memberships Pro generates the frontend plugin pages, your site will create a page titled “Log In” with the correct page shortcode. This page can be modified using the WordPress Editor or another page builder—just remember to keep the pmpro_login shortcode or block present on that page.
Some sites make this page function as both the login and registration page. If this applies to your site, consider including a message that outlines the benefits of registration, and link to the Membership Levels page.
Don’t be afraid to get creative; your login page must be functional, but it can also be branded.
Here are a few more tips for styling your login page:
- Add a welcoming headline or a sentence that sets the mood for the member as they begin their journey on your site
- Avoid the use of other sidebars or links on this screen
- Be sure to test how your login page displays on various responsive screens
4. Add Conditional Login Links to Your Menu
Paid Memberships Pro comes with a group of links you can include in your site’s navigation menus. The two that we’ll focus on in this context are the links titled “Log In” and “Log Out”.
When added to your menu, these links will automatically hide and show based on the user’s login status.
Make your menus even more robust by using the Nav Menus Add On. This plugin repurposes every menu location in your theme to show a different set of links based on the visitor, user, or member status.
In fact, we use this Add On on the Paid Memberships Pro website to show our premium members a link to the premium support forums (using the “Member Menu” theme location of our theme for membership sites, Memberlite).
FAQs: Login Best Practices
Place the login link in the upper right corner of the page, and make sure it persists in this same exact spot on all pages. Consider also adding a CTA to your pricing page or registration page in the same area.
Place the log out link in the exact same spot of the Log In link. This is where people expect to find the log out link.
You can modify the login page using the WordPress Editor or another page builder, but keep the pmpro_login shortcode or block. Style it to be welcoming and branded while avoiding unnecessary distractions.
If you’re using a classic or hybrid theme, you can place our conditional links in your navigation menus on the Appearance > Menus screen. These links automatically hide and show based on the user’s login status. If you’re using a Block theme, the WordPress Login/Out block offers the same functionality. Use the Nav Menus Add On to further customize your conditional menus.
Final Thoughts on Login and Logout Links
When you’re ready to audit your site’s log in and log out experience, start by making sure the links are located in the expected location—for any screen size. With this foundation, you can feel confident that your members can log in and access all the value you’re delivering.
Take your login experience a step further by implementing more login best practices from this guide.
- Try using widget areas. Going this route, you’ll give members a straightforward form to log in no matter what page of your site they are on. Plus, once logged in, they will be greeted with a friendly welcome message and list of action links to quickly jump to your premium content, community, courses, and more.
- Or, setup a conditional menu. This approach helps members and non-members alike reach the right landing pages for their user type.
Login is just one touchpoint. See the 10 Ways to Enhance Your Member Experience for the rest.
For more detailed guidance and assistance with everything we’ve covered here, check out our premium technical support options.
Free Download: The AI-Powered Membership Site Blueprint
Download the free guide: Learn how to plan, build, and grow a membership site using AI as your strategic partner: from buyer persona to launch and beyond.


