Members and non-members have different needs when it comes to navigating your membership site. For visitors, they’re considering signup and need access to your pricing and features, while logged in members just want quick access to their premium content.
Unlock the power of member-specific navigation with the Nav Menus Add On for Paid Memberships Pro. With this plugin, you’ll get benefits like:
- Dynamically swap navigation menus: Give members one-click access exclusive content and features, and site visitors a tailored path to conversion.
- Display different menus for logged-in vs. non-members: Personalize the user journey from the first click.
- Craft member-specific menus for any level: Cater to individual member needs and access restrictions. This is especially helpful for sites with a freemium membership funnel that use navigation to upsell a paid tier.
Say goodbye to one-size-fits-all navigation and hello to a dynamic, engaging experience for members and potential members alike.
Installation
You must have the Paid Memberships Pro plugin installed and activated with a valid license type to use this Add On.
- Navigate to Memberships > Add Ons in the WordPress admin.
- Locate the Add On and click Install Now.
- To install this plugin manually, download the .zip file above, then upload the compressed directory via the Plugins > Add New > Upload Plugin screen in the WordPress admin.
- Activate the plugin through the Plugins screen in the WordPress admin.
Try a Demo: View the PMPro demo site or launch a free private demo now.
Video: Member-Specific Menus With the Nav Menus Add On
Navigation Menu Settings
This Add On is compatible with a classic or hybrid theme. If you are using a Block Theme or a page builder like Elementor, check out this companion guide on how to create a conditional main menu for your WordPress site.
Customize Menus By Theme Location
If you’re using a classic or hybrid theme, this Add On will automatically duplicate each menu location that your theme supports.
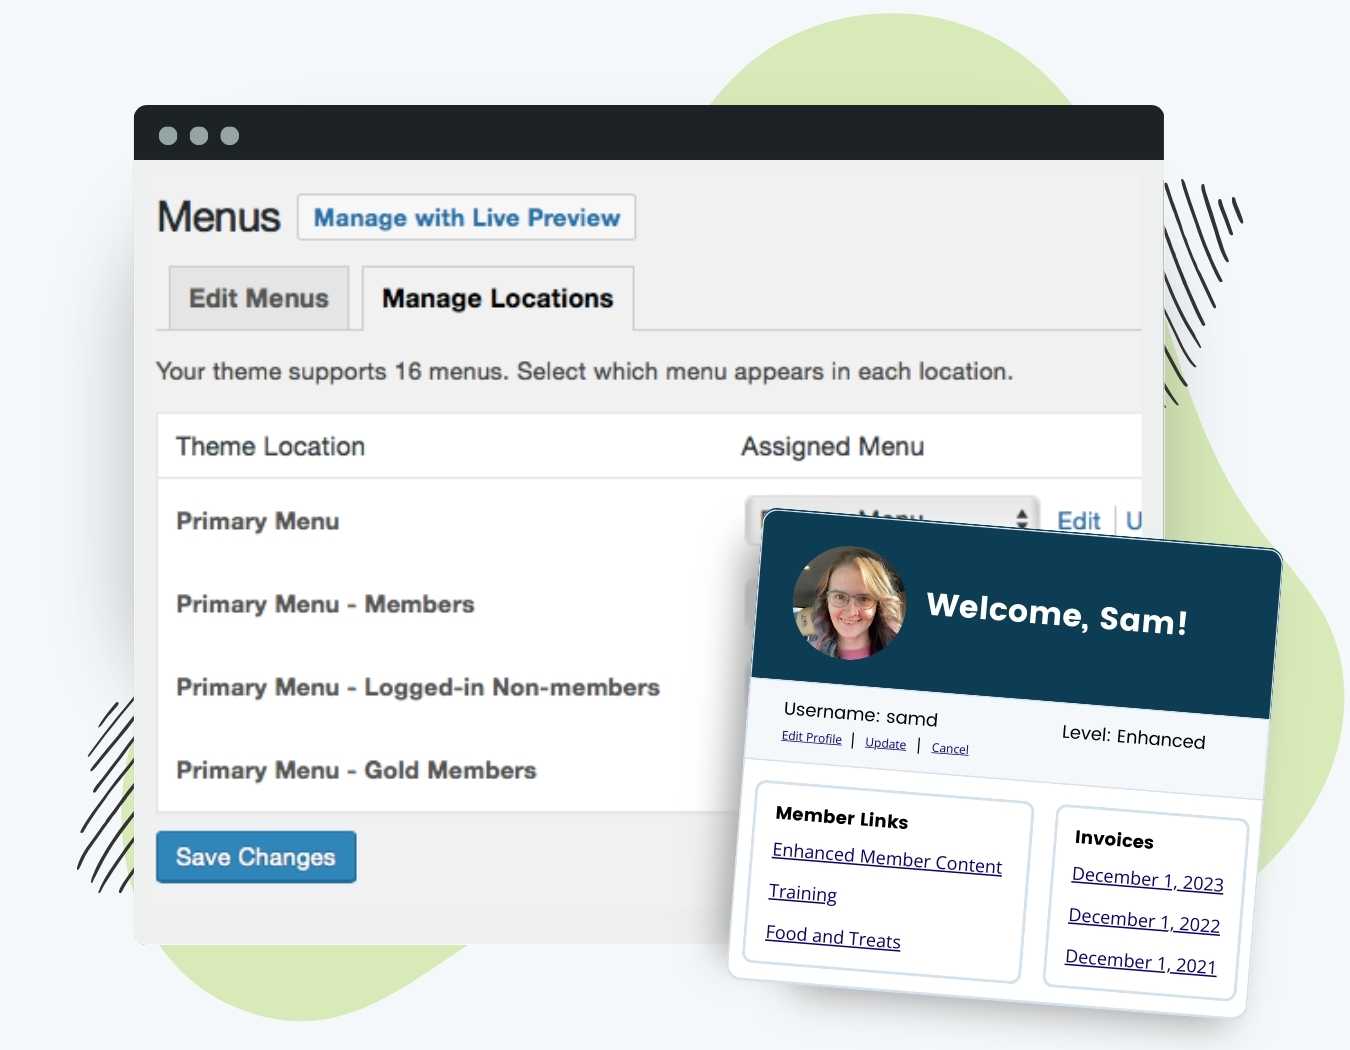
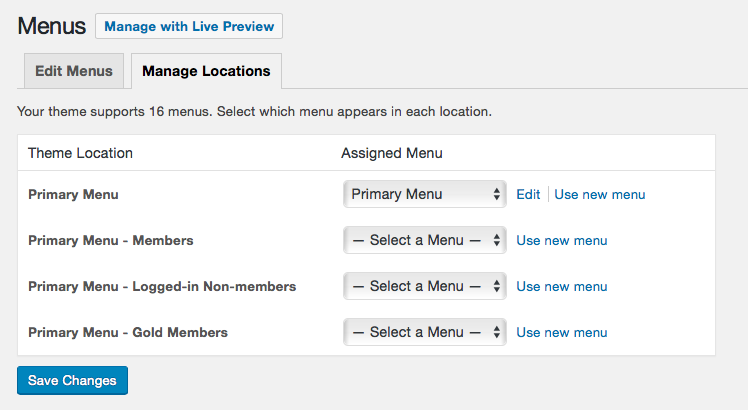
- Navigate to Appearance > Menus in the WordPress admin.
- Click the Manage Locations tab.
- Here, you’ll see every default menu in your theme is duplicated with the following new locations:
{location name}– Members: This version of the menu is swapped with the{location name}menu in if the current logged in user has any membership level.{location name}– Logged-in Non-members: This version of the menu is swapped with the{location name}menu in if the current user is logged in but does not have any membership level.
- Create a new menu or assign an existing menu to these new menu locations.
- If you do not set a menu, it will fallback to the theme-specific menu for that location.
- Save changes.
Customize Menus By Specific Membership Level
If you’re using a classic or hybrid theme, this Add On supports a member-specific menu for each membership level.
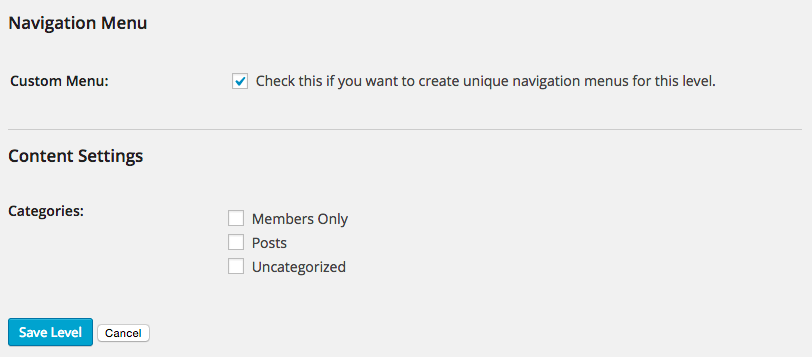
- Navigate to Memberships > Settings > Levels.
- Select a Membership Level to edit.
- Locate the Navigation Menu settings in the Other Settings section.
- Check the box to create a level-specific menu.
- Save settings.
Now navigate back to your Appearance > Menus screen to create new menus for this level and assign to the new locations.
Now you can navigate back to the Appearance > Menus screen to create a unique menu for each level-specific menu location.
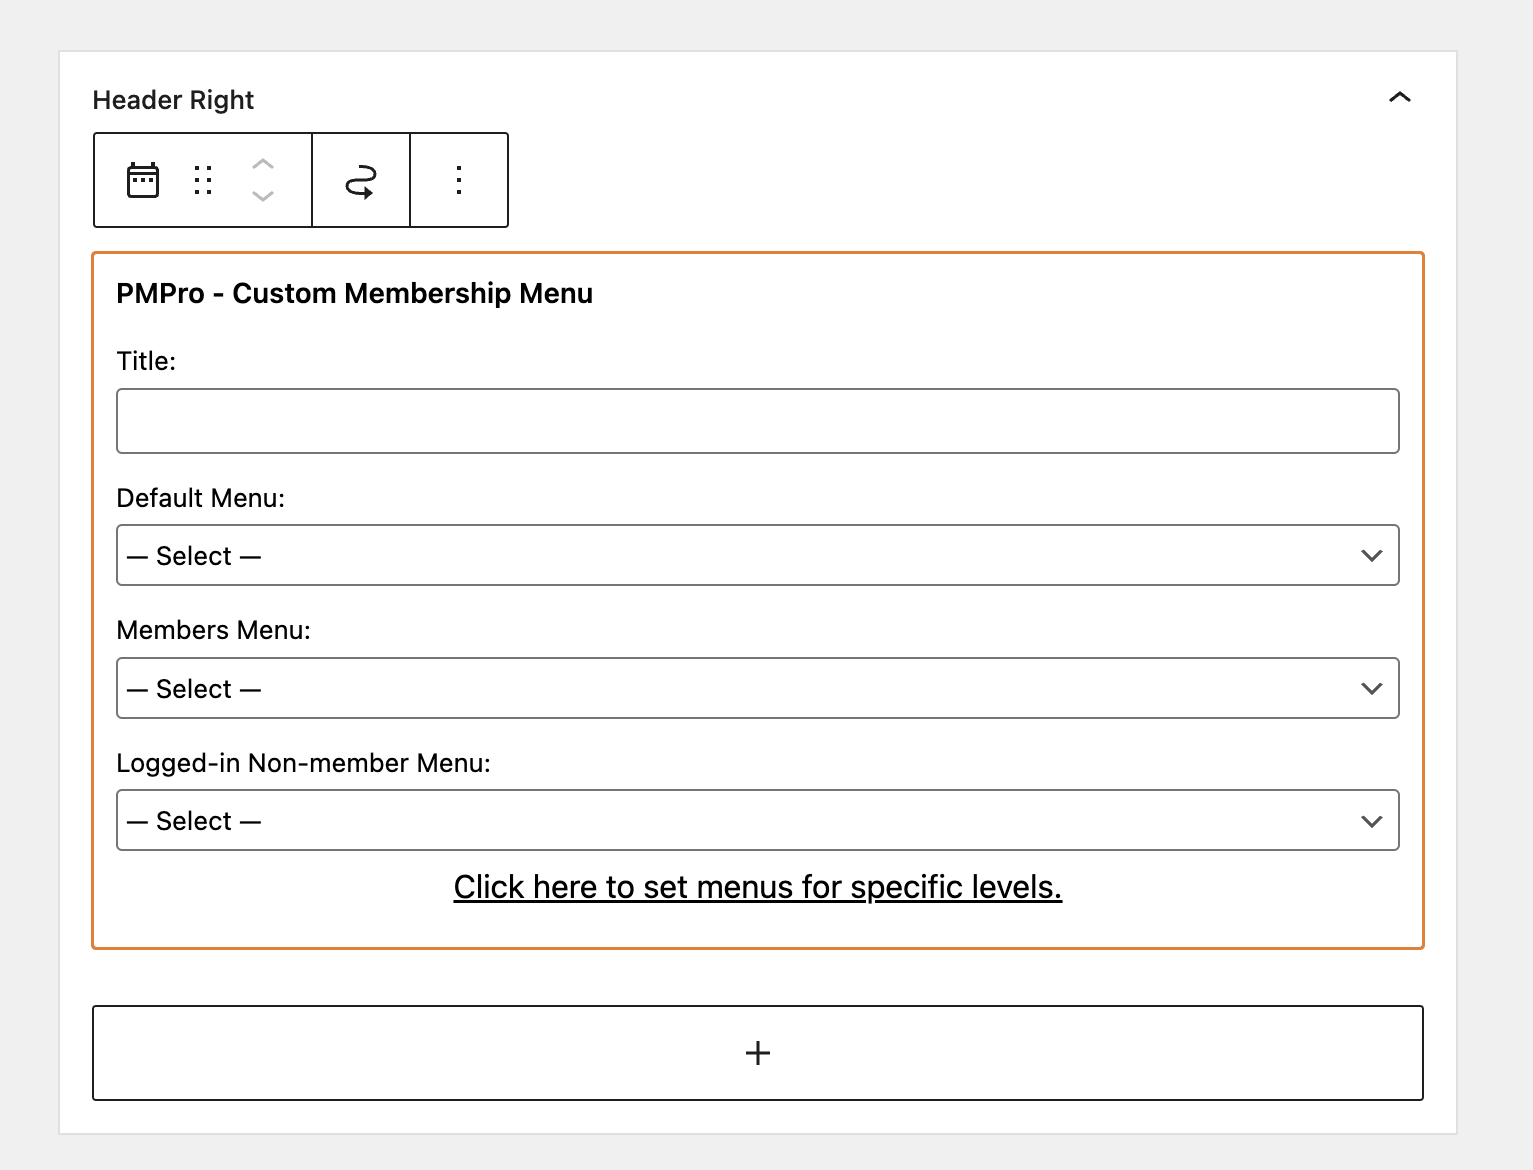
Using the Membership Menu Widget
The Nav Menus Add On includes a custom widget that can be placed in any available widget area in your theme.
- First, create each custom menu you want to conditionally display in the widget area. Menus must be created in the Appearance > Menus page of the WordPress Dashboard prior to selecting them for display in the widget.
- Now, navigate to the Appearance > Widgets in the WordPress Dashboard.
- Insert the widget named PMPro – Custom Membership Menu.
- Customize Widget settings:
- Title: Set a title to display before the menu items. (optional)
- Members Menu: Select a global menu to display for members of ANY membership level. (optional)
- Logged-in Non-members Menu: Select a global menu to display for logged in users without a membership level. (optional)
- Click the link labeled Click here to set menus for specific levels to expand more options.
- These options will show each active membership level on your site and allow you to assign a unique menu per level.
Screenshots


Action and Filter Hooks
This Add On has a single filter hook that allows you to set the priority of which menu to display when the user has more than one membership level (in the case that you are using the Multiple Memberships Per User Add On – MMPU).
apply_filters( 'pmpronm_prioritize_levels', array $level_ids );
This is a Premium Add On
Premium plans include a dedicated hosting environment, all Add Ons, priority support, unlimited "Do It For Me" development requests, and access to an AI Skills library.

