
Features
- Automatically add users to GetResponse campaigns when their membership level changes.
- Works with or without Paid Memberships Pro installed.
Installation
- Upload the “pmpro-getresponse” directory to the “/wp-content/plugins/” directory of your site.
- Activate the plugin through the Plugins’ menu in WordPress.
 How it Works
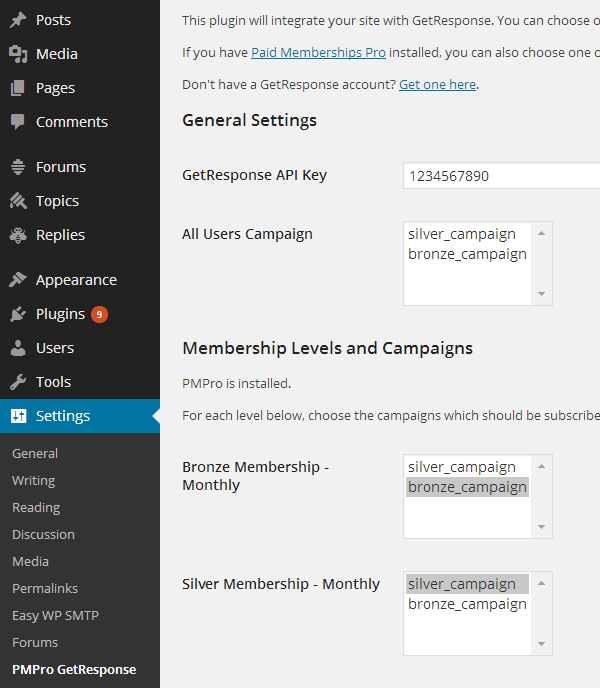
After installing PMPro GetResponse, a new page under Settings will be added in the WordPress dashboard titled “PMPro GetResponse”.
On this page, you will be prompted to enter your GetResponse API key. Once entered, you will be able to select which campaigns you would like your users to be subscribed to.
If PMPro is installed, you will be able to select a different set of campaigns for each membership level you have created. If PMPro is not installed, you will only be able to select one set of campaigns for all users.
Note: If your WordPress users do not have First and Last Names filled out, their “display name” will be used as the GetResponse Contact name.
Obtaining your GetResponse API key
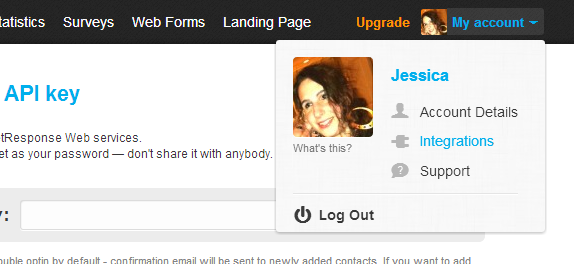
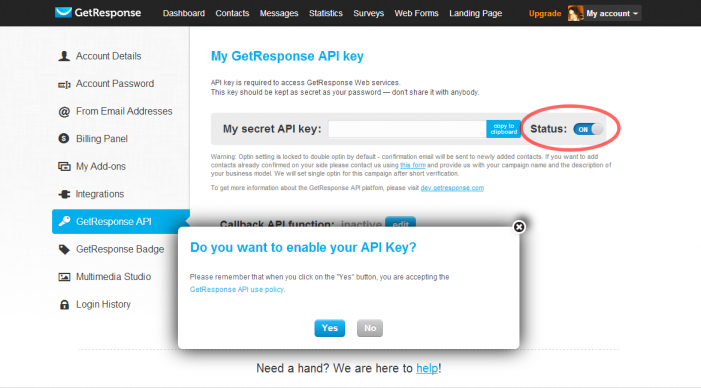
Obtaining your GetResponse API key is very simple, but may be a little confusing to new users who are not familiar with the GetResponse interface. To obtain your API key, do the following:
- Log into your GetResponse account.
- From your dashboard, navigate to My Account > Integrations > GetResponse API
- Make sure that the “Status” toggle is switched to On. You will be asked if you want to enabled your API key. Select “Yes”.
- Copy your API key to your PMPro GetResponse settings page.
 Custom Fields
GetResponse allows you to add extra information about your contacts by using Custom Fields. The PMPro GetResponse addon supports this with the use of the pmpro_getresponse_custom_fields filter.
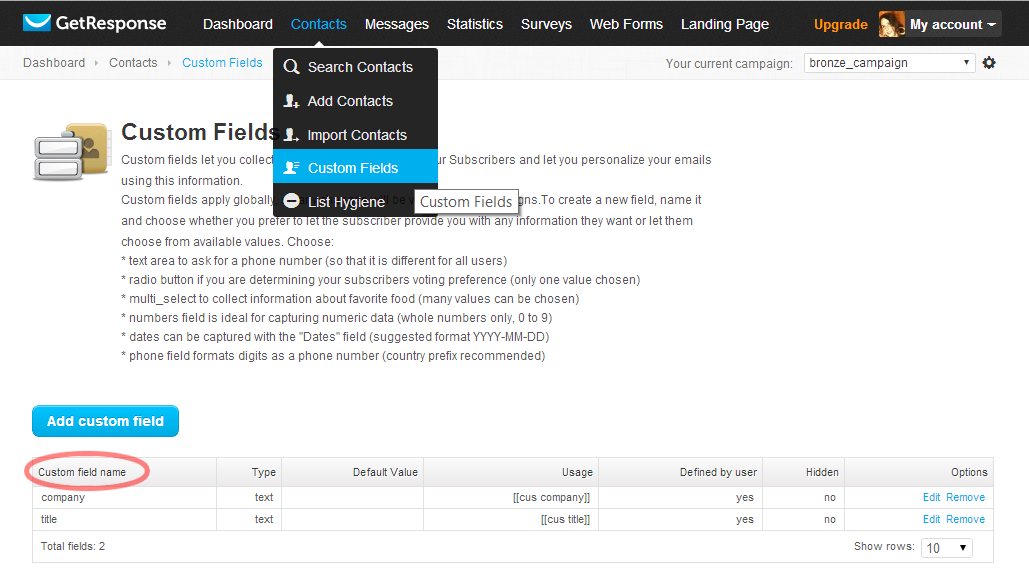
Before using the filter, you must first set up your custom fields in the GetResponse dashboard:
- Navigate to Contacts > Custom Fields.
- Click “Add custom field”.
- Enter your custom field name (required), type (required), and default value (optional).
Once you have your custom fields set up, you can use the pmpro_getresponse_custom_fields filter by passing an associative array containing the custom field name(s) and value(s).
Here’s an example using custom fields named “city”, “state” and “company”:
Combine this with custom User Fields to make collecting your customer’s data even easier!

