Paid Memberships Pro includes built-in support for profile pictures, allowing members to upload custom avatars directly from your site. Profile pictures replace the default Gravatar image and appear anywhere WordPress uses the get_avatar() function — in comments, member directories, the admin bar, and more.
This feature eliminates the need for third-party avatar plugins such as Basic User Avatars.
Profile pictures require the WordPress Show Avatars setting to be enabled. Navigate to Settings > Discussion and check the box for Show Avatars under the Avatar Display section.
If Show Avatars is disabled, PMPro’s profile picture settings will not appear in the admin.
Enabling Profile Pictures
You can enable profile pictures in two ways: sitewide for all users, or on a per-level basis for specific membership levels.
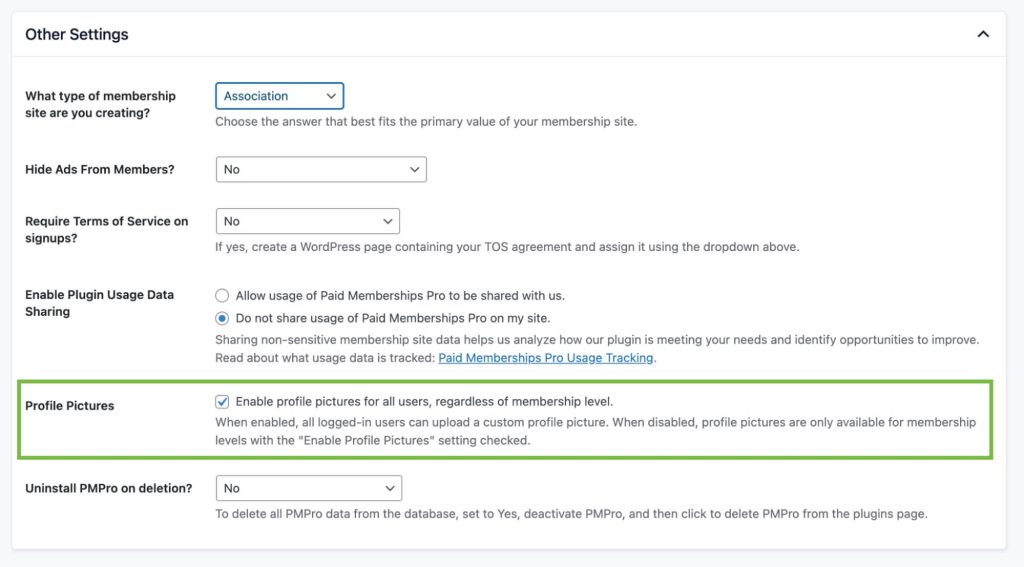
Sitewide (All Users)
- Navigate to Memberships > Settings > Advanced.
- Under the Other Settings section, check the box for Profile Pictures.
- Save your settings.
When enabled sitewide, all logged-in users can upload a custom profile picture, regardless of their membership level.
Per Membership Level
- Navigate to Memberships > Settings > Levels.
- Edit the membership level you want to enable profile pictures for.
- Under the Other Settings section, check the box for Enable Profile Pictures.
- Save the level.
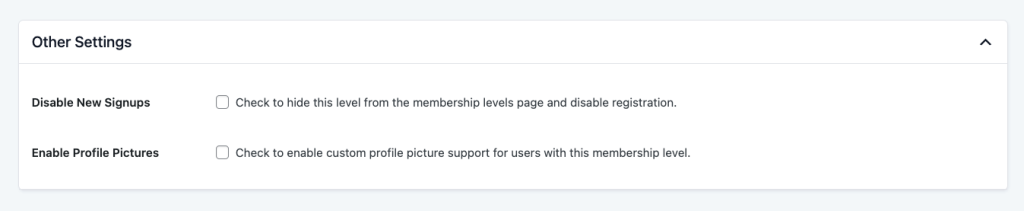
When enabled per level, only members with that specific level can upload a profile picture. You can enable this setting on as many levels as you need.
Upload Requirements
- Allowed file types: PNG, JPG, JPEG, GIF, WebP
- Maximum file size: 2 MB
- Maximum dimensions: Images are automatically cropped to a square and resized to a maximum of 1024 x 1024 pixels.
Members see these requirements displayed as a hint below the upload field.
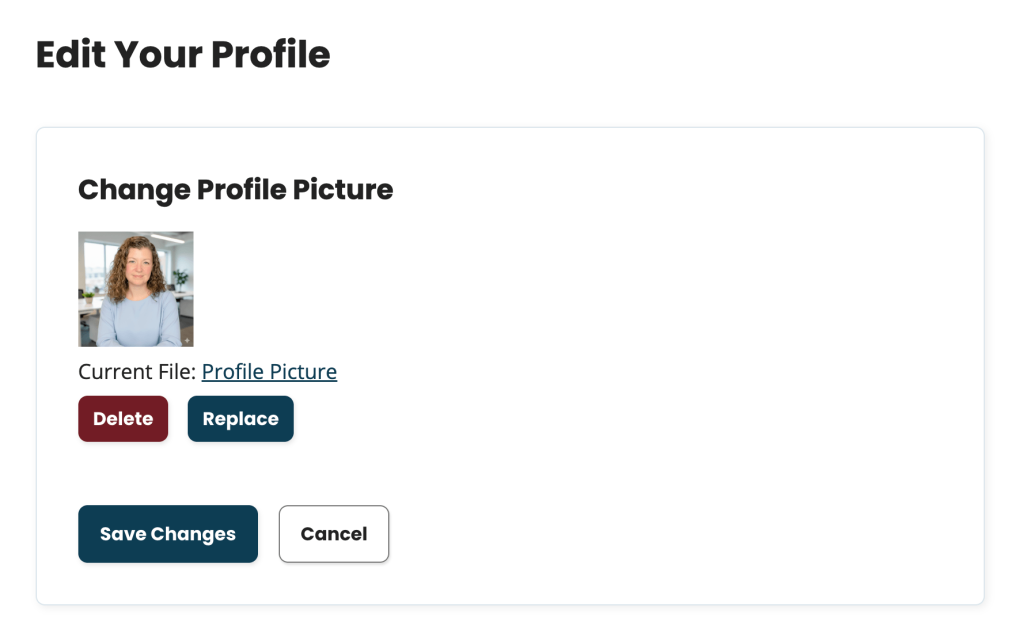
How Members Upload a Profile Picture
Members manage their profile picture from the dedicated Change Profile Picture page linked in their Profile Section of the Membership Account Page.
On the Change Profile Picture page, members can:
- Upload a new profile picture by selecting an image file.
- Replace their current profile picture with a new one.
- Delete their profile picture (reverting to the default Gravatar or site default).
The page shows a preview of the member’s current profile picture (or their Gravatar/site default), along with action buttons and a file upload field.
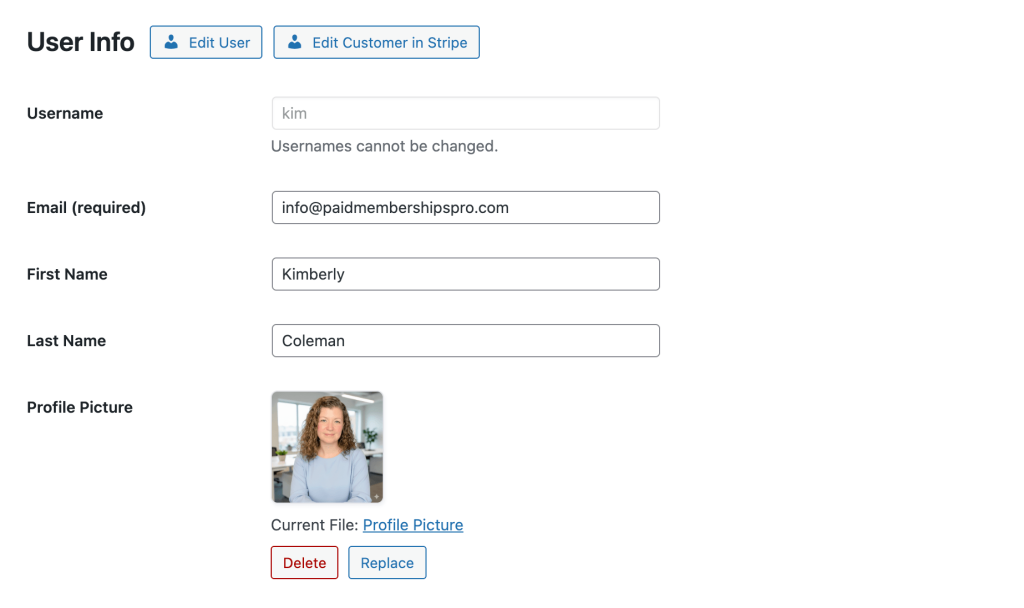
Managing Profile Pictures in the Admin
Administrators can manage a member’s profile picture from the Edit Member screen.
- Navigate to Memberships > Members.
- Click on a member’s name to open their Edit Member page.
- The profile picture field appears with a preview of the current image.
- Administrators can upload, replace, or delete a member’s profile picture.
How Profile Photos Are Handled
- WordPress Integration: Displays member avatars anywhere WordPress renders one — comments, admin bar, user lists, member directories, and compatible plugins.
- File Storage and Sizing: Avatars are stored outside the Media Library, protected from direct browsing, and deleted automatically when a user is removed from WordPress.
- On upload, PMPro validates the file, crops it to a square from the center, resizes it to a maximum of 1024×1024px, and generates optimized sizes at 96px, 256px, and 512px — all retina-ready (2x resolution).
- WordPress User Profile: An admin note appears on the Edit User page (Users > Edit User) when PMPro is managing the avatar.
Get Support From Our Team of Experts
For more help with this PMPro feature, check out our Support Page with three ways to get support as a free or premium member.
Last updated on March 31, 2026

