Directions on installing Paid Memberships Pro Add Ons via your membership site’s WordPress admin.
There are three types of Add Ons available for Paid Memberships Pro:
- Free Add Ons are available to download on the Add On pages.
- Standard Add Ons that can be installed and updated through the WordPress admin for any site with a Standard or higher license.
- Plus Add Ons that can be installed and updated through the WordPress admin for any site with a Plus or higher license.
Continue reading to learn how to install and update Add Ons based on the license type.
Search and Filter Add Ons
From your WordPress admin, go to Memberships > Add Ons. You’ll see a list of available Paid Memberships Pro Add Ons. Each Add On card gives a brief description of the Add On, the license key required and the status of the Add On. Filter options include:
- All
- Popular
- Free
- Premium
- Active, if any Add Ons are installed and activated on your site
- Inactive, if any Add Ons were previously activate and now deactivated.
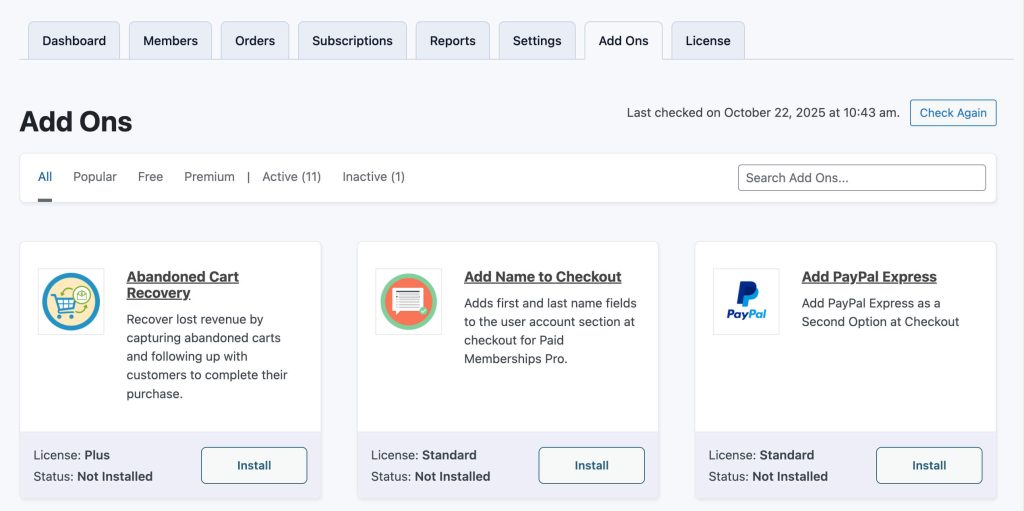
Tip: You can use the search bar at the top right of the page to find Add Ons by name, keyword or use case. For example, type “community” in the search bar to view all the Add Ons we recommend for a community-focused membership site.
Install or Update Free Add Ons
Every Add On can be installed from the Memberships > Add Ons screen. You must have a valid premium license in order to install or update Add Ons that are offered with our Standard or Plus plan. Click here for documentation on how to validate your license key »
- Navigate to Memberships > Add Ons in the WordPress admin.
- Search for the Add On by name or browse Add Ons in a filtered category.
- After locating the desired Add On, click “Install”.
- Once the plugin is installed in your WordPress site, you can activate the Add On in the same window.
- Or, navigate to the Plugins screen in the WordPress admin. Locate the Add On in the list of plugins.
- Click “Activate” to activate the plugin.
How to Update Free or Premium Add Ons
Every Add On can be updated from the Memberships > Add Ons screen. You must have a valid premium license in order to update a premium Add Ons.
- First, it is very important to have a current back up of your membership site before you update plugins.
- Navigate to the Plugins screen in the WordPress admin.
- Click the “Update Available” tab to view out of date plugins.
- For any PMPro Add On in this list, click to review the plugin’s changelog.
- If you are happy with the updates, click “update now”.
- You must have a valid license key for the Add On in order to update from this screen.
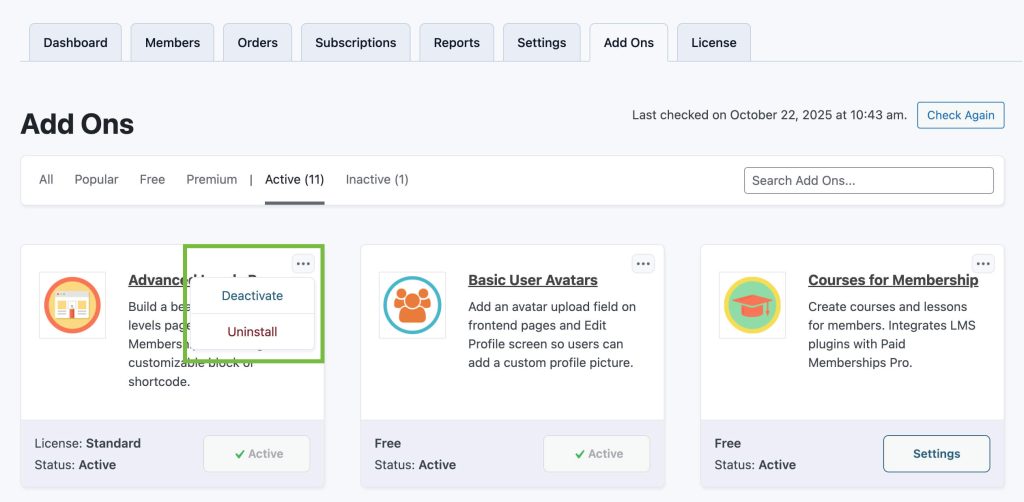
Deactivating or Uninstalling Add Ons
- Navigate to Memberships > Add Ons.
- Filter by “Active“.
- Click the three dots at the top left corner of the Add On card you wish to deactivate.
- Select “Deactivate” or “Uninstall“. Deactivated Add Ons will remained installed on your WordPress site. As soon as the Add On is deactivated, the Inactive filter optioin will show.
Using Open Source Add Ons Without a License
GitHub provides a way to download a .zip file that you can then install in your WordPress site via the Plugins > Add New > Upload Plugin screen.
But, when you use the file that GitHub provides, the plugin directory might include a suffix such as -dev or the branch name. While the plugin will work as intended, this folder name can cause confusion down the road if you later download a copy of those same plugins from our site.
You also may not be notified that a plugin is out of date and in need of a security or bug patch.
To avoid this issue, we recommend that you change the plugin folder name before activating and using the Add On in your site.
- Unzip the downloaded Add On from GitHub.
- Remove the
-devor-main(or other suffix) from the plugin folder. - Then upload the unzipped plugin to the
/wp-content/plugins/folder of your site’s web hosting environment. - Or, compress the folder before uploading to WordPress via the Plugins > Add New > Upload Plugin screen.
Get Support From Our Team of Experts
For more help with this PMPro feature, check out our Support Page with three ways to get support as a free or premium member.
Last updated on October 22, 2025

