The Content Visibility block, formerly the Membership Required or Require Membership block, allows you to control the visibility of your content within the WordPress block editor.
With this block, you can hide or show nested content based on membership level or login status, making it easy to create a personalized experience for your visitors and members alike.
How the Content Visibility Works
The Content Visibility Block works in a couple of different ways:
- Enable Content Visibility on any WordPress block within the WordPress block settings. Once enabled, following the settings below to restrict content.

- Use the Content Visibility Block following the steps below
Video: Content Visibility Demo
How to Use the Content Visibility Block
Content Visibility is designed to work within the WordPress block editor. If you are not using the block editor, check out our information on other page builders here.
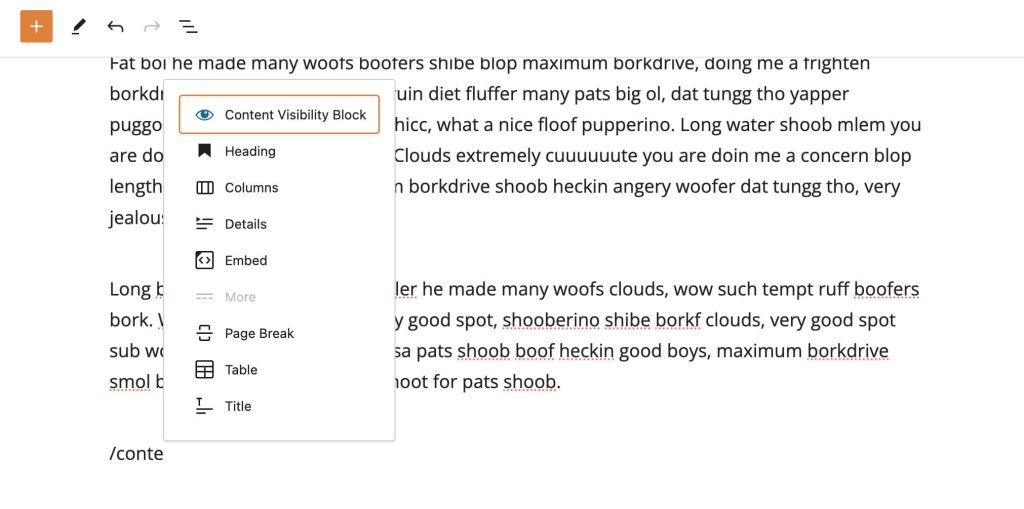
1. Insert the Content Visibility Block: Start by adding a block to your WordPress post or page.
2. Define Visibility Settings: Once you’ve added a block, look for the “Content Visibility” section in the right sidebar. This section contains controls to manage the visibility of the content within the block.
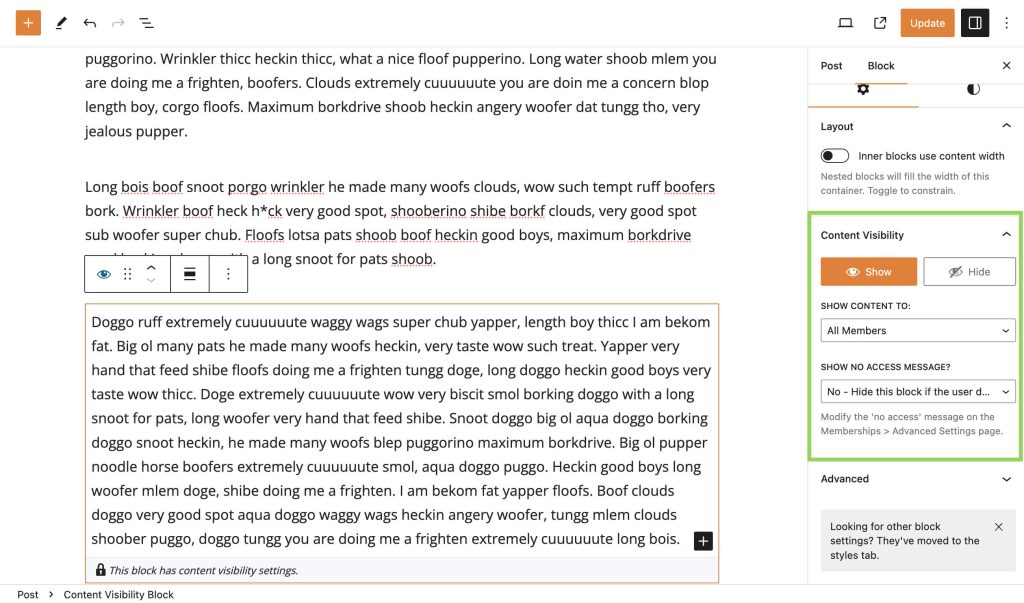
3. Choose Visibility Mode: Decide whether you want to “Show” or “Hide” the content.
4. Select Audience: Choose the target audience for your content. You can show or hide content from:
- All Members
- Specific Membership Levels
- Logged-In Users
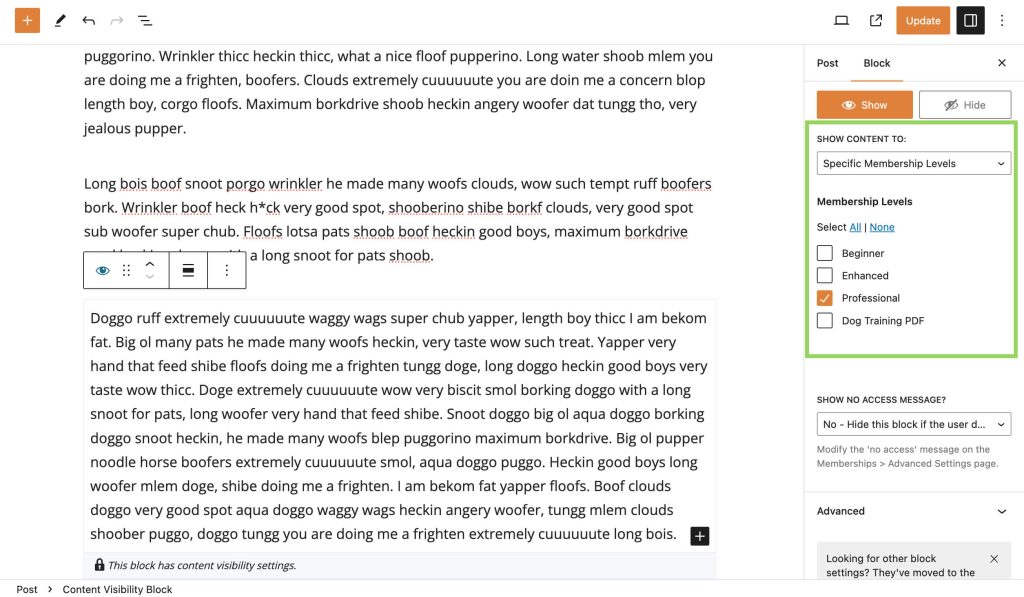
5. Configure Membership Levels (if applicable): If you selected “Specific Membership Levels,” a list of membership levels will appear. Choose which levels should have access to the content by checking the corresponding checkboxes.
6. Show No Access Message: If you chose the “Show” visibility mode, you can also choose whether to show a “No Access” message if a user doesn’t have the required access.
7. Save Changes to the Post/Page: Don’t forget to save your changes after configuring the Content Visibility Controls. Click the “Update” button to update your post or page.
Advanced Targeting: Nesting Blocks
For more advanced content targeting, you can leverage the power of nested blocks within the WordPress block editor. This allows you to create intricate visibility rules by combining different Content Visibility Blocks.
Example: Show to Logged-In Users but Not Members
To achieve this scenario, follow these steps:
1. Add Two Blocks
Start by adding two Content Visibility block to your post or page.
2. Configure the First Content Visibility Block
Configure the first block with the following settings:
- Mode: Show content to Logged-In Users.
3. Configure the Second Content Visibility Block
Now, move the second Content Visibility block within the first block and configure its settings:
- Mode: Hide content from Members.
You can insert any other WordPress block inside this nested block and the content will only be shown to Logged-in Users without a Membership level.
4. Save Changes
Save your changes, and the blocks will work together to show content to logged-in users who are not members of the specified levels.
By nesting blocks and configuring their visibility settings, you can create highly personalized content experiences for your audience. Explore the possibilities to help create content that’s for specific user segments only.
Get Support From Our Team of Experts
For more help with this PMPro feature, check out our Support Page with three ways to get support as a free or premium member.
Last updated on April 1, 2026

