The Single Level Block allows you to customize and display information about a membership level in a pricing-table like format on your Membership Levels page or other places in your WordPress posts or pages.
This block is designed to provide flexible options for showcasing membership details that stay up to date with the linked level’s price, description, expiration, and more.
Table of contents
Getting Started
To use the Single Level Block, follow these simple steps:
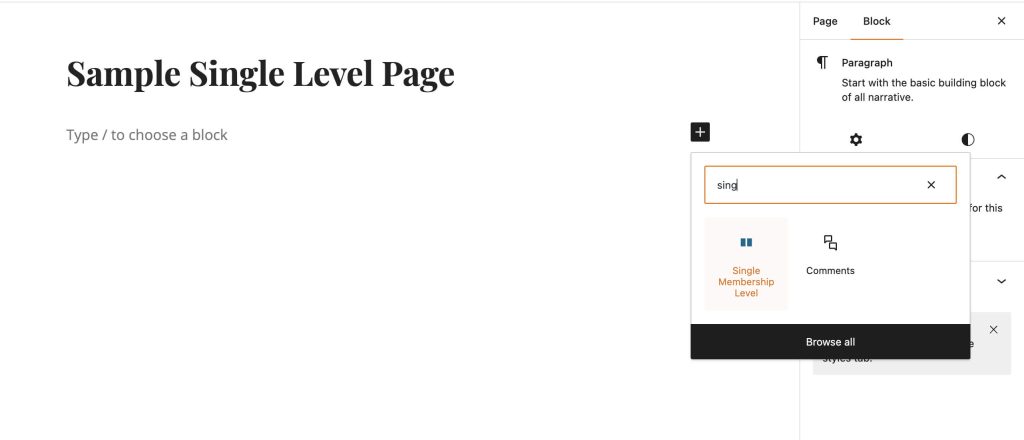
1. Add the Single Level Block
Start by adding the “Single Level Block” to your Membership pricing page, or any other WordPress post or page using the block editor.
2. Configure Level Settings
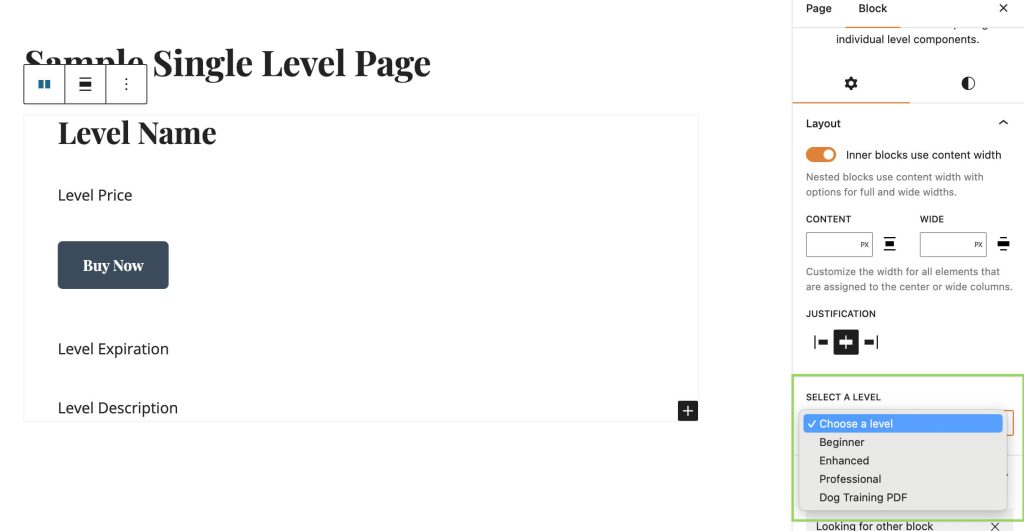
Once added, you’ll see the block in the editor. If it’s the first time you’re using it, you’ll need to configure the level settings. Here’s how:
- Select a Level: Open the block settings in the right sidebar, and under “Select a level,” choose the membership level you want to showcase.
3. Customize Content Blocks
The Single Level Block is a wrapper for all the nested level components within. The first time you insert the block, it will include all available nested blocks. You can remove items, reorder them, and customize the layout however you want.
- Name Block: Displays the name of the selected membership level.
- Price Block: Shows the price associated with the selected membership level.
- Checkout Button Block: Provides a button for users to proceed to the membership checkout.
- (note: use the same docs as the Checkout Button block we have to update).
- Expiration Block: Displays the expiration details of the selected membership level or nothing if the level does not expire.
- Description Block: The level description, if set, or nothing if the level has no description.
4. Add More Level Blocks
You can add multiple single level blocks to your page, each for a different membership level.
- Select the outermost level block.
- Use the Duplicate action to create a second block.
- Change the membership level for the duplicated block.
- Repeat these steps until you have all of your levels represented.
- Choose whether to organize your levels into columns using the WordPress core columns block.
5. Preview and Save
Preview your changes to ensure the content appears as expected. Once satisfied, click the “Update” button to save your post or page.
Advanced Configuration
The Single Level Block Editor supports advanced configurations for developers or users looking to extend its functionality. You can customize the block template by adding or removing content blocks to tailor the display to your specific needs.
Nested Blocks
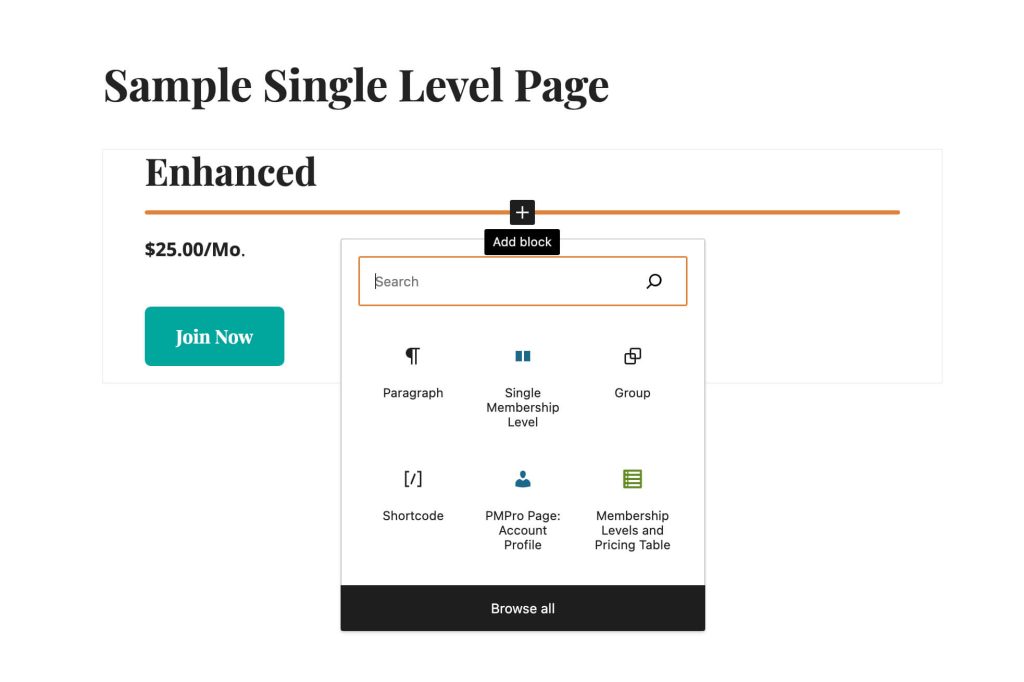
The Single Level Block Editor allows nesting of other blocks within it. For example, you could place an image block or a video block within the level. This allows you to totally customize the appearance of your membership levels page.
With the Single Level Block Editor, you can effortlessly showcase membership levels and their details, creating a seamless and engaging experience for your site visitors. Explore the customization options and make your membership content stand out.
Get Support From Our Team of Experts
For more help with this PMPro feature, check out our Support Page with three ways to get support as a free or premium member.
Last updated on April 1, 2026

