Do you want to add some custom user fields to your membership site but don’t know how? In this step-by-step guide, we show you how to code custom User Fields in PMPro (formerly know as Register Helper).
- You can use the user fields settings page to create fields with no code. If you aren’t comfortable working with code, stop reading this guide and visit the documentation page on creating fields without code.
- BUT If you have unique field needs, you can use custom code to create even more complex and intelligent user fields. Going the code route also unlocks additional field types not yet supported on the settings page.
- Learn how to use the Code Snippets plugin to add code to your WordPress site.
- Learn how to navigate the User Fields documentation, and show you how to set up some custom fields.
What are User Fields?
User Fields is a robust feature in Paid Memberships Pro to create custom profile fields for your membership site. User fields helps you set up custom checkout fields by level, collect specific information about your members, and add this collected data to your member’s profile. Fields can be collected at membership checkout, on the user’s profile or for administrative view-only.
You can do a whole lot with User Fields. And when we merged Register Helper into the core Paid Memberships Pro plugin, we wanted give non-developers a way to add fields via a GUI (graphical user interface), without limiting how developers can extend the fields via the User Fields API.
- You can set up text-based custom fields, such as collect telephone numbers
- You can add a dropdown field to your checkout page.
- You can add fields that only the admin can see and populate. You can even add fields that users can view, but only admins can edit.
- You can create a field that depends on another field’s value.
- You can save field data in other places, not just the user object.
- The options are (almost) endless.
Warning: we are about to get into some developer-focused stuff. If you are not comfortable with code—I encourage you to keep reading. The basic principles of setting up a custom field with code are actually pretty simple to grasp. You can do it.
But please know that you have no-code options as well:
- Use the User Fields settings page at Memberships > Settings > User Fields in the WordPress admin.
- OR (if you have a premium membership) reach out to our support team for technical help.
Let’s go!
Video Demo
Before We Get Started
Before we dive into any coding, we will first need a couple of things in place:
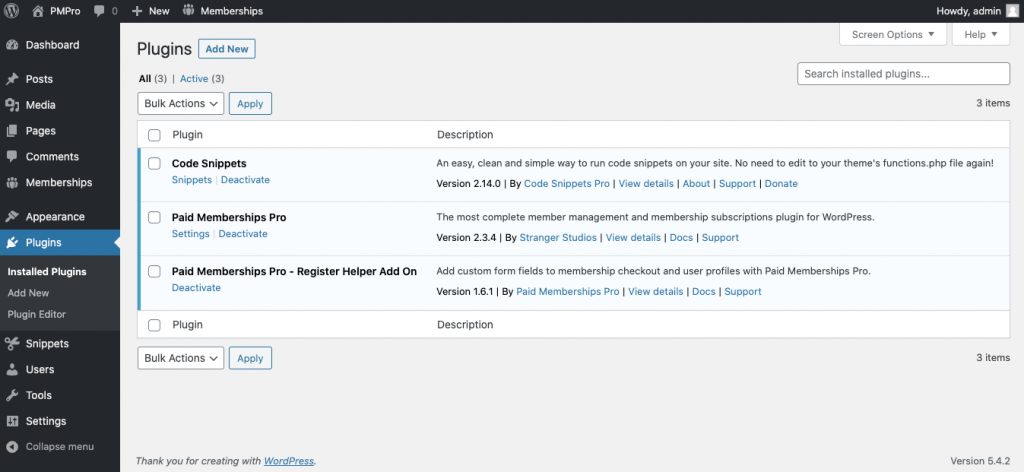
- Install and activate Paid Memberships Pro on your website.
- Download, install, and activate the Code Snippets plugin. We will be adding our code to this 3rd party plugin.
Using Custom Code to Add User Fields
Once you have installed and activated Paid Memberships Pro and the Code Snippets plugin. You are ready to start coding up your custom fields.
Prepare Your Code Snippet
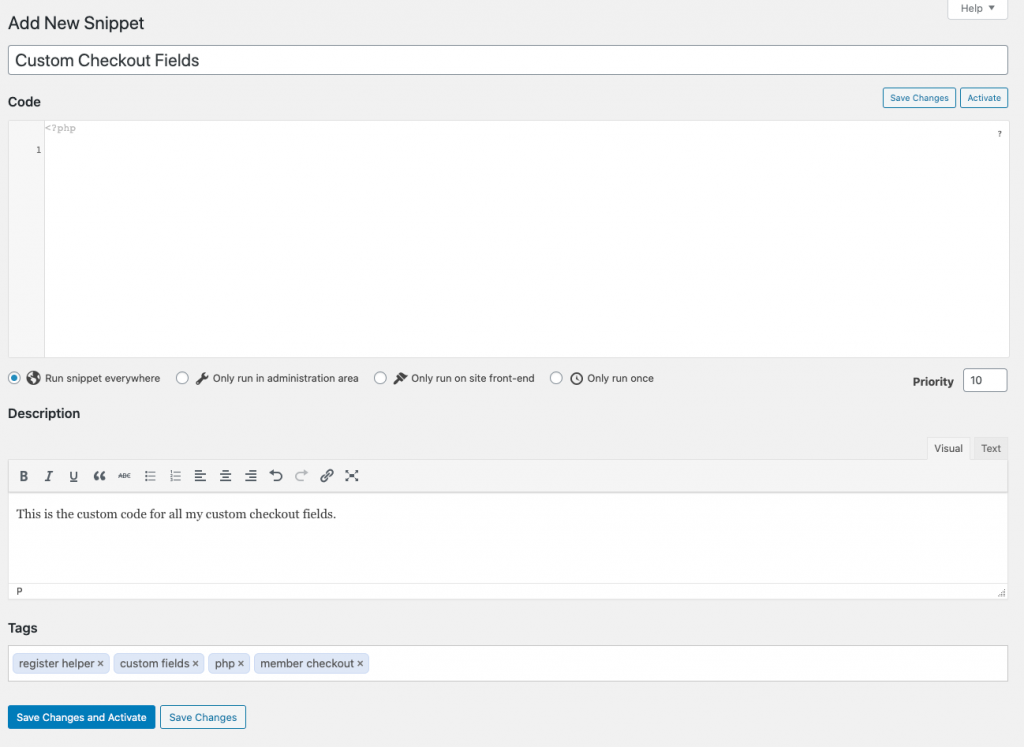
First, let’s go ahead and configure the Code Snippets plugin:
- Open up the Code Snippets plugin by selecting “Snippets” > “Add New” from the WP Dashboard.
- Name your code snippet. I named mine “Custom Checkout Fields”.
- Give your code snippet a description and (if applicable) add any tags to your code snippet.
- Set your code snippet to “Run snippet everywhere”. If needed, you can set your code snippet priority.
Starting a Function
- First, create a function that runs on
init, a WordPress action hook otherwise known as Initialize. This action hook ‘fires’ after WordPress has finished loading but before any headers are sent. Learn more about the init action hook here.
function my_pmpro_add_fields_to_checkout() {
   // This is where our fields code will go.
}
add_action( 'init', 'my_pmpro_add_fields_to_checkout' );
You can name your function however you would like. For this example, we are using the function name my_pmpro_add_fields_to_checkout.
- Next, add an
IF Statementto your function, that checks to see if the User Fields functionality in Paid Memberships Pro is activate. If this function is not active, return a boolean value offalse. This step prevent any errors coming up if for some reason Register Helper gets deactivated or is no longer located on your site.
function my_pmpro_add_fields_to_checkout() {
	// Don't break if PMPro is out of date or not loaded.
	if ( ! function_exists( 'pmpro_add_user_field' ) ) {
		return false;
	}

	// This is where our fields code will go.
}
add_action( 'init', 'my_pmpro_add_fields_to_checkout' );
- Create an empty fields array,
$fields = array();. This is where we will create our custom fields. This is currently empty and won’t display anything if saved.
function my_pmpro_add_fields_to_checkout() {
	// Don't break if PMPro is out of date or not loaded.
	if ( ! function_exists( 'pmpro_add_user_field' ) ) {
		return false;
	}

	// This is where our fields code will go.
	$fields = array();

}
add_action( 'init', 'my_pmpro_add_fields_to_checkout' );
- Next, create a field group. This code defines a new “box” with a heading and optional description wherever your new fields are displayed.
function my_pmpro_add_fields_to_checkout() {
	// Don't break if PMPro is out of date or not loaded.
	if ( ! function_exists( 'pmpro_add_user_field' ) ) {
		return false;
	}

	// This is where our fields code will go.
	$fields = array();

	// Add a field group to put our fields into.
	pmpro_add_field_group( 'Business Details' );
}
add_action( 'init', 'my_pmpro_add_fields_to_checkout' );
- Finally, add a
foreach loop. This loop checks each of the custom fields (not added yet) and places them in our field group.
function my_pmpro_add_fields_to_checkout() {
	// Don't break if PMPro is out of date or not loaded.
	if ( ! function_exists( 'pmpro_add_user_field' ) ) {
		return false;
	}

	// This is where our fields code will go.
	$fields = array();

	// Add a field group to put our fields into.
	pmpro_add_field_group( 'Business Details' );

	// Add all of our fields into that group.
	foreach ( $fields as $field ) {
		pmpro_add_user_field(
			'Business Details',
			$field
		);
	}
}
add_action( 'init', 'my_pmpro_add_fields_to_checkout' );
You should have something very similar to the code above. If not, feel free to copy the code block above and add it to your Code Snippets plugin.
Nothing should happen if the code is run. This is an empty function that is ready and waiting for fields to be added to it.
Add User Fields to Our Function
It is time to start adding the actual custom fields to our code. In your function, locate the $fields = array();. The next portion of this tutorial adds code right under this section.
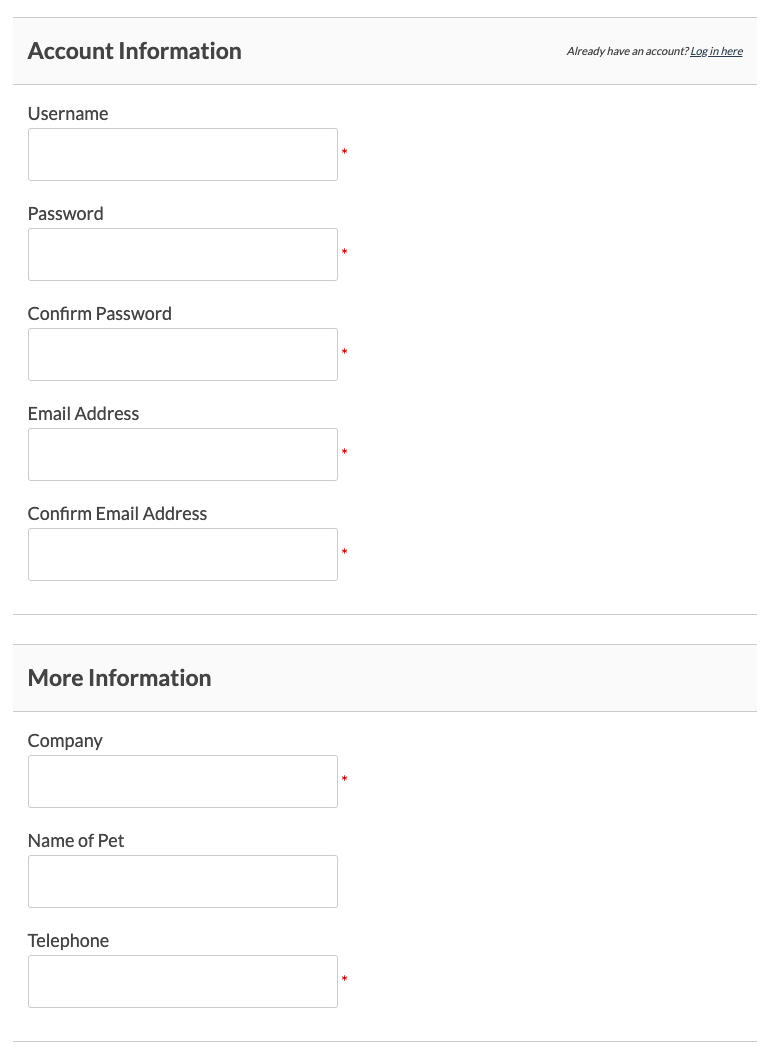
In this tutorial, I am going to make a “Company” field for members to input their Company’s name when performing a checkout. We need to create a new array item in the $fields array variable and assign it three main parameters:
- Name – Assign the input name of the field here. This will also be used as the designated field meta key. In this case, we will use name “company”.
- Type of field – Select the type of field here. There are multiple field types that you can choose from. We want members to write out their company name so we will use a “text” field.
- An array of options – There are some options that apply to every field type, and some that are unique to specific field types. I will add three attributes to this array. Learn more about the types of array options available here.
- Label – This label will be added to the custom field on the frontend of the PMPro checkout page. I am using “Company” for this example.
- Profile – Display or hide this field from the member’s profile. I have set this to true.
- Required – This will make the field required. I have this set to true.
$fields[] = new PMPro_Field(
	'company',
	'text',
	array(
		'label' => 'Company',
		'size' => 40,
		'class' => 'company',
		'profile' => true,
		'required' => true,
		'levels' => array(1,2),
		'memberslistcsv' => true
        )
);
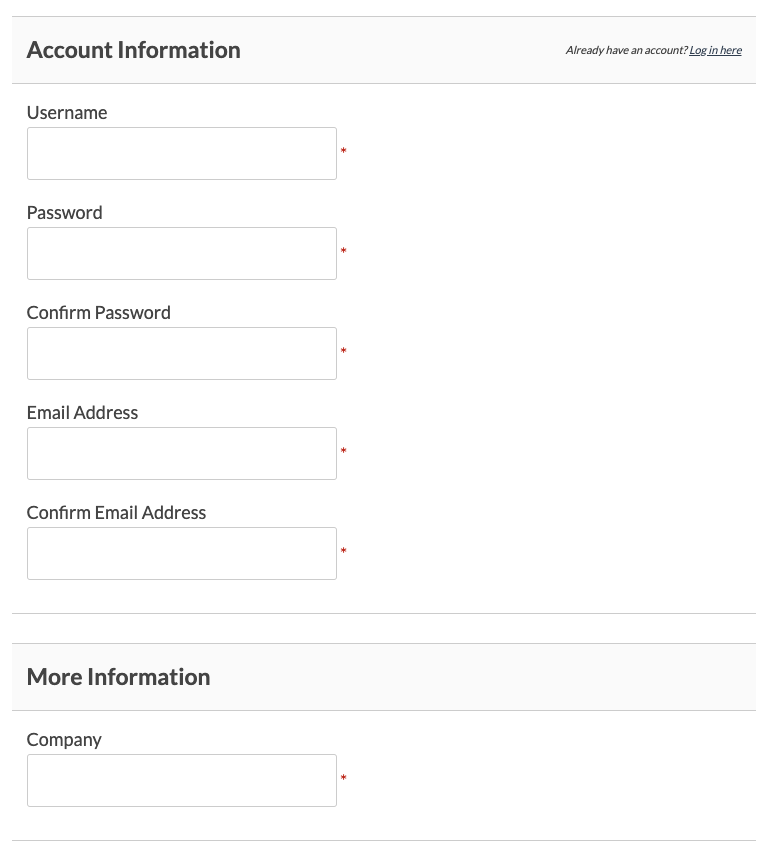
If your code snippet is active, you should see the ‘Business Details’ section and the ‘Company’ field on your membership site’s checkout page. If not, copy the code below and add it to your Code Snippet plugin.
function my_pmpro_add_fields_to_checkout() {
	// Don't break if PMPro is out of date or not loaded.
	if ( ! function_exists( 'pmpro_add_user_field' ) ) {
		return false;
	}

	// This is where our fields code will go.
	$fields = array();

	// Add a Company text field.
	$fields[] = new PMPro_Field(
		'company',
		'text',
		array(
			'label' => 'Company',
			'size' => 40,
			'class' => 'company',
			'profile' => true,
			'required' => true,
			'levels' => array(1,2),
			'memberslistcsv' => true
	        )
	);

	// Add a field group to put our fields into.
	pmpro_add_field_group( 'Business Details' );

	// Add all of our fields into that group.
	foreach ( $fields as $field ) {
		pmpro_add_user_field(
			'Business Details',
			$field
		);
	}
}
add_action( 'init', 'my_pmpro_add_fields_to_checkout' );
Adding More Fields
At this point, you have a working example of how to add user fields via code.
- If you want to add more fields, copy the entire
$fields[] = new PMPro_Fieldsection of code. - Then, paste the code directly under the previous field.
- Once done, you should have two of the same fields.
- Now edit the second field by changing the field parameters and attributes.
Custom Coded Fields Wrap Up
If you have followed along with this tutorial, you should have a Paid Memberships Pro checkout page with a “Company” custom field in a box titled “Business Details”.
If this User Fields API is new to you, know that the more you become familiar with the documentation, the better you will become at adding custom fields to Paid Memberships Pro.
Feel free to use the code example in this guide as a starter for your custom fields.
- Copy and paste the code from this example into your Code Snippets plugin.
- Change a few lines of code to match what fields you’re looking to create
- Activate the snippet.
Continue learning about user fields in Paid Memberships Pro in our documentation:
- Create User Fields via Settings
- Create User Field Groups
- Creating Fields via Custom Code
- Supported Field Types and Field Attributes
Free Download: The AI-Powered Membership Site Blueprint
Download the free guide: Learn how to plan, build, and grow a membership site using AI as your strategic partner: from buyer persona to launch and beyond.


