
Kit is an email marketing platform that offers robust tools for automation and subscriber tagging.
This integration subscribes and tags your Paid Memberships Pro members in Kit. When a member’s level changes, the plugin automatically updates their tags to match their current membership status.
Installation
You must have the Paid Memberships Pro plugin installed and activated with a valid license type to use this Add On.
- Navigate to Memberships > Add Ons in the WordPress admin.
- Locate the Add On and click Install Now.
- To install this plugin manually, download the .zip file above, then upload the compressed directory via the Plugins > Add New > Upload Plugin screen in the WordPress admin.
- Activate the plugin through the Plugins screen in the WordPress admin.
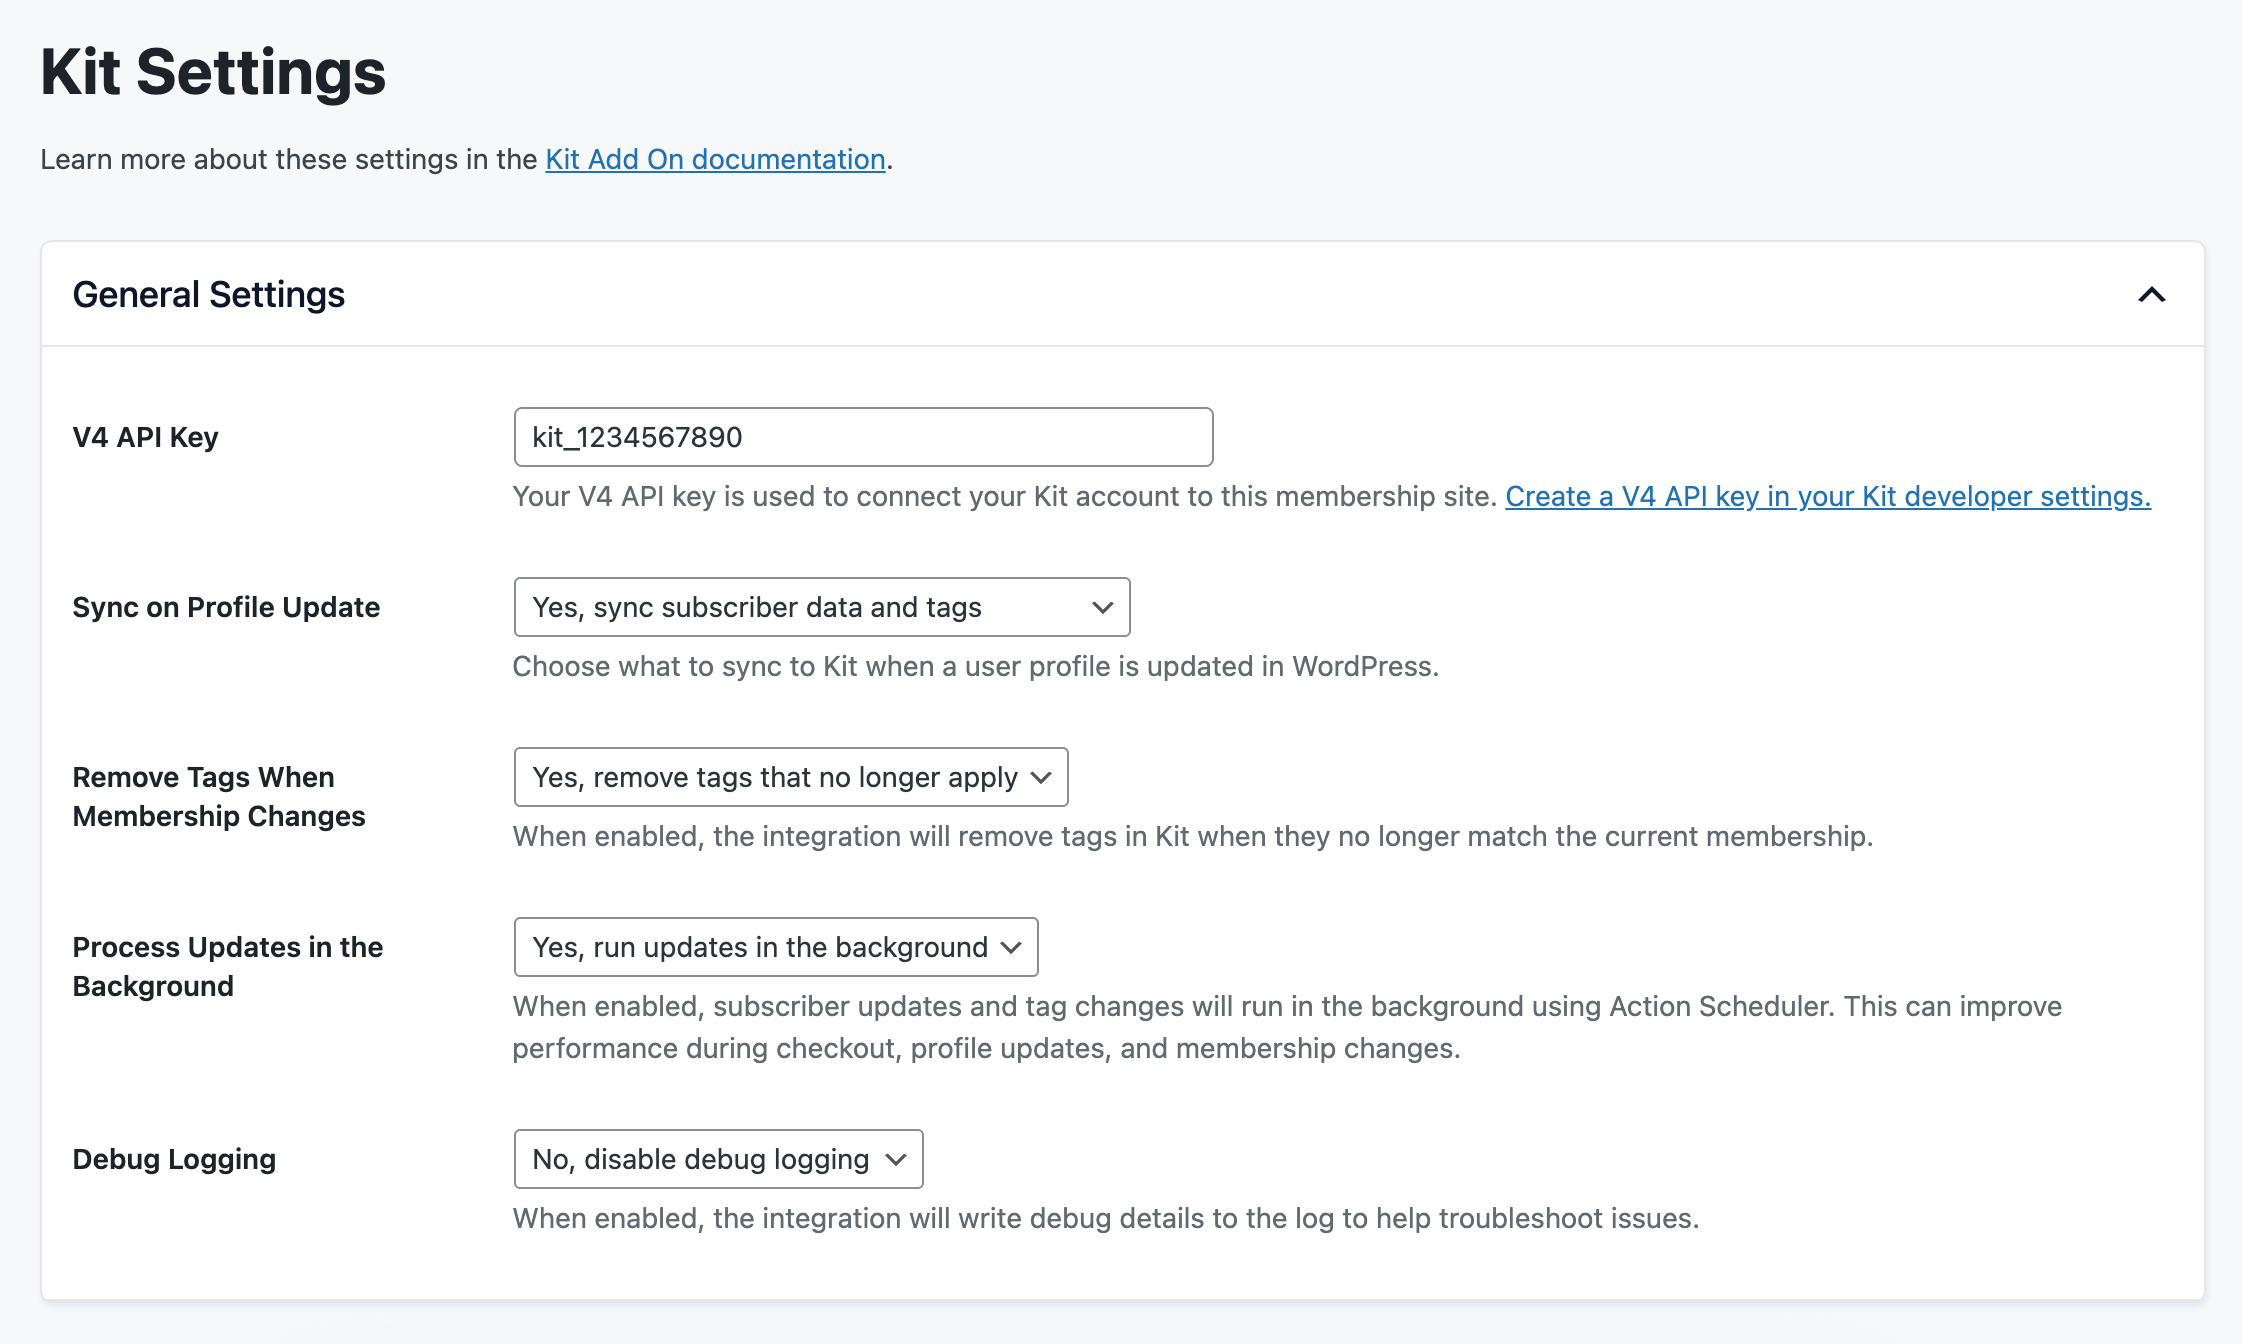
General Settings
- Navigate to Memberships > Kit in the WordPress admin.
- Enter your V4 API Key. This key can be found on the Developer Settings page in your Kit account.
- Configure the additional settings as needed (see below).
- Click Save Changes.
V4 API Key
Your V4 API key is used to connect your Kit account to this membership site. You can create a V4 API key in your Kit developer settings.
Sync on Profile Update
Choose what to sync to Kit when a user profile is updated in WordPress:
- Yes, sync subscriber data and tags: Updates the subscriber’s information and recalculates their tags based on current membership levels.
- Yes, sync subscriber data only: Updates the subscriber’s information (name, email, custom fields) without modifying tags.
- No, do not sync anything on profile update: Disables syncing when profiles are updated. Tags will still be updated when membership levels change.
Remove Tags When Membership Changes
When enabled, the integration will remove tags in Kit when they no longer match the member’s current membership level. This is useful for keeping your Kit segments accurate when members change, cancel, or expire from a level.
- Yes, remove tags that no longer apply (default): Tags are added when a member gains a level and removed when they lose it.
- No, never remove tags: Tags are only added, never removed. Use this if you want to preserve a history of membership levels in Kit.
Process Updates in the Background
When enabled, subscriber updates and tag changes will run in the background using Action Scheduler. This can greatly improve performance during checkout, profile updates, and membership changes.
- Yes, run updates in the background (default): Recommended for most sites, especially those with high traffic or many membership level changes.
- No, run updates immediately: Updates are processed synchronously. Use this for debugging or if you need immediate updates in Kit.
Debug Logging
When enabled, the integration will write debug details to an access-protected log file to help troubleshoot issues. Once enabled, a link to download the log file will appear in the settings.
For most sites, you should keep debugging off unless you are actively working through an issue in your site.
How to Assign Tags to a Membership Level
After saving your API key, you will see an option to assign tags to each membership level in your site.
- Navigate to Memberships > Kit in the WordPress admin.
- In the Assign Tags section, you will see a list of all your membership levels.
- For each level, select one or more tags from the checkbox list. You can assign multiple tags to a single level.
- Click Save Changes.
As new members join your site, the selected tags will be assigned to that subscriber in your Kit account.
How Tag Management Works
- When a member gains a level: The tags assigned to that level are added to the subscriber in Kit.
- When a member loses a level: If “Remove Tags When Membership Changes” is enabled, the tags assigned to that level are removed from the subscriber.
- Multiple levels: If a member has multiple membership levels, they will have all tags from all their active levels.
This integration only manages tags that are assigned to membership levels in the settings. Tags added to subscribers through other means (directly in Kit, other integrations, etc.) are not affected.
How to Import Existing Members and Tag them in Kit
This integration will not run an update on all existing members. To import existing member data to your Kit account, you will need to prepare and upload a CSV file.
Before you begin the import process, please review Kit’s documentation on How to Import a Subscriber List.
Step 1: Export Your Members
- Navigate to Memberships > Members.
- Export the full members list or filter your list to the correct data you’d like to import to Kit.
Step 2: Prepare Your CSV
- In a spreadsheet editing program, remove all unnecessary columns. By default, Kit only includes two fields on your subscribers’ profiles: First Name and Email address. You must add additional fields within Kit for any custom data you would like to import.
- Keep the
membership_levelcolumn temporarily to help you populate the correct tags. - Add a new column labeled Tags and adjust the data for each subscriber to be imported. For example, if you want to tag people in your “Bronze” membership level with the Kit tag “pmpro-bronze”, add that single tag value to your Tags column. You can add multiple tags per subscriber by separating them with a comma.
- Remove the
membership_levelcolumn before importing. - Export the data as a .csv file.
Step 3: Import to Kit
- Go to the Subscribers page in your Kit dashboard.
- Complete the import process following Kit’s import instructions.
Migrating from the ConvertKit Integration Add On
If you were previously using the Paid Memberships Pro – ConvertKit Integration Add On, this plugin will automatically migrate some of your settings.
What Gets Migrated
- Tag assignments: Your membership level to tag mappings are automatically migrated.
- Subscriber IDs: Subscriber IDs stored in user meta are migrated to the new format.
What Requires Manual Setup
- V4 API Key: You must generate a new V4 API key in Kit. The old API key and API secret are not compatible with this integration.
After Migration
Once the Kit Add On is activated:
- The old ConvertKit Integration Add On will be automatically deactivated.
- You can safely delete the old ConvertKit Integration Add On from your site.
- Navigate to Memberships > Kit and enter your new V4 API key.
- Review your tag assignments to ensure they migrated correctly.
Action and Filter Hooks
apply_filters( 'pmprokit_subscriber_data', array $subscriber_data, WP_User $user );
Filter the subscriber data before it is sent to Kit.
apply_filters( 'pmprokit_subscriber_tag_ids', array $new_tag_ids, WP_User $user );
Filter the Kit tag IDs assigned to the subscriber. Custom tags added here must also be defined in pmprokit_controlled_tag_ids.
apply_filters( 'pmprokit_controlled_tag_ids', array $controlled_tag_ids );
Filter which Kit tag IDs are managed by Paid Memberships Pro.
apply_filters( 'pmprokit_log_file_path', string $log_file_path );
Filter the file path used for the integration debug log.
do_action( 'pmprokit_update_subscriber_for_user', int $user_id, bool $update_tags );
Runs when a user’s Kit subscriber record is updated.
Screenshots
Navigate to Memberships > Kit in the WordPress admin to configure your API key and general settings.
Assign Tags to Membership Levels
After entering your API key, the Assign Tags section displays all membership levels with checkboxes to select one or more tags for each level.

Frequently Asked Questions
This integration uses Kit’s V4 API, which requires a different type of API key than the older v3 API. The V4 API provides better performance and more features. You can generate a V4 API key in your Kit developer settings.
Yes. Unlike the previous ConvertKit integration which only allowed one tag per level, this integration allows you to assign multiple tags to each membership level.
Members with multiple levels will have all tags from all their active levels. When they lose a level, only the tags specific to that level are removed (if tag removal is enabled).
Only if “Remove Tags When Membership Changes” is set to “Yes”. If set to “No”, tags are preserved even after a membership ends.
The current version focuses on subscriber management and tagging. Purchase data tracking is not included in this version.
This is a Free Add On.
Create a free account or log in to gain access to downloads and documentation.

