Use the PMPro Advanced Levels Page block to replace the default list of levels on your Membership Levels page, or to add a pricing table to any page on your site. This page covers how to add the block and what each of its settings does.
Add the Block to Your Membership Levels Page
Paid Memberships Pro creates a Membership Levels page that lists every level open for signups. To use the Advanced Levels Page layouts on that page instead, swap the default block for the Advanced Levels Page block.
- In the WordPress admin, edit the page assigned as your Levels page under Memberships > Settings > Pages.
- Remove the default Membership Levels and Pricing Table block. On older sites, this page may use the
[pmpro_levels]shortcode instead. - Click the + button to add a block and search for “Advanced Levels”. Select the PMPro Advanced Levels Page block. You can also find it in the “Paid Memberships Pro” block category.
- Open the block settings in the sidebar and choose your levels, layout, and display options. The preview in the editor updates as you change each setting. See Block Settings below.
- Save the page.
The block works on any page or post, so you can also add it to a landing page, a sales page, or your home page. To learn more about adding blocks, see our guide to all available PMPro blocks. If you prefer shortcodes, use [pmpro_advanced_levels] with the attributes listed in the shortcode attribute reference.
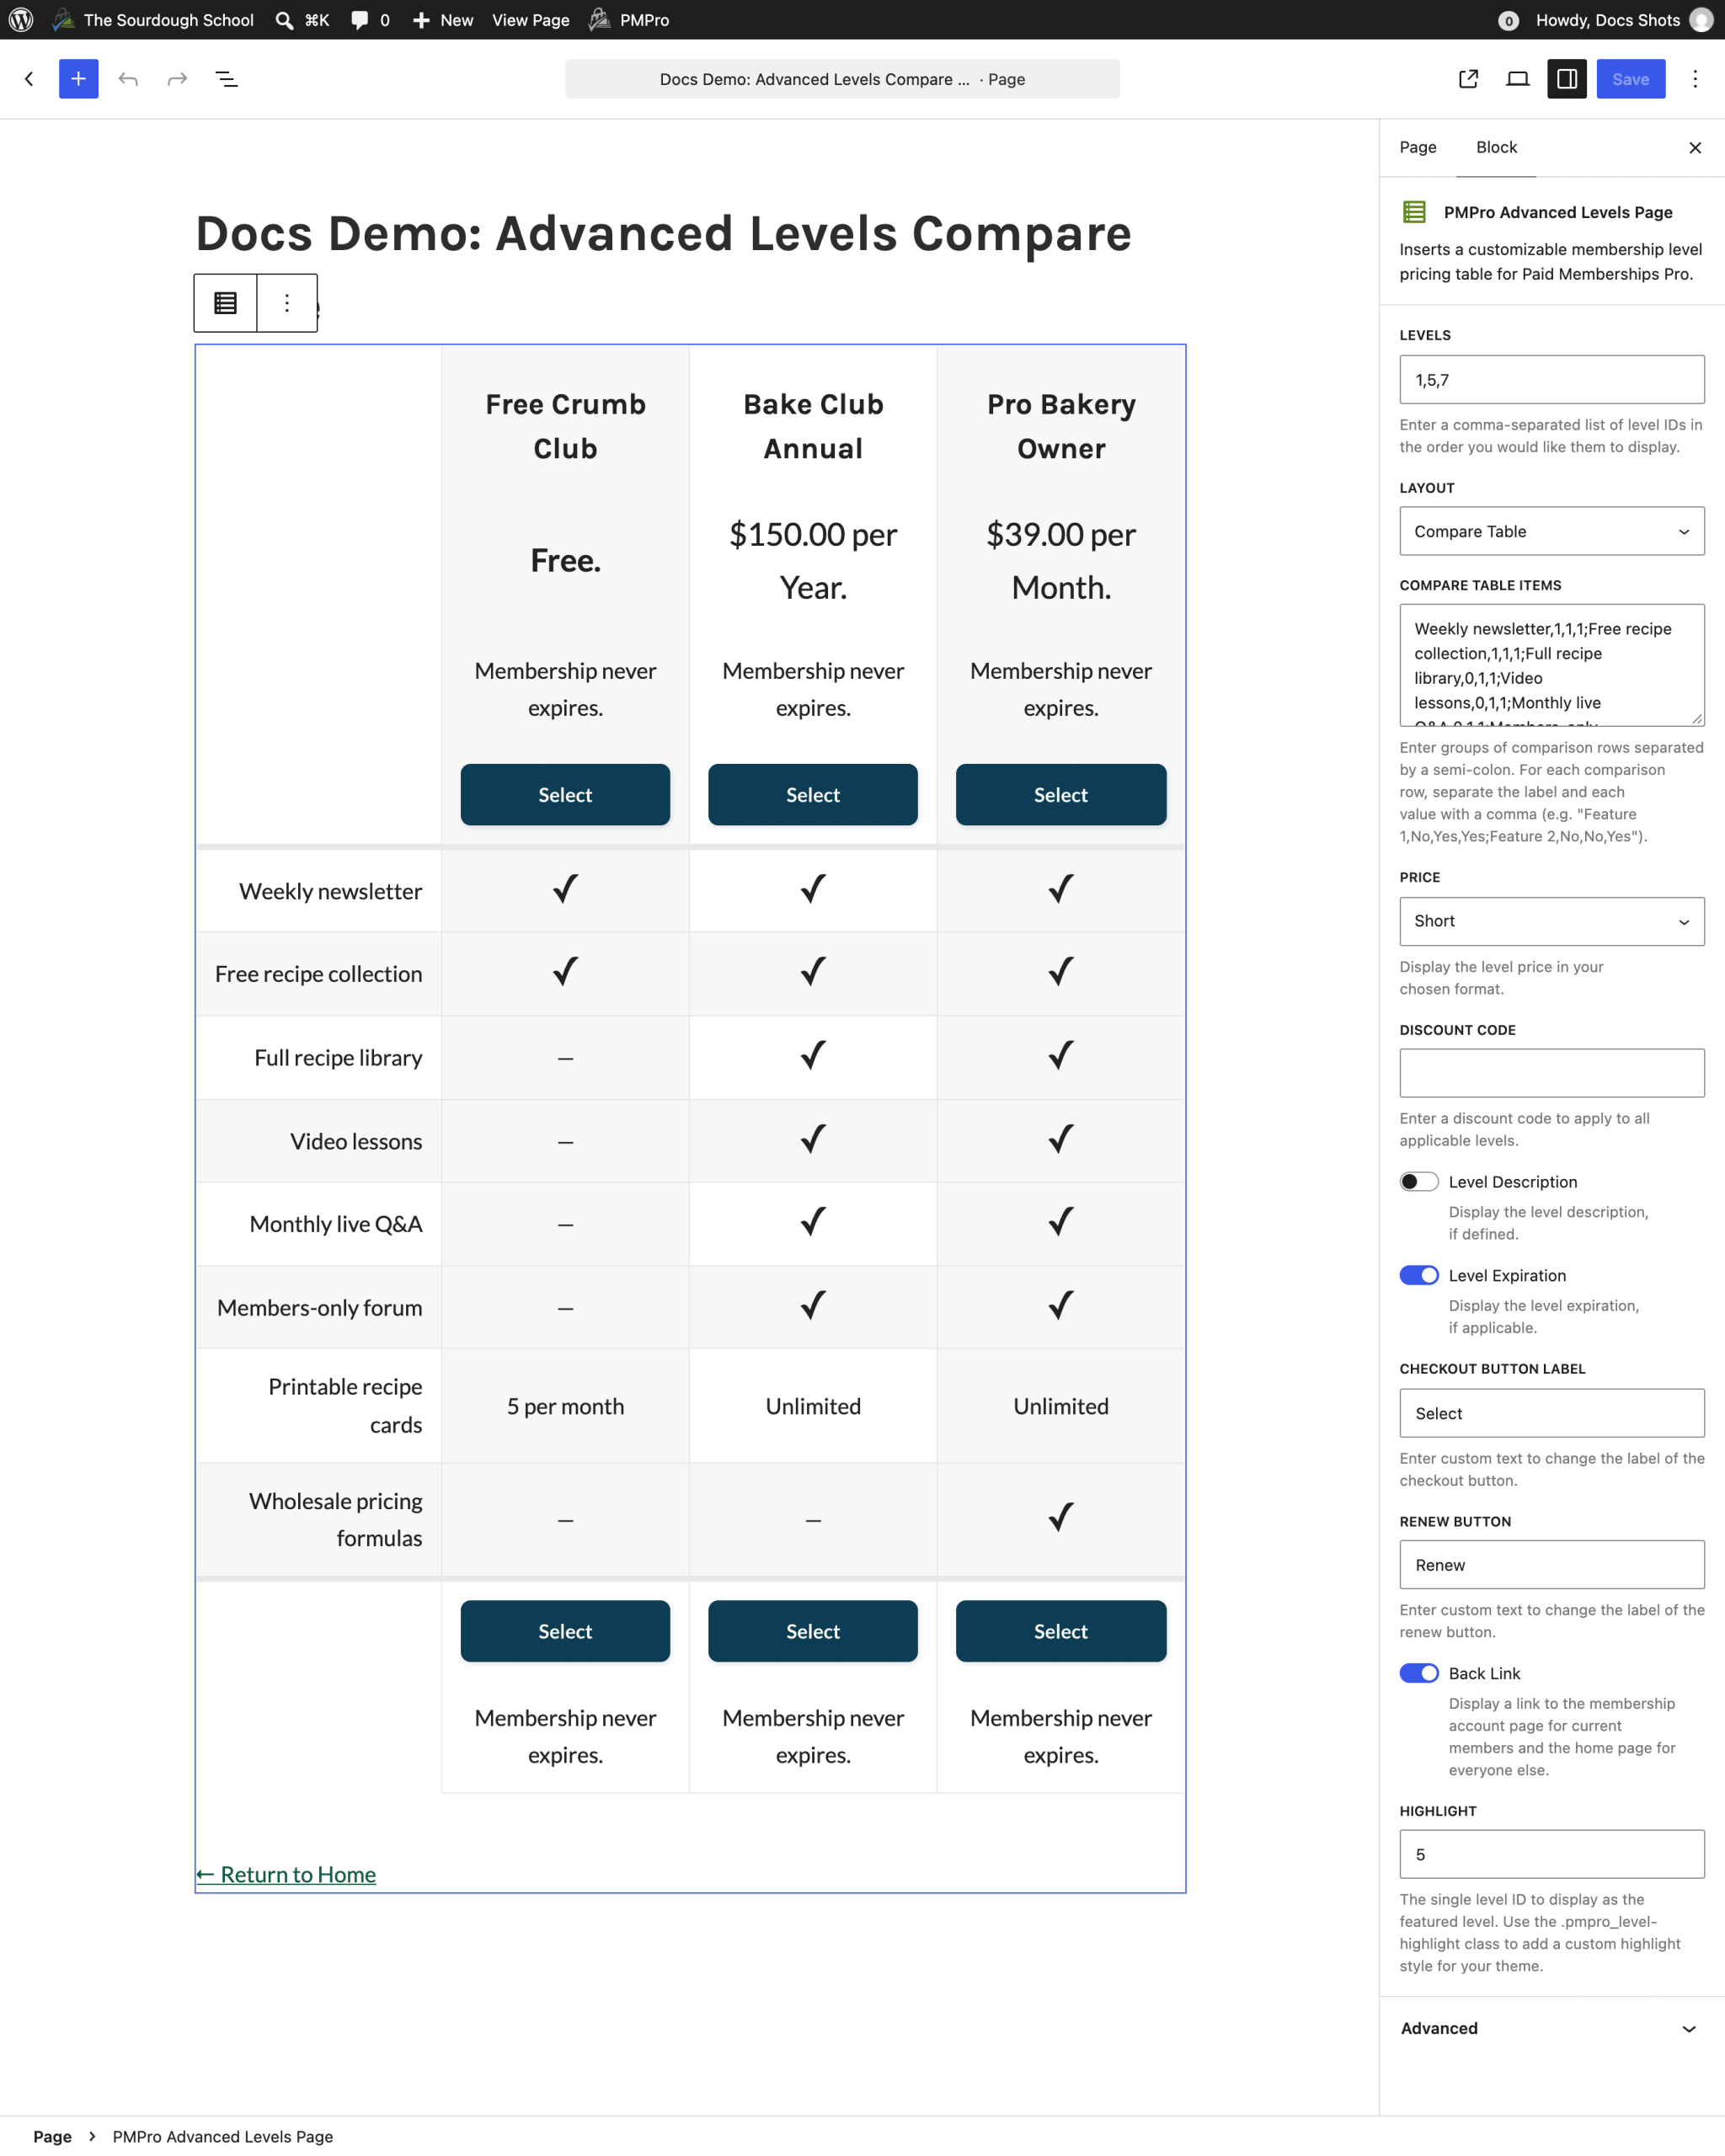
Block Settings
Select the block to see its settings in the sidebar. Every setting is optional. With no changes, the block shows all of your levels that allow new signups in the Div layout.

- Levels: Enter a comma-separated list of membership level IDs in the order you want them to appear, such as
1,5,7. Leave this field blank to show every level that allows new signups, in the order set on Memberships > Settings > Levels. You can find each level’s ID in the ID column on that screen. Levels with Disable New Signups checked are never shown, even if you enter their ID. - Layout: Choose how to display the levels: Div (default), Table, 2 Columns, 3 Columns, 4 Columns, or Compare Table. See Choose a Layout for Your Levels Page for an example of each.
- Compare Table Items: Only appears when the layout is Compare Table. Enter the rows for your feature comparison. See Build a Membership Comparison Table for the format.
- Price: Choose how to display each level’s price: Short (default), Full, or Hide. See Price Display Options for examples.
- Discount Code: Enter a discount code to show discounted pricing. The code is applied to each displayed level it is valid for, and it is added to that level’s checkout link. Levels the code doesn’t apply to show their regular price.
- Level Description: Show the description you entered for each level. On by default.
- Level Expiration: Show when each level expires. Levels with no expiration show “Membership never expires.” On by default.
- Checkout Button Label: The text on the button that links to checkout. Default: Select.
- Renew Button: The text on the button shown to a member whose level is expiring soon. Default: Renew.
- Back Link: Show a link below the levels. Members see “Return to Your Account” and everyone else sees “Return to Home.” The home link is not shown when the block is on your site’s front page. On by default.
- Highlight: Enter the ID of a single level to feature. The Add On adds the
pmpro_level-highlightCSS class to that level. Our Memberlite theme includes a style for this class. Most other themes need custom CSS. See Highlight a Level.
Buttons Shown to Members
The button for each level changes based on whether the person viewing the page already has that level.
- Visitors and members without this level: See the checkout button (the Checkout Button Label text), which links to checkout for that level.
- Members whose level is expiring soon: See the renew button (the Renew Button text), which links to checkout for that level.
- Members with this level: See a “Your Level” button that links to the Membership Account page. The level also gets the
pmpro_level-currentCSS class.
The “Your Level” button text can only be changed with the account_button shortcode attribute. See the shortcode attribute reference.
Video: Advanced Levels Page Block Demo
Get Support From Our Team of Experts
Have a question about how to use this feature? Our Support Page outlines three ways to get support.
Our Max plans include hands-on help customizing your membership site and implementing new features. Upgrade to PMPro Max now »
Last updated on November 9, 2026