reCAPTCHA is a Google service that aims to block abusive, automated traffic. With Paid Memberships Pro, you can easily integrate this service into your membership checkout process for better fraud protection.
This post covers when and why to use reCAPTCHA, how to create a reCAPTCHA account, and configure it for your membership site.

Table of contents
- When and Why to Use reCAPTCHA
- More About Payment Gateway Fraud Detection
- Is This Happening to Me?
- How reCAPTCHA Works
- How to Sign Up for reCAPTCHA
- Video: How to Set Up reCAPTCHA
- How to Set Up reCAPTCHA on Your Paid Memberships Pro Site
- New in PMPro 3.9: Captcha on Login and Password Reset Forms
- How to Test Your New Checkout with reCAPTCHA
- Better Safe Than Sorry
- Frequently Asked Questions
When and Why to Use reCAPTCHA
You might already be familiar with reCAPTCHA; if you’ve ever gone to a site that uses it, you’ve probably checked a box that says, “I’m not a robot”.
And if reCAPTCHA identified you as “suspicious” in any way, you probably also had to solve a visual puzzle to access the site. This is pretty common, even if you’re not actually suspicious.
The reason reCAPTCHA works is because humans can usually solve these puzzles, while bots cannot.
By default, Paid Memberships Pro uses a “honey pot” technique to catch most automated spammers. This method uses a hidden form field that valid visitors cannot see, but an automated “bot” visitor will attempt to populate.
This process creates an error on the checkout form submission.
For this reason, we generally recommend activating reCAPTCHA for all of your membership levels – not just the free ones.
To explain: Your paid level requires a credit card or successful PayPal checkout, so there is less opportunity for spammers to get in – and they usually aren’t going to spend real money spamming your site.
Why do you need something like reCAPTCHA on your membership site? Well, unfortunately there are spammers who use membership checkout forms to validate stolen credit cards, which they intend to use to make fraudulent purchases.
These attackers will essentially use a membership checkout form as a “credit card validator” to test different names, addresses, card numbers, zip codes, and CVV numbers. Once they find a successful combination, they will use the validated card to make fraudulent purchases elsewhere.
Remember, if this is happening to you, you should activate reCAPTCHA for all memberships.
More About Payment Gateway Fraud Detection
Your payment gateway has built-in fraud detection that will monitor repeated signup attempts that use similar data. However, no fraud detection process is 100% perfect – inevitably, some charges will get through.
While the money coming into your account may look nice, these charges will inevitably be refunded, or if you don’t catch them in time, charged back.
Related: Payment Gateway Comparison
If you are using Authorize.net as your payment gateway, be sure to inquire about the free Advanced Fraud Detection Suite™, which enables you to set up “rules” for types of transactions that appear fraudulent.
Additionally, Stripe allows you to customize its default fraud detection settings via custom risk evaluation rules configured in your Stripe account.

reCAPTCHA automatically filters out malicious activity, ensuring your website’s resources are used efficiently and giving you more time to focus on providing quality content for your members.
—David Wanjuki, Technical Support Engineer, Paid Memberships Pro
Is This Happening to Me?
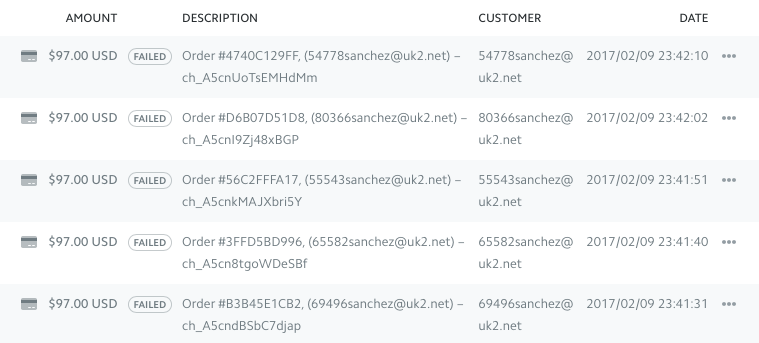
The easiest way to confirm if your membership checkout form is being used for fraudulent checkout attempts is via your payment gateway’s “charges” dashboard.
For example, if you are using Stripe, your “Payments” dashboard shows all attempted charges. If you see a large number of charges labeled “failed,” you may be at risk.
We advise turning on reCAPTCHA for all memberships in this case.
How reCAPTCHA Works
With reCAPTCHA v2 enabled, your membership checkout page will have a new section that looks like this:
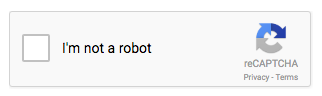
If the user is logged in to a Google service, such as Gmail or Drive, they will simply need to check the box labeled “I’m not a robot”. Google’s reCAPTCHA service will validate them and this is usually the only step needed.
Anyone that the service identifies as “suspicious” will have to solve a visual puzzle to get through. These puzzles range from “choose all the pictures with a number in them” or “select all the images of a cat”.
Here’s the “test” I got when taking a screenshot of the process for this post. If you fail the first test, you’ll be given another test. At most, I’ve had to complete two screens of image identification before successful validation.
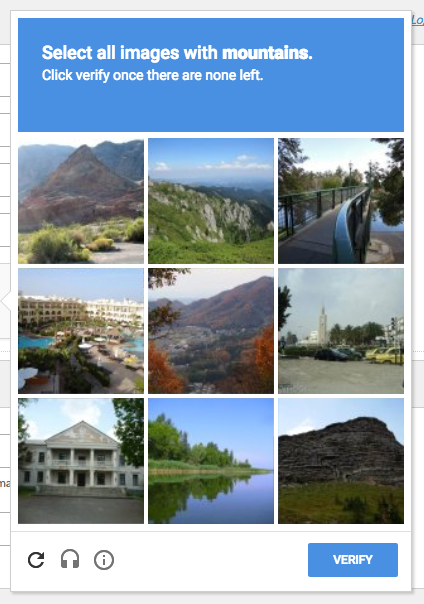
Humans will be able to solve the puzzle, but a bot will not.
With reCAPTCHA v3 enabled, your users won’t automatically see the “I’m not a robot” check box – that only shows up if reCAPTCHA detects something suspicious.
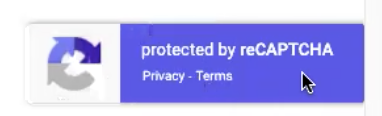
Instead, users will see the Protected by reCAPTCHA box appear when they hover over the reCAPTCHA icon in the lower right corner of their screen.
How to Sign Up for reCAPTCHA
- Sign Up for a reCAPTCHA account.
- Once you’ve signed up and you’re on the reCAPTCHA dashboard, click the plus icon in the top right corner to register a new site.
- In the Label field, enter your site’s name. This is only used to identify the site in your reCAPTCHA dashboard.
- For the reCAPTCHA type, we recommend selecting “reCAPTCHA v3” because it gives the user a better experience (plus, you’ll get better conversion rates), but you can use either one.
- Under Domains, type your domain name. You may want to include both the “www” and “non-www” versions. You can include as many sites as you want here, which is great news if you’re managing multiple membership sites or working on behalf of clients.
- Under Owners, you can add any Gmail address that you like.
- Now, simply accept the terms of service, check the box if you want to receive alerts, and click Submit.
Site (API) Keys
Next, you’ll be redirected to a new page that displays the keys for the reCAPTCHA version you chose. Keep this tab open so you can easily copy your site key and secret key when you’re ready for them.
You do not need to do anything with the “client-site” or “server side” integration.
Video: How to Set Up reCAPTCHA
How to Set Up reCAPTCHA on Your Paid Memberships Pro Site
- On your WordPress admin dashboard, go to Memberships > Settings.
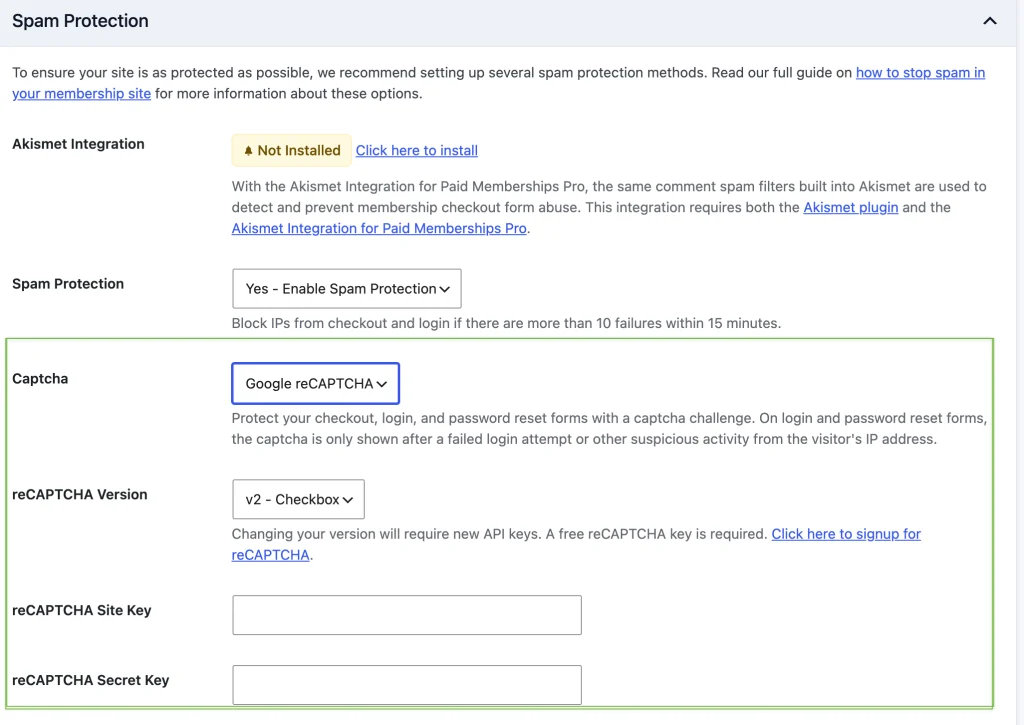
- Click the Security tab and scroll down to the Spam Protection section.
- Where it says Captcha, select Google reCAPTCHA.
- Additional reCAPTCHA settings will appear:
- reCAPTCHA Version — select the version you’re going to use: v2 – Checkbox or v3 – Invisible. Note that changing your version will require new API keys.
- reCAPTCHA Site Key — enter your Site Key (formerly labeled “reCAPTCHA Public Key”).
- reCAPTCHA Secret Key — enter your Secret Key (formerly labeled “reCAPTCHA Private Key”).
- Save the Settings.
New in PMPro 3.9: Captcha on Login and Password Reset Forms
Prior to v3.9, the captcha only protected the membership checkout. As of v3.9, your captcha now also protects the login and password reset forms, including the default WordPress login at wp-login.php.
On those forms, the captcha appears only after a failed login attempt or other suspicious activity from the visitor’s IP address in the last 15 minutes—so legitimate members will rarely see it. This closes a common gap: without it, attackers could hammer your login and password reset forms with automated password-guessing and account-takeover attempts even when checkout was protected.
How to Test Your New Checkout with reCAPTCHA
- Put your membership gateway in test mode if you don’t want to test with a real credit card or payment account.
- Go to your checkout page, choose a level, and enter your test payment credentials.
- Ensure that you see the Protected by reCAPTCHA box appear when you hover over the reCAPTCHA icon in the lower right corner of your screen.
Remember: If you’re using reCAPTCHA v3, you won’t automatically see the “I’m not a robot” check box – that only shows up if reCAPTCHA detects something suspicious.
The checkbox and visual puzzle will still show up if reCAPTCHA requires it during a real checkout.
New in PMPro 3.9 — failed payments require a new captcha check. After a failed payment, the visitor must pass the CAPTCHA again before their next checkout attempt. Before this change, one solved captcha covered every retry in the same session, which made checkout attractive for automated card testing. To test this: submit checkout with a failing test card, then attempt checkout again — you should be presented with the CAPTCHA challenge before the second attempt goes through.
We always recommend testing your membership checkout process after making any changes to your Paid Memberships Pro settings – even if it’s just a free membership level signup or a discount code to make your paid level free.
Note: reCAPTCHA does rely on JavaScript as well as successfully copied/pasted keys in order to work. If you have any issues setting up reCAPTCHA on your Paid Memberships Pro membership site, be sure to check the reCAPTCHA frequently asked questions page for answers to common errors or issues.
Better Safe Than Sorry
Remember: If you think your membership checkout has been used in a fraudulent way, it’s always best to process a refund for the transaction immediately to avoid chargebacks and headaches down the line.
If you see fraudulent charges that all use the same email domain, simply search your Members list (and All Users list) for that “@domain.com” to isolate the members in question. See this post on how to process a refund for more guidance.
Frequently Asked Questions
reCAPTCHA is a Google service designed to block abusive, automated traffic, enhancing fraud protection during the membership checkout process.
reCAPTCHA helps prevent spammers from using your membership checkout forms to validate stolen credit cards, which they could use for fraudulent purchases. It is recommended to activate reCAPTCHA for all membership levels to enhance security.
reCAPTCHA v2 adds a checkbox labeled “I’m not a robot” to your checkout page. Users identified as suspicious will need to solve a visual puzzle.
reCAPTCHA v3 users won’t see the checkbox unless reCAPTCHA detects something suspicious. A “Protected by reCAPTCHA” message will appear on the page.
Check your payment gateway’s dashboard (e.g., Stripe’s “Payments” dashboard) for a large number of failed charges. If you see this, enable reCAPTCHA for all memberships.
In PMPro v3.9, the separate reCAPTCHA and Turnstile on/off settings were consolidated into a single Captcha dropdown at Memberships > Settings > Security. Select Google reCAPTCHA there, and the version, site key, and secret key fields will appear. Your existing keys and version carry over automatically. If you had both reCAPTCHA and Turnstile enabled, your site now uses reCAPTCHA.

Free Download: The AI-Powered Membership Site Blueprint
Download the free guide: Learn how to plan, build, and grow a membership site using AI as your strategic partner: from buyer persona to launch and beyond.