If your members uploaded custom avatars through ProfilePress, or its earlier version, WP User Avatar, those images do not carry over automatically when you move to Paid Memberships Pro’s own avatar system. This recipe copies each member’s existing avatar into PMPro’s format so nobody has to re-upload a profile picture after the switch.
PMPro added native profile picture support in version 3.7. Members can upload a custom avatar from their membership account page, and it replaces Gravatar everywhere WordPress normally shows one: comments, the member directory, and anywhere you use the pmpro_member shortcode. This recipe bridges the gap between the plugin you are leaving and the one you are moving to.
Do You Need This Recipe?
This recipe is useful if any of the following apply to your site:
- Members previously uploaded custom avatars through ProfilePress or its earlier version, WP User Avatar.
- You are switching to PMPro’s built-in avatar system and do not want to ask every member to re-upload a photo.
If your members have never used ProfilePress, WP User Avatar, or a similar avatar plugin, you do not need this recipe. New members can simply upload an avatar through PMPro directly.
Prerequisites and Considerations
Before adding this code, it’s important that you’re clear on a few of the parameters to using this in your site:
- PMPro Version: Requires PMPro 3.7 or later for the native avatar system, and relies on the Action Scheduler support built into PMPro 3.5 and later.
- Background Processing: The migration runs in batches of 20 members through Action Scheduler, not all at once. Your site needs WP-Cron or a real server cron firing regularly for batches to keep processing. If batches stall, check that Action Scheduler and WP-Cron are running correctly.
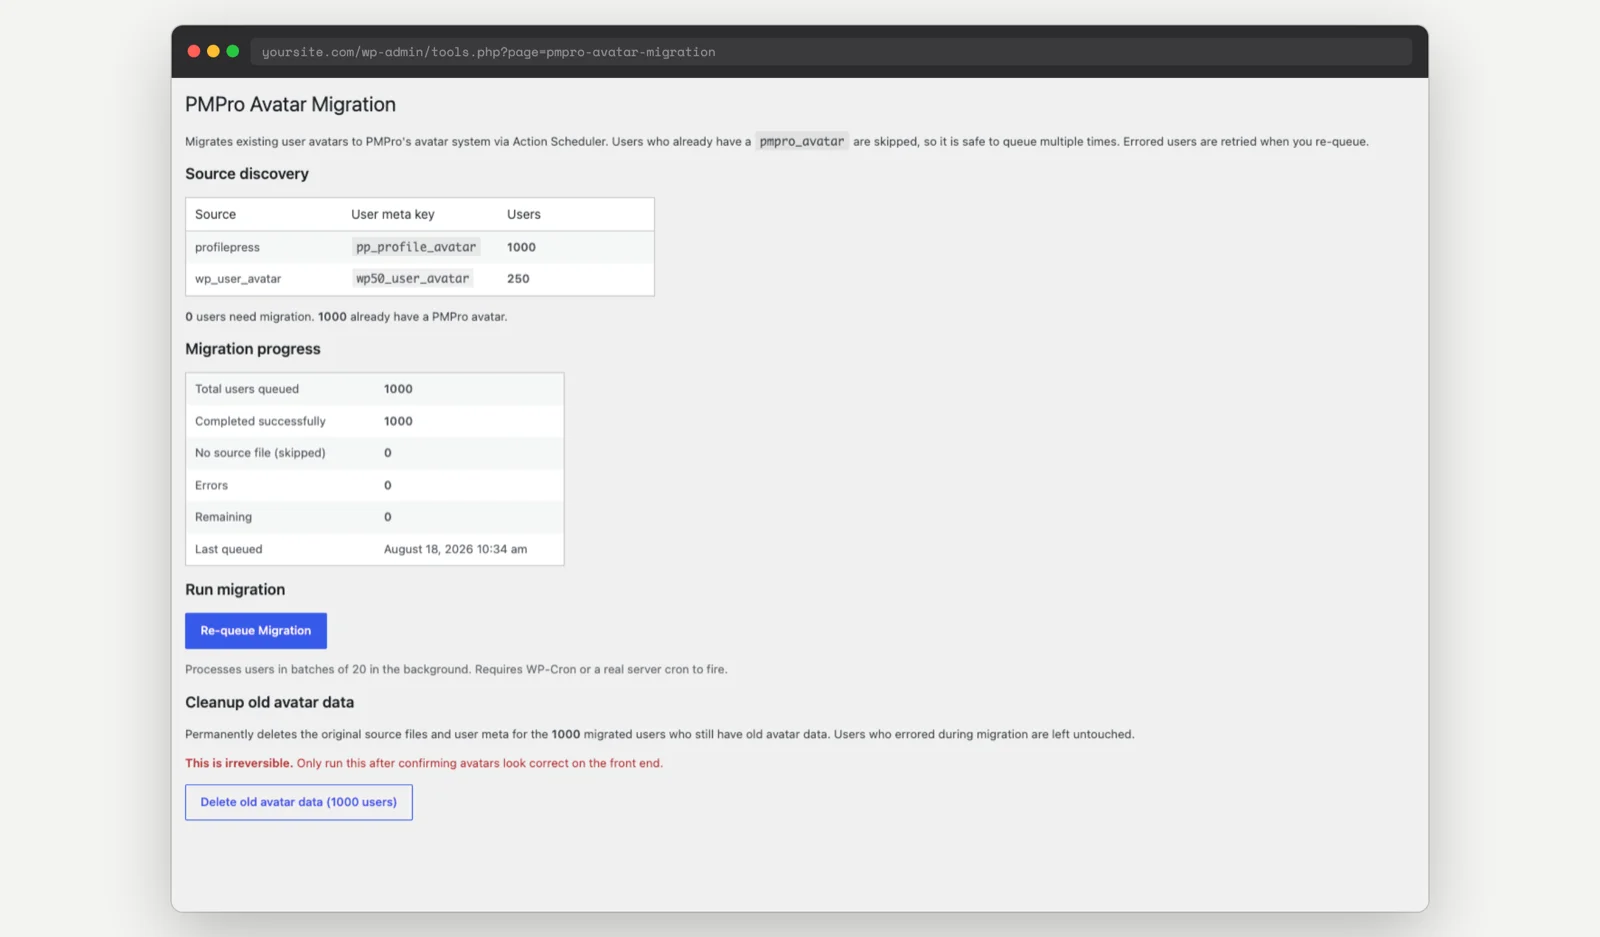
- Cleanup Is Permanent: The optional cleanup step deletes the old ProfilePress or WP User Avatar files and user meta. Only run cleanup after confirming avatars display correctly on the front end. This step cannot be undone.
- Safe to Re-Run: Members who already have a PMPro avatar are skipped automatically, so queueing the migration again does not duplicate or overwrite existing work. Errored members are retried automatically the next time you queue.
If you’re clear on these requirements and considerations, the rest of this post will explain what the recipe actually does and how to run it in your membership site.
Related: Shortcode Documentation
About the Code Recipe
This recipe adds a PMPro Avatar Migration page under Tools in the WordPress admin. It checks each member for an avatar from two possible sources: the pp_profile_avatar user meta key that ProfilePress uses now, and the wp_user_avatar meta key used by ProfilePress’s earlier incarnation, WP User Avatar. The first source that resolves to a real file on disk wins for that member.
The admin page shows how many members match each source, how many still need migration, and how many already have a PMPro avatar. Clicking Queue Migration schedules background batches through PMPro’s Action Scheduler integration.
Each batch processes 20 members: it crops their existing avatar to a square, resizes it to PMPro’s stored sizes, and saves it using PMPro’s own avatar functions, so the result looks and behaves exactly like an avatar a member uploaded directly.
If a member’s source file cannot be found, or an error occurs during processing, that member is marked with an error message instead of being silently skipped. The admin page lists errored members and their specific error, and requeuing the migration retries them automatically.
Step-by-Step Implementation Guide
- Add the snippet below using a code snippets plugin or a site-specific plugin.
- Go to Tools > PMPro Avatar Migration in your WordPress admin.
- Review the Source Discovery table to confirm how many members have avatars to migrate.
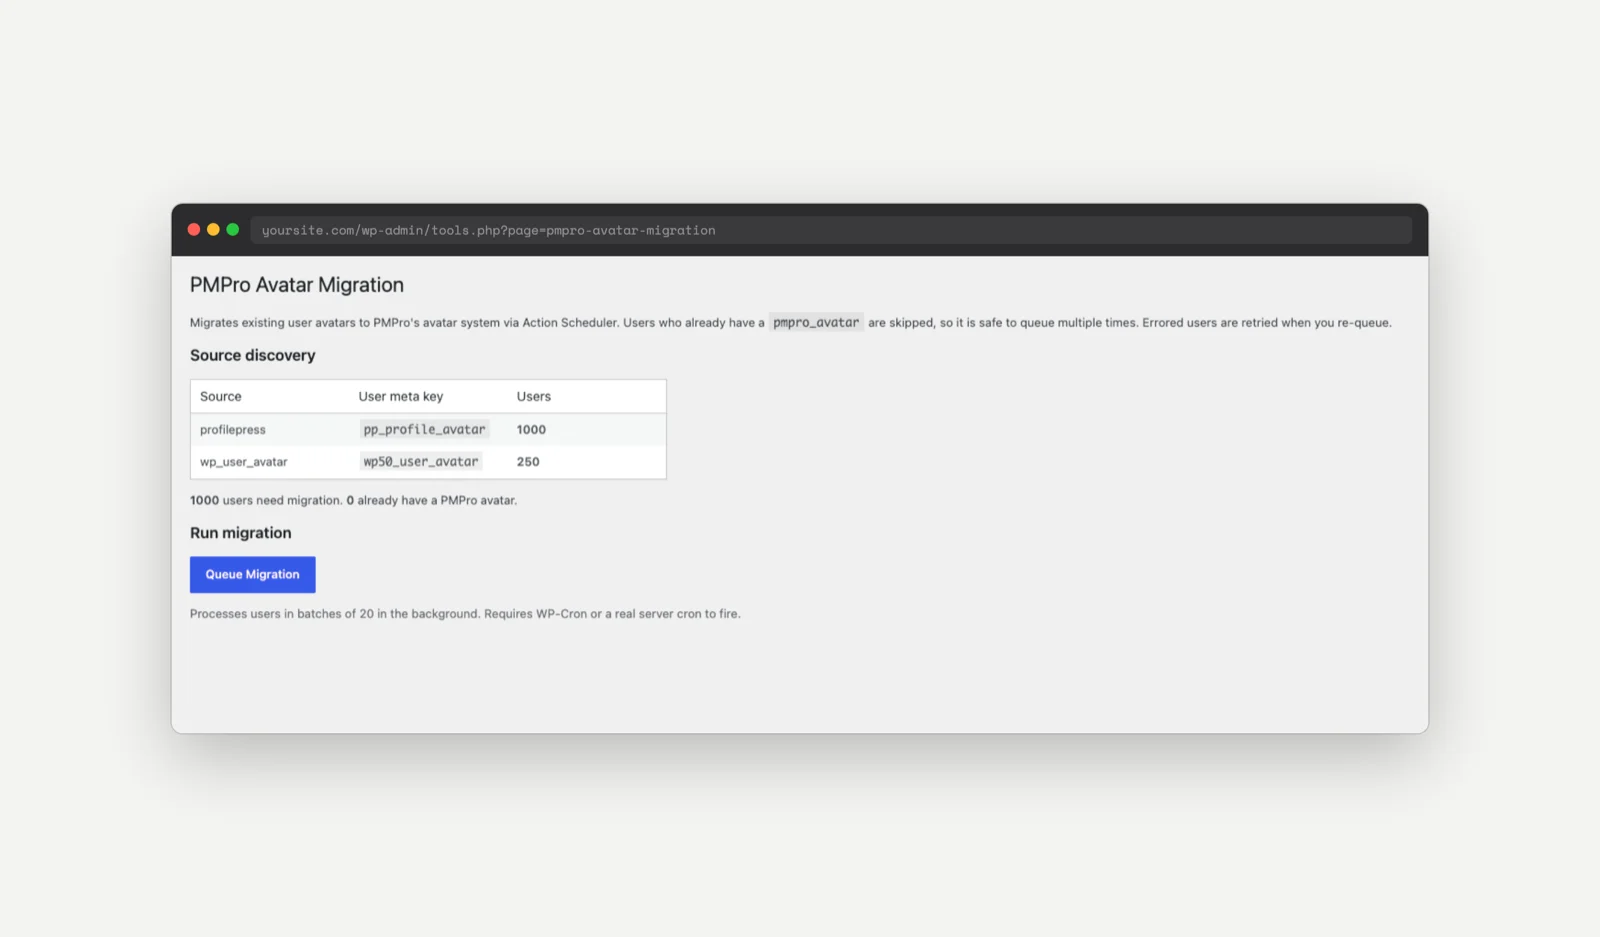
- Click Queue Migration. This schedules background batches. No page needs to stay open for this to run.
- Refresh the page periodically to watch progress. Action Scheduler processes batches automatically in the background.
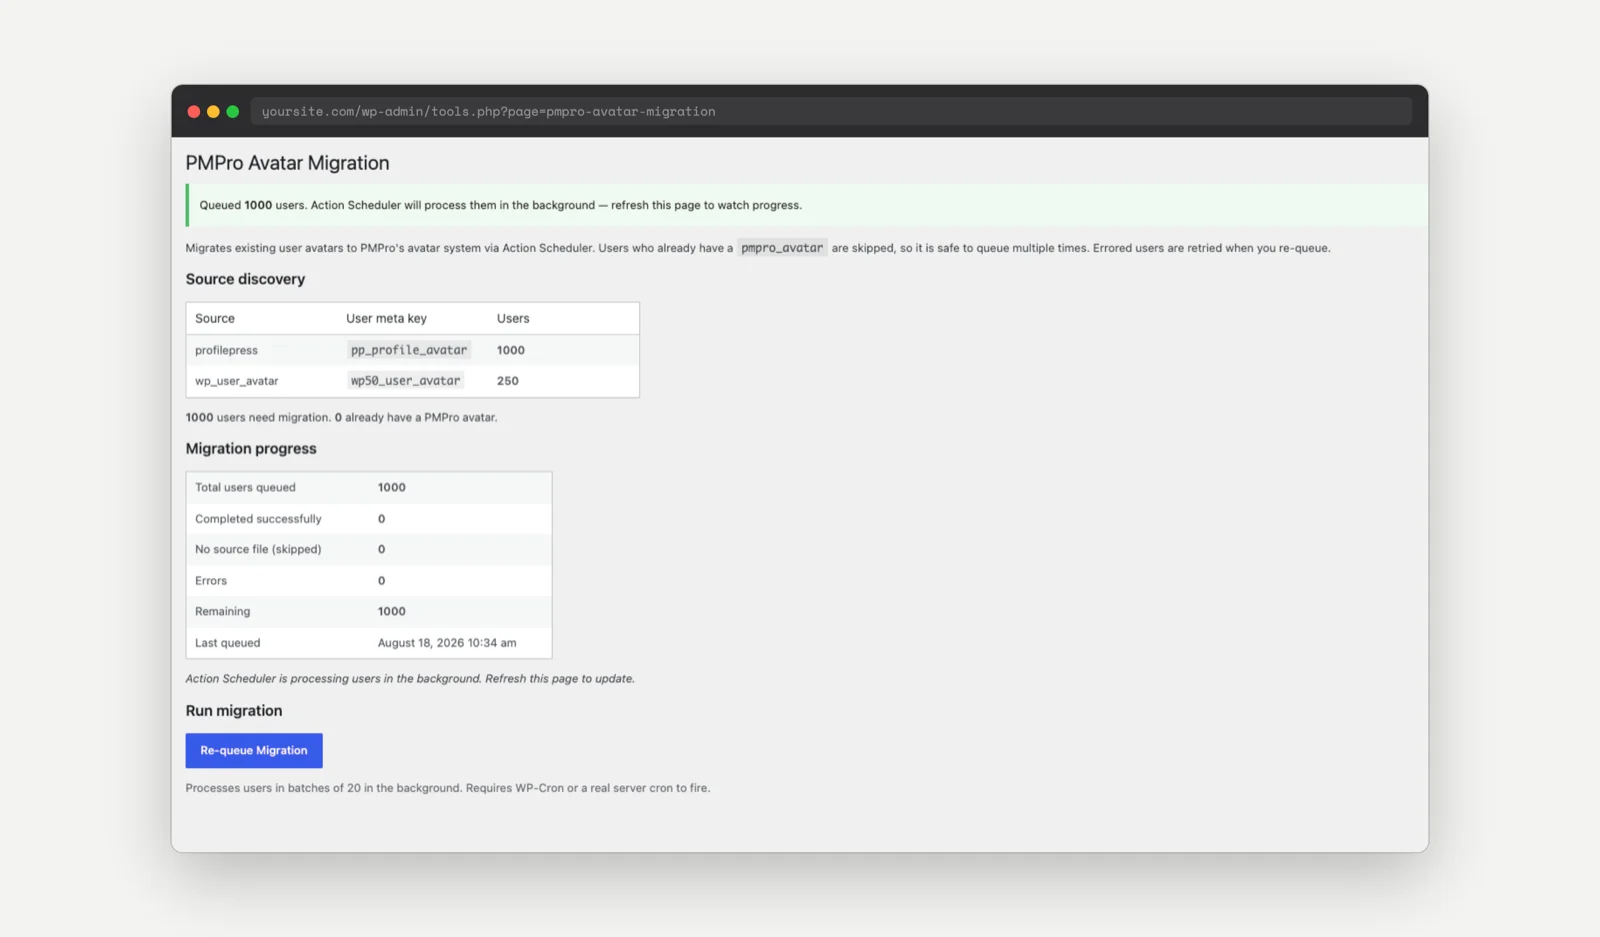
- If any members show up under Users With Errors, review the error message, fix the underlying issue if possible, and click Re-queue Migration to retry them.
- Once migration is complete and you have confirmed avatars display correctly on your site, use the Cleanup section to permanently delete the old ProfilePress or WP User Avatar files and meta.
The Code Recipe
Migrate ProfilePress Avatars to PMPro’s Avatar System
Adding the Recipe to Your Website
You can add this recipe to your site by creating a custom plugin or using the Code Snippets plugin available for free in the WordPress repository. Read this companion article for step-by-step directions on either method.
How to Customize This Code Recipe
There are two places in the code that you can use to modify the default behavior.
- Batch Size: The migration processes 20 members per batch by default. Modify line 203 of this snippet to change the
$batch_sizevalue if you want larger or smaller batches. - Admin Access: The migration page requires the
manage_optionscapability by default. Adjust the capability check on line 445 and452if you want a different role to run the migration.

Get Support From Our Team of Experts
Have a question about how to use this feature? Our Support Page outlines three ways to get support.
Our Max plans include hands-on help customizing your membership site and implementing new features. Upgrade to PMPro Max now »