To start tracking, add your GA4 Measurement ID to the Add On settings. You can also limit which membership levels are included in ecommerce tracking and exclude administrators from your stats.
Find Your Measurement ID
A Measurement ID is the unique identifier for a web data stream in your Google Analytics property. It starts with G- followed by letters and numbers (for example, G-PSW1MY7HB4). The Add On uses this ID to send data from your membership site to the correct property.
- Sign in to your Google Analytics account and select the property for your membership site.
- Click Admin in the lower left corner.
- Under Data collection and modification, click Data streams.
- Select the Web tab, then click the data stream for your website. If you don’t have a data stream for your domain yet, add one.
- Copy the Measurement ID from the first row of the stream details.
You need Editor access or above on the Google Analytics property to view the Measurement ID. See Google’s Measurement ID help article for more details.
Configure the Add On Settings
Navigate to Settings > PMPro Google Analytics in the WordPress admin. Until you save a Measurement ID, the Add On shows a reminder notice with a link to this screen on the Paid Memberships Pro admin pages.
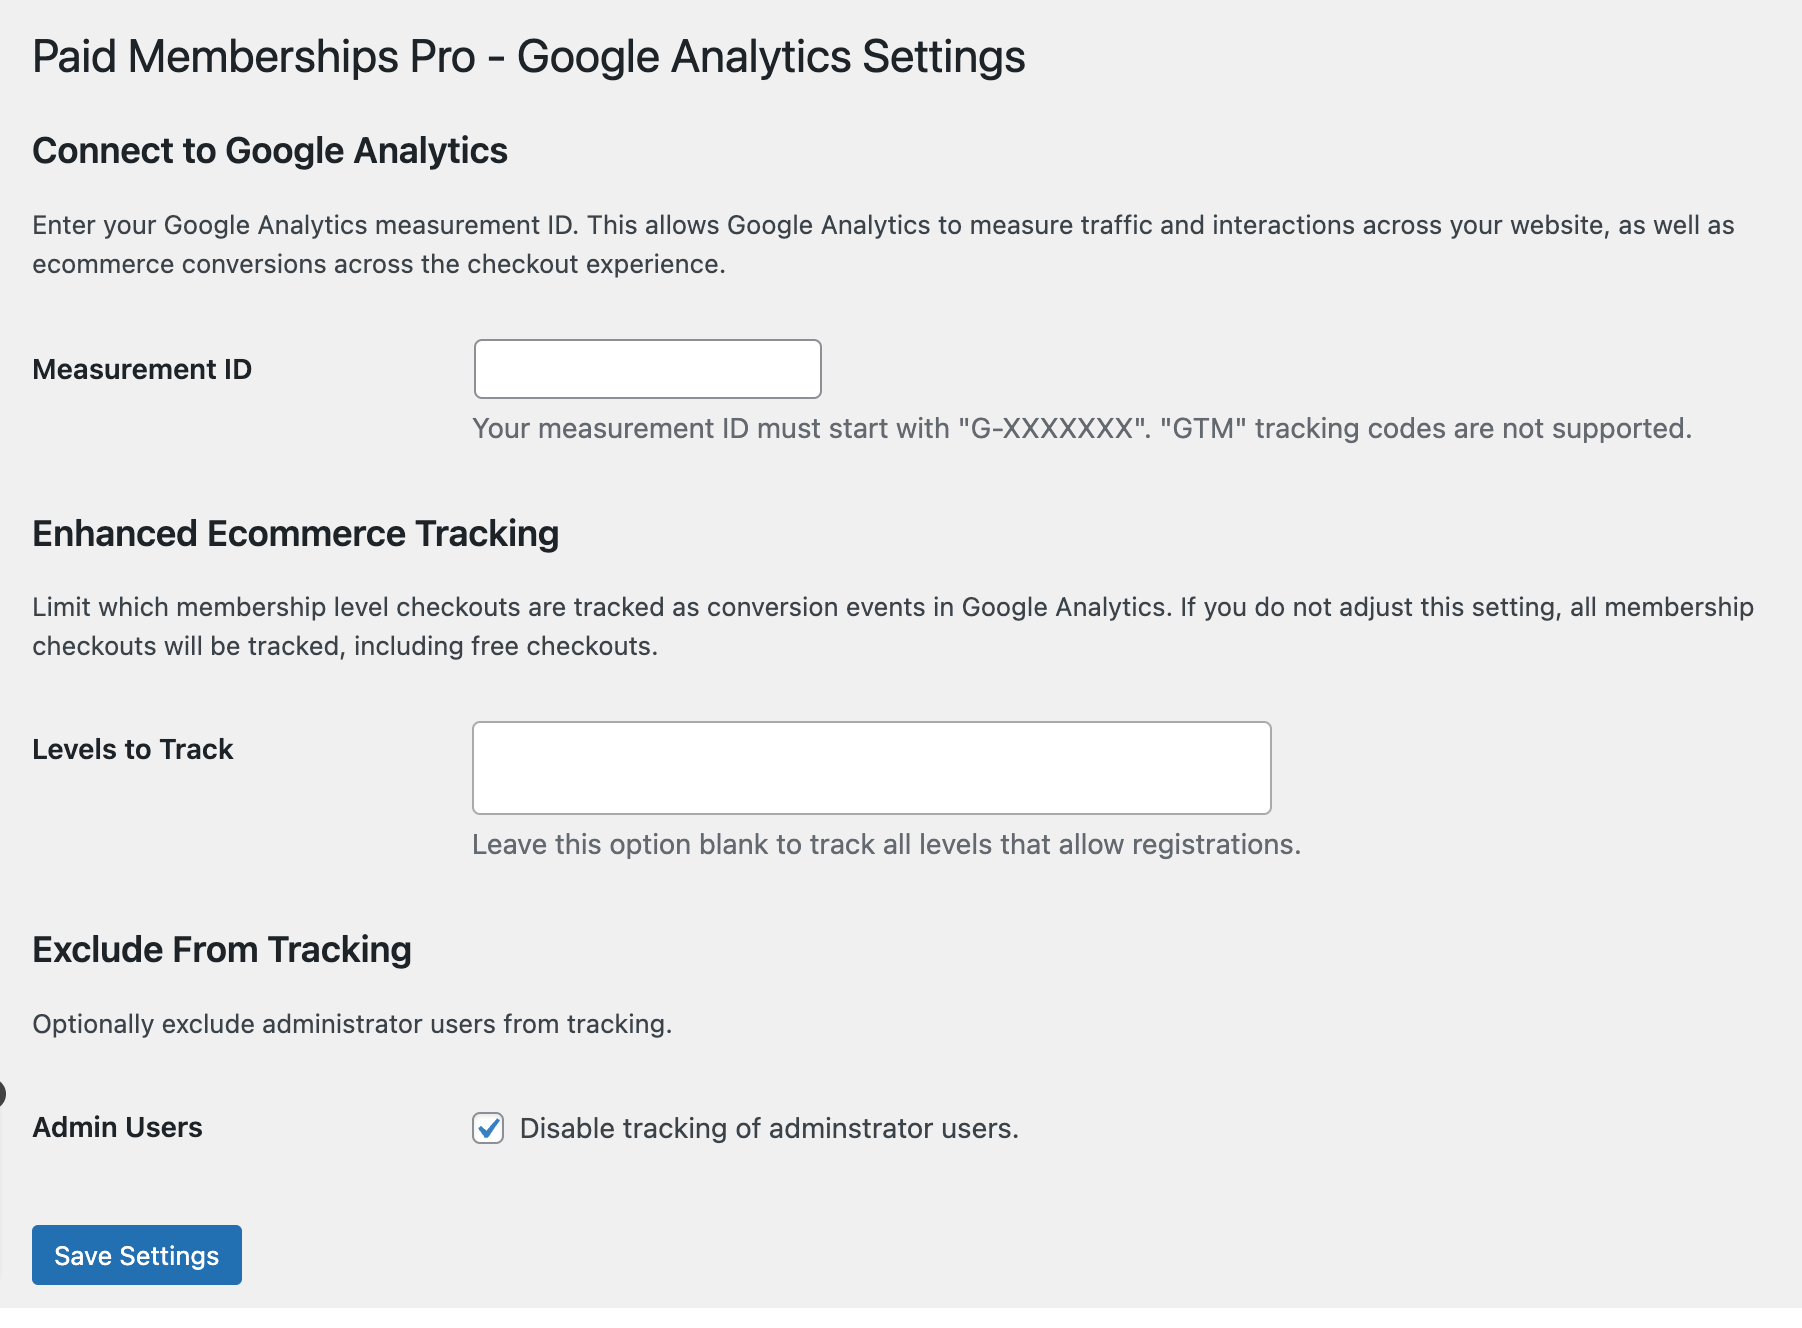
Connect to Google Analytics
- Measurement ID: Paste the Measurement ID you copied from Google Analytics. The ID must start with
G-. No tracking code loads on your site until this field is filled in.
Enhanced Ecommerce Tracking
- Levels to Track: Optionally choose specific membership levels to include in ecommerce tracking. Start typing a level name to select it. Leave this field blank to track every level that allows new signups (recommended). This setting controls which levels are included in the
view_itemevent on your Membership Levels page. Learn more about each event in Events and Data Sent to Google Analytics.
Exclude From Tracking
- Admin Users: Check Disable tracking of administrator users to stop the tracking code from loading for logged-in administrators (any user who can manage site options). We recommend enabling this so your own visits and test checkouts don’t skew your data.
Click Save Settings.
Your site is now sending general site activity (sessions, pageviews, landing pages, referrers) and membership checkout events to Google Analytics. To report on membership data like level, author, and post type, finish setup by creating custom dimensions in GA4.
Test Your Integration
Standard Google Analytics reports can take a day or more to show new data. To confirm the integration is working right away, use Google Tag Assistant or the Realtime report in your GA4 property.
- Log out, or test in a private browser window. If you enabled Admin Users exclusion, no data is sent while you’re logged in as an administrator.
- Visit your Membership Levels page, then choose a level to open the checkout page.
- Complete a test checkout. Use a free level, or a paid level with a 100% discount code.
- Confirm that the
view_item,add_to_cart,begin_checkout, andpurchaseevents appear in Tag Assistant or the Realtime report.
The purchase event is only sent when the member interacted with the checkout form in the same browser. Fill out the form by typing or clicking during your test rather than skipping straight to the confirmation page.
Get Support From Our Team of Experts
Have a question about how to use this feature? Our Support Page outlines three ways to get support.
Our Max plans include hands-on help customizing your membership site and implementing new features. Upgrade to PMPro Max now »
Last updated on November 6, 2026