To start syncing members, connect the Add On to your Mailchimp account with an API key. Then choose which audiences non-members join, which audiences members can opt in to, and which audiences each membership level subscribes to.
Find Your Mailchimp API Key
The Add On uses a Mailchimp API key to read your audiences and update contacts. You need a Mailchimp account to create one. If you don’t have an account yet, sign up for Mailchimp.
- Log in to your Mailchimp account.
- Click your profile icon and choose Profile.
- Click the Extras drop-down, then choose API keys.
- In the Your API Keys section, click Create A Key.
- Name your key so you know which site uses it, such as your membership site’s name.
- Click Generate Key, then click Copy Key to Clipboard.
Video: How to Locate Your Mailchimp API Key
Configure the General Settings
Navigate to Settings > PMPro Mailchimp in the WordPress admin. Paste your key into the Mailchimp API Key field and click Save Settings. The page reloads with a checkbox for each audience in your Mailchimp account. If Mailchimp can’t verify the key, an error message shows at the top of the settings page.
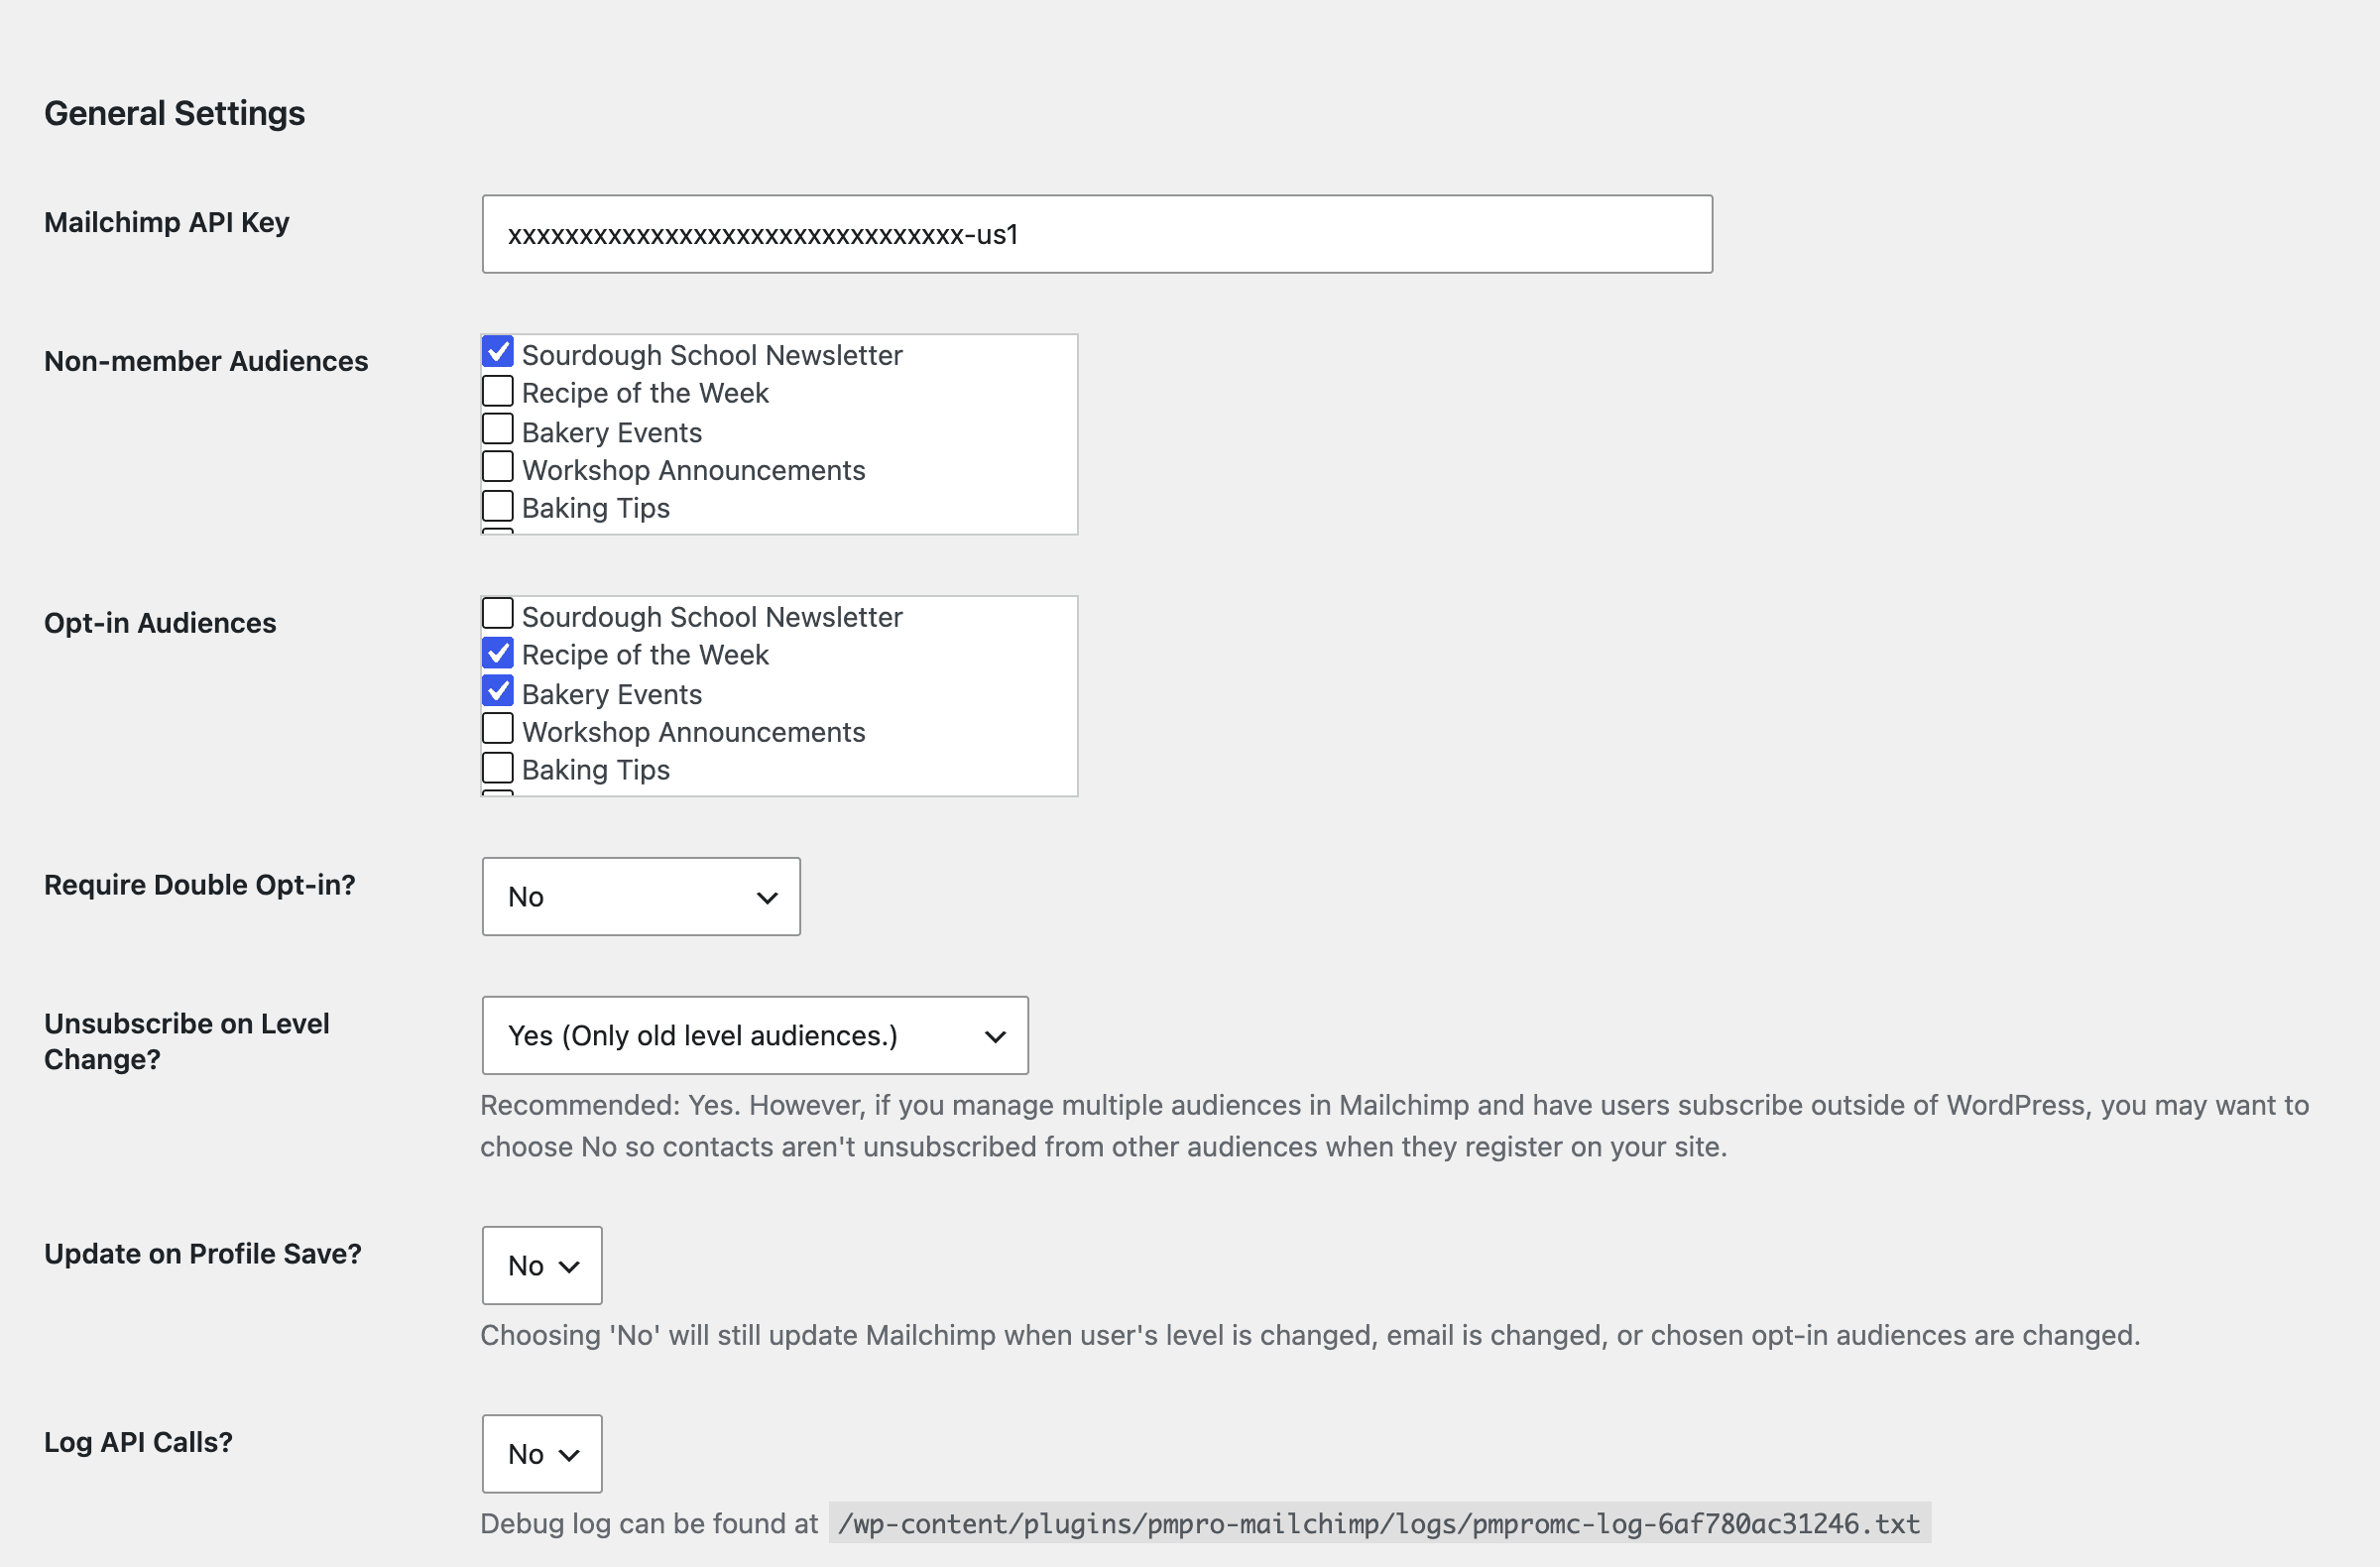
- Mailchimp API Key: The API key you copied from Mailchimp.
- Non-member Audiences: Users who don’t have a membership level are added to these audiences. This includes people who register for your site without checking out for a level, and members who lose all of their levels. When a user gains a membership level, they are removed from these audiences, unless the audience is also set for their new level.
- Opt-in Audiences: Audiences that members can choose to join on the membership checkout page. Members can change their choices later from their profile. Don’t also set an opt-in audience as a non-member audience or a level audience. If you do, the settings page shows an error message reminding you to change it.
- Require Double Opt-in? Choose Yes (All audiences) to add new contacts with a “Pending” status instead of subscribing them right away. Mailchimp then emails them a link to confirm. This applies to every audience the Add On subscribes people to. Default: No.
- Unsubscribe on Level Change? Choose what happens when a member loses a membership level. Default: Yes (Only old level audiences.).
- No: Members are not unsubscribed from any level audiences when they lose a level.
- Yes (Only old level audiences.): Members are unsubscribed from the audiences set for the level they lost. Audiences that one of their remaining levels also uses are kept.
- Yes (Old level and opt-in audiences.): Same as above. When a member no longer has any membership level, they are also unsubscribed from all opt-in audiences. They can subscribe again from their profile.
- Update on Profile Save? Choose Yes to send the user’s current data to Mailchimp every time their profile is saved. Choose No to update Mailchimp only when the user’s level changes, their email address changes, or their opt-in audience choices change. Default: No.
- Log API Calls? Choose Yes to record the data sent to Mailchimp and Mailchimp’s responses in a log file. The file location shows below the setting. Only turn this on while you’re troubleshooting. See Log API Calls and Troubleshoot Syncing. Default: No.
Assign Audiences to Membership Levels
The Membership Levels and Audiences section lists every membership level on your site. For each level, check the audiences that members of that level should be subscribed to. A member with more than one level is subscribed to the audiences for all of their levels.
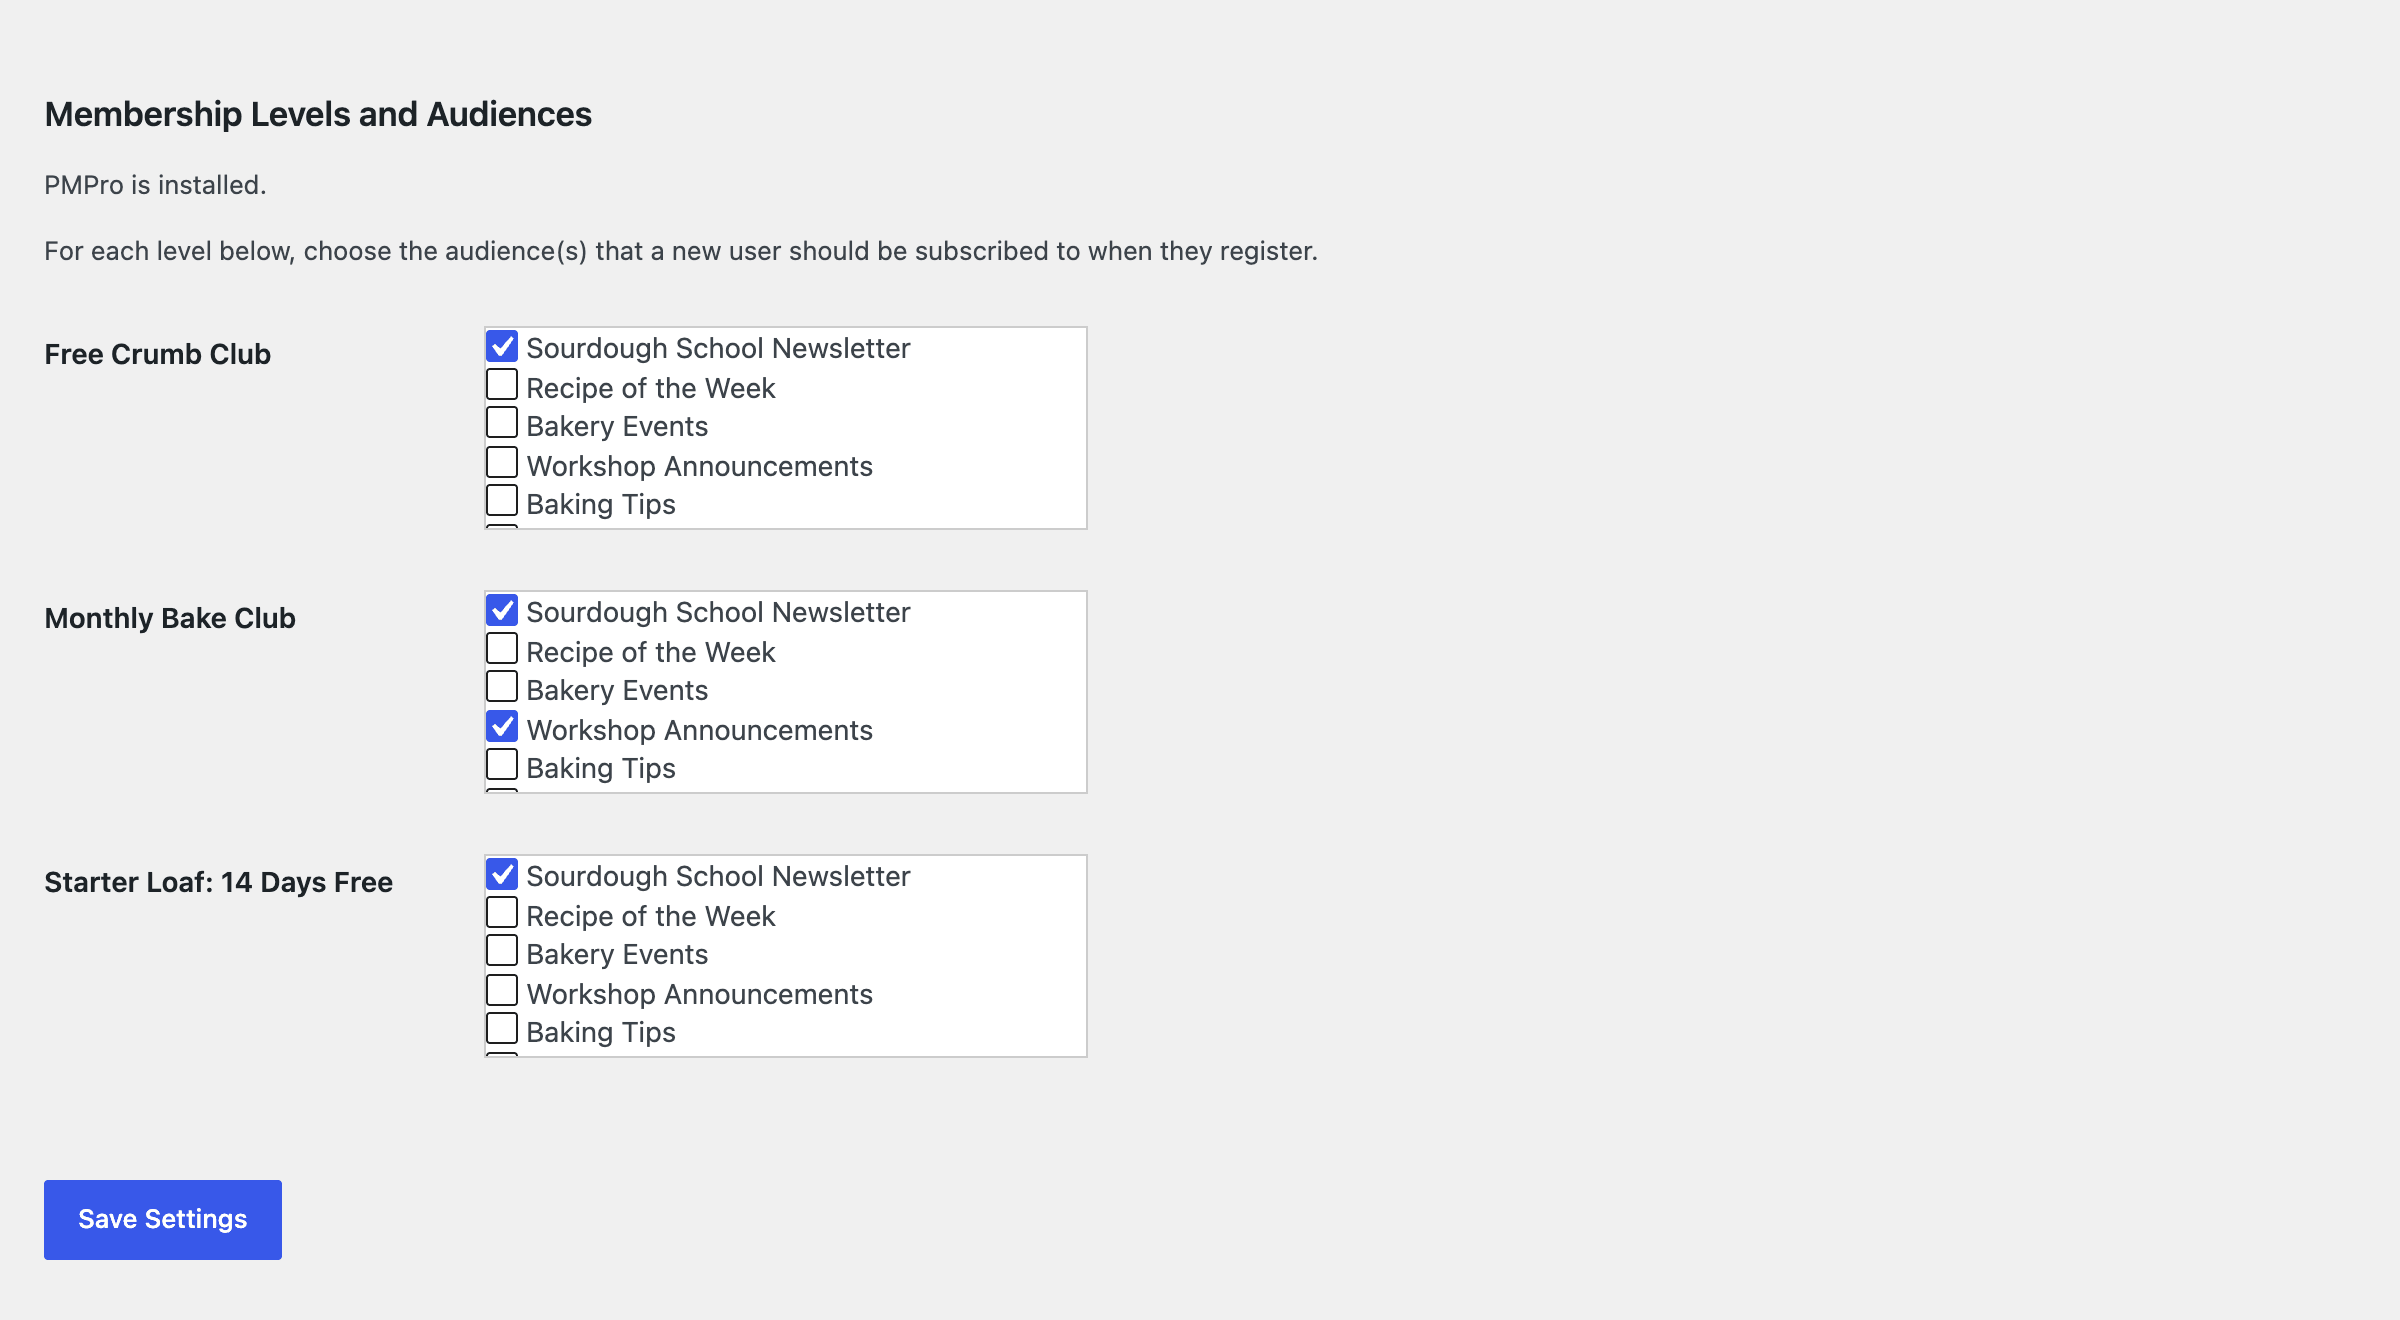
Click Save Settings. New settings apply to future registrations, checkouts, level changes, and profile updates. Existing members are not added to Mailchimp when you save. To bring your current members into Mailchimp, see Import Existing Members Into Mailchimp.
Next, read How Members Sync With Mailchimp Audiences to see exactly when the Add On subscribes, updates, and unsubscribes contacts.
Get Support From Our Team of Experts
Have a question about how to use this feature? Our Support Page outlines three ways to get support.
Our Max plans include hands-on help customizing your membership site and implementing new features. Upgrade to PMPro Max now »
Last updated on November 13, 2026