If you run a membership site with Paid Memberships Pro, there may come a time when you want to make changes to a user’s subscription—billing amount or next payment date, for example.
These changes are necessary to do things like:
- Allow members to pause their subscriptions
- Give active members a discount or temporary discount
- Upgrade or downgrade a subscription
- Raise the price for individual active members
- Fix subscriptions for members who paid the wrong price or experienced some other price calculation issue at the checkout
If you use Stripe to accept recurring payments with Paid Memberships Pro, you can modify subscriptions directly from the Stripe Dashboard. In this post, we will walk you through the process.
Finding a Subscription in Stripe
To modify a subscription in Stripe, first you’ll need to locate the subscription you want to change. Here’s how you do this:
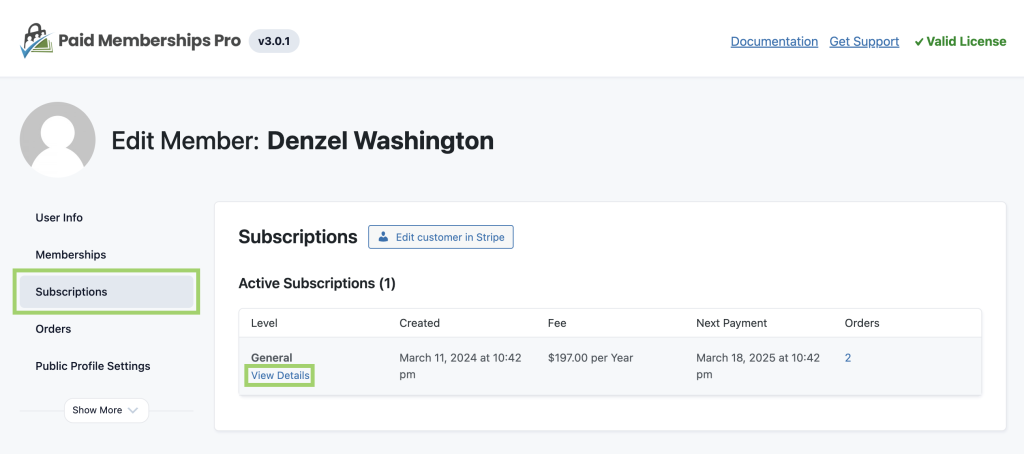
- Navigate to Memberships > Members > Edit Member > Subscriptions.
- Hover over the subscription you want to update and click “View Details“.
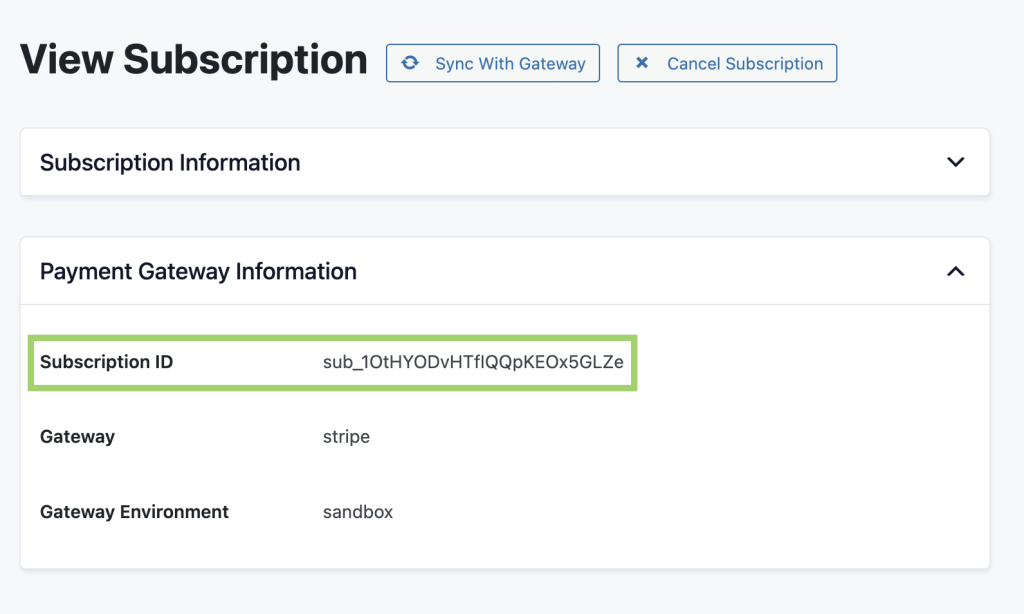
- Copy the subscription ID found in the “Payment Gateway Information” section.
- Log into your Stripe Dashboard.
- In the search bar, paste the Subscription Transaction ID that you copied and select the subscription that shows up
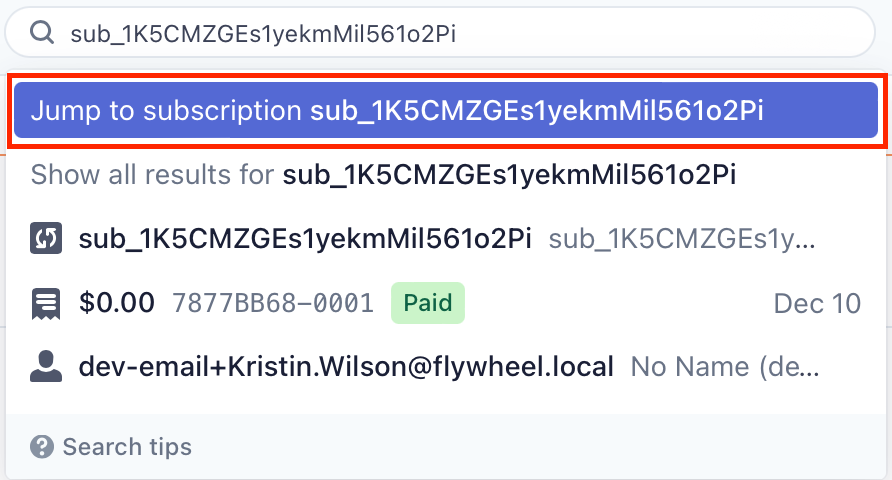
On the page that loads, you should be able to see information about the chosen subscription such as the billing amount, next payment date, and previous payments that have already been made.
Editing a Subscription
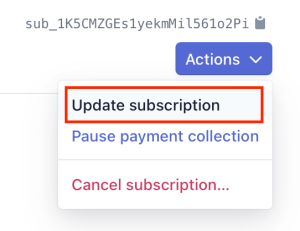
Regardless of whether you are trying to change the billing amount or the next payment date for the subscription, you can begin editing it by selecting Actions > Update subscription.
Changing the Billing Amount
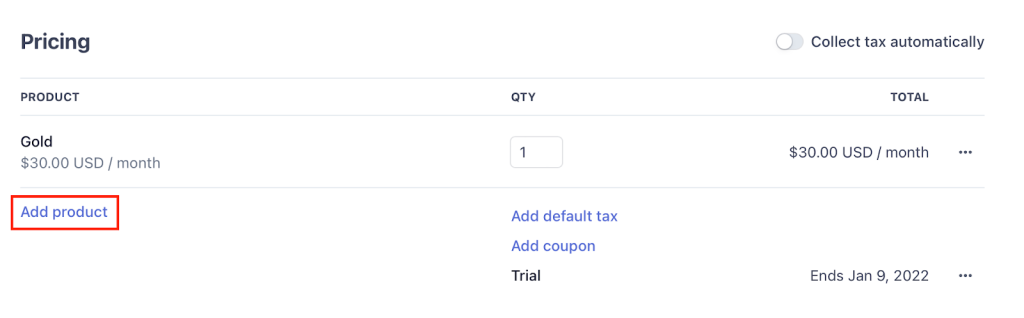
- Click on Add product
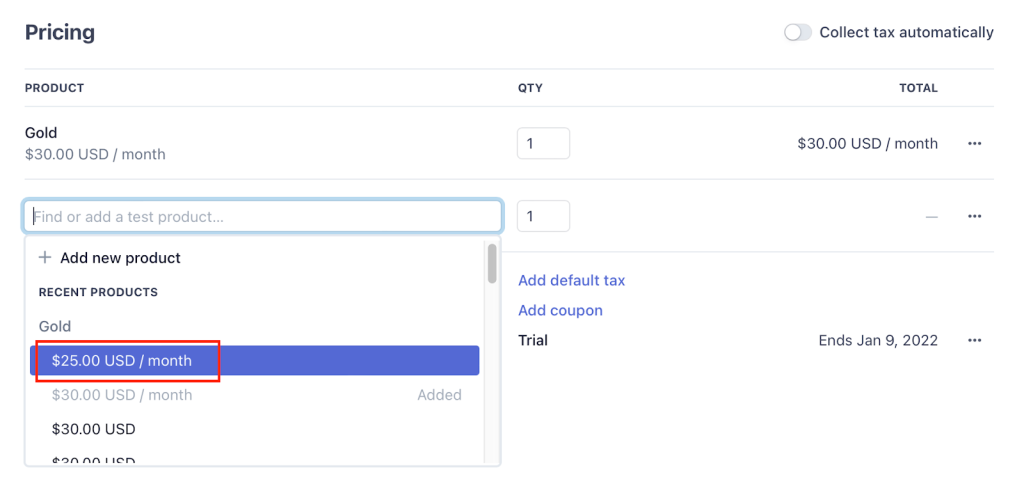
- In the Pricing table row, select a price to begin charging the user. (If you cannot find the desired price, continue on to the next section.)
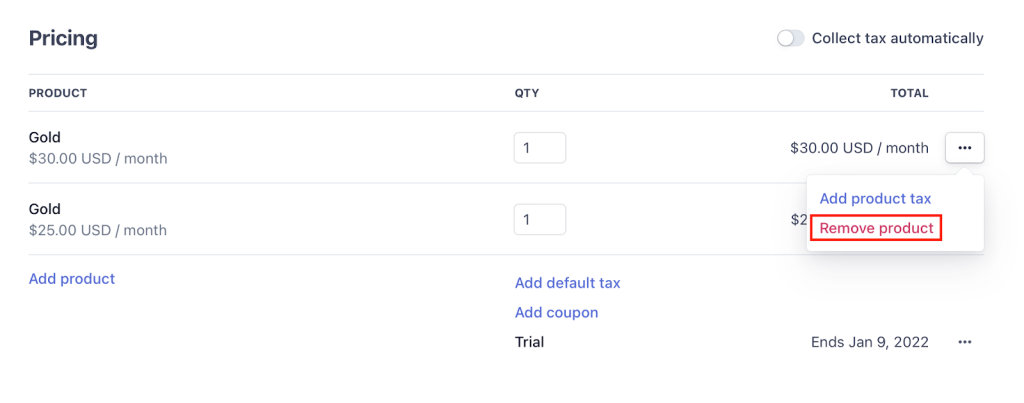
- To remove the previous subscription price, click the options dropdown (three dots) next to the product and select Remove product
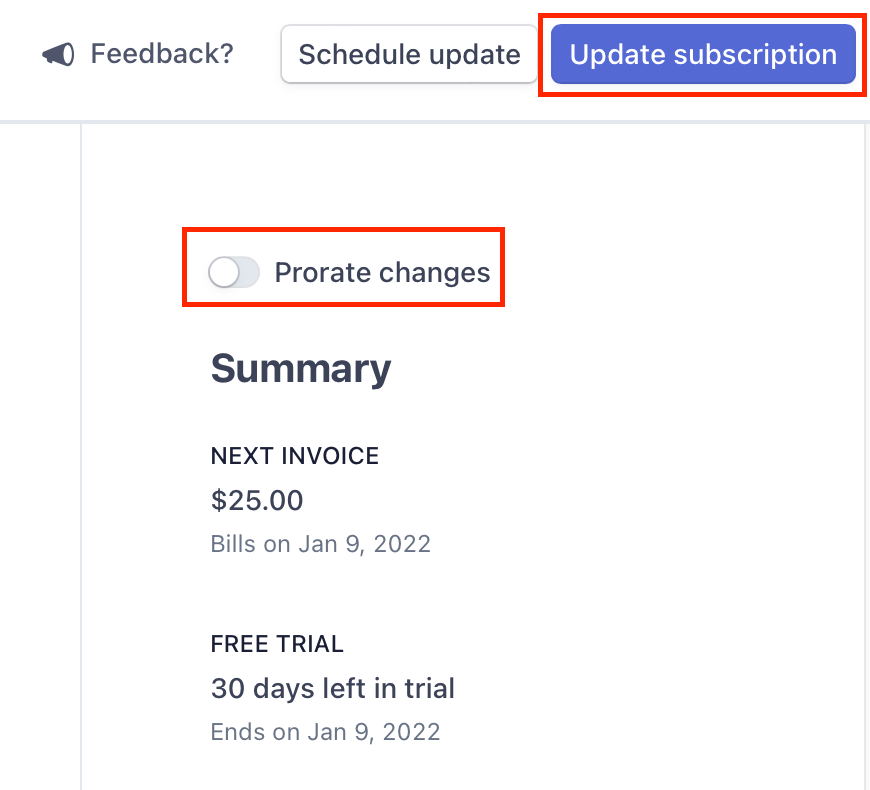
- Disable the Prorate changes option
- Select Update subscription
If the Desired Price Does Not Exist
Iff you are not able to find the price that you would like to charge the user, follow these steps:
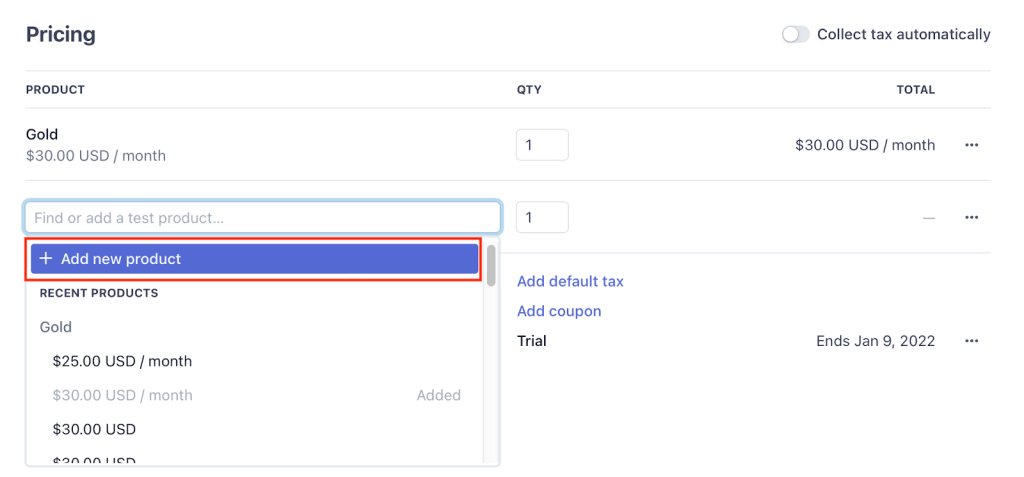
- Click Add new product
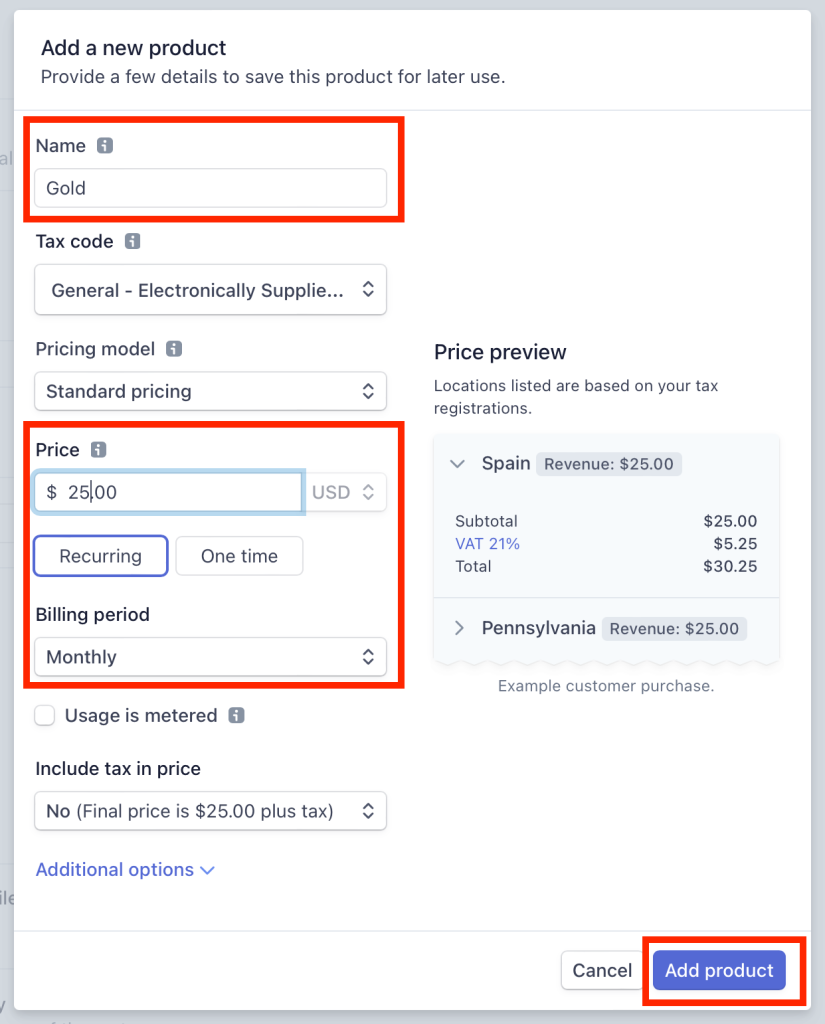
- Add a name for the product (this can be the same as the product that you are replacing)
- In the Price field, enter the new billing amount
- Make sure that the Billing period is set to the desired frequency (for example, “monthly”)
- Click Add product
Changing the Next Payment Date
- From the options dropdown (three dots) next to the Trial field, click Add trial to add a new trial period, or Update trial period if there is already a trial on the subscription
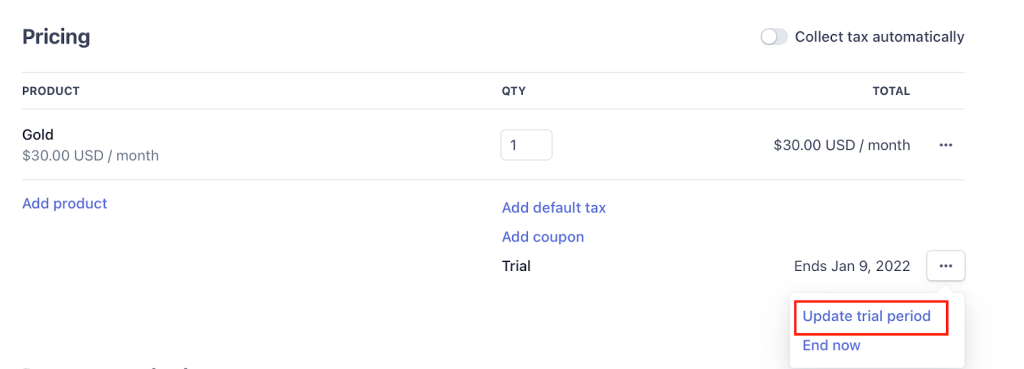
- Depending on whether or not the subscription is already in a trial period, either:
- Enter the number of days until you would like the next payment to be charged, or
- Select the date that you would like the next payment to be charged
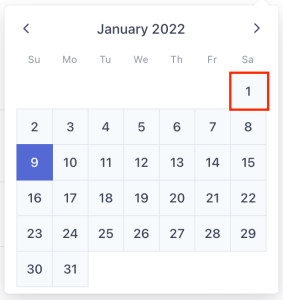
- Disable the Prorate Changes option
- Select Update Subscription
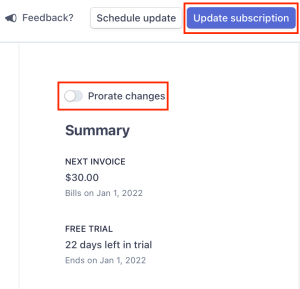
Updating Subscription Information in PMPro
Now that you’ve updated the subscription in Stripe, you can sync your PMPro site with Stripe.
Syncing the gateway is optional. The temporary disconnect between Stripe and PMPro will automatically correct itself. However, if you want the information to reflect the new subscription information, follow the steps below:
- Navigate to Memberships > Members > Edit Member > Subscriptions.
- Hover over the subscription you want to update and click “View Details“.
- Click “Sync with Gateway“. This will update data in PMPro about the subscription, such as the next payment date and billing amount data.
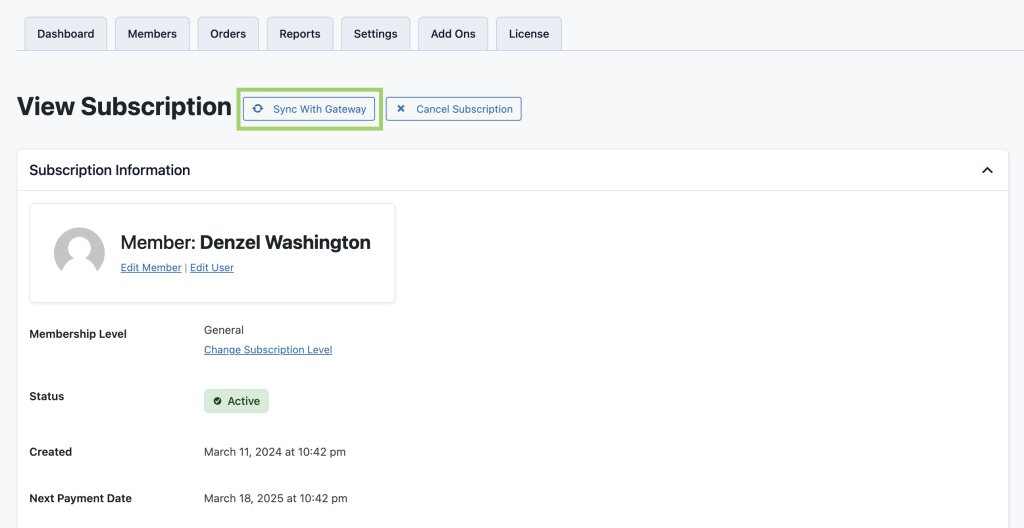
If you want to learn more about modifying payment subscriptions in Stripe, be sure to check out the Stripe documentation on changing subscriptions.
Join our free community of membership site creators.
PMPro offers a community Slack space for members, and you’re invited. Learn more about the community’s free benefits and get a link to join Slack now.

Free Download: The AI-Powered Membership Site Blueprint
Download the free guide: Learn how to plan, build, and grow a membership site using AI as your strategic partner: from buyer persona to launch and beyond.