Members submitting content to your site changes the dynamic of your membership. Instead of you producing everything, your members can contribute to share their expertise, stories, or resources that the entire community can benefit from. Done well, it deepens engagement and gives members a reason to stay active long after they join.
Of the major WordPress form builders, Ninja Forms has the lowest barrier to making this work. Their free core plugin and Front End Posting extension come bundled with a “Create a Post” starter template.
This guide covers the full setup: configuring the form, connecting it to PMPro, choosing the right moderation settings, and putting member content in front of your readers.
Table of contents
What You’ll Need
This tutorial requires three plugins:
- Ninja Forms: The free core plugin, available from the WordPress repo
- Ninja Forms – Front End Posting Add-On: A paid plugin that that turns submissions into real WordPress posts
- Paid Memberships Pro: To restrict the form and tie submission privileges to a membership level
Ninja Forms’ free core is enough to validate that your site can run the plugin smoothly before you license the Front End Posting add-on. If you’re brand new to Ninja Forms, build a contact form first, make sure it sends email, then come back here. Don’t try to troubleshoot two new plugins at once.
1. Drop In the Create a Post Template
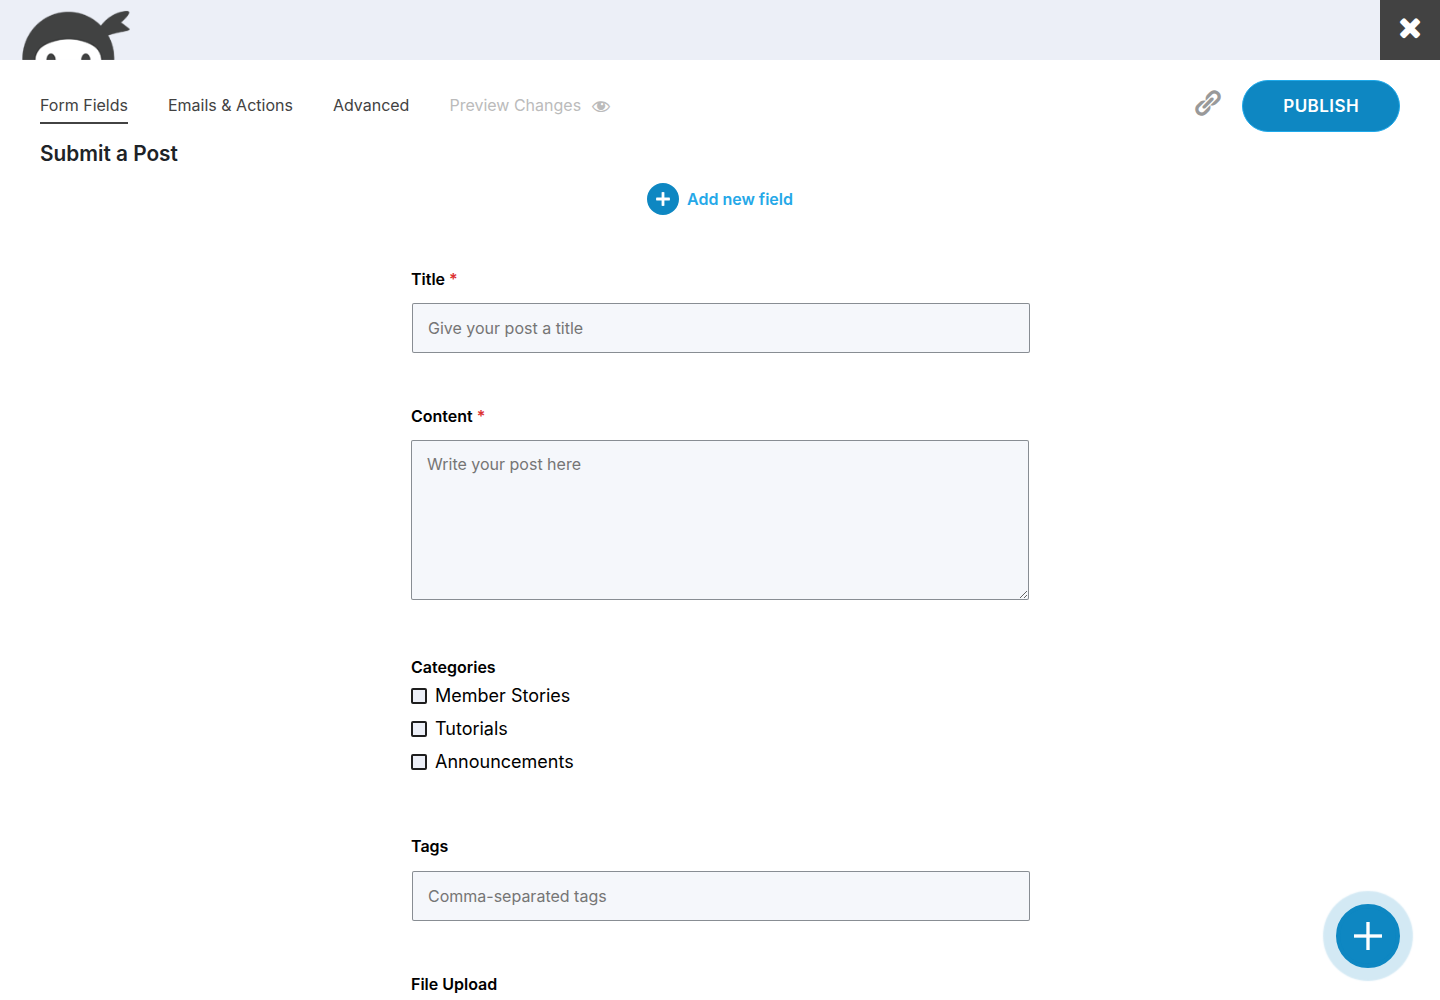
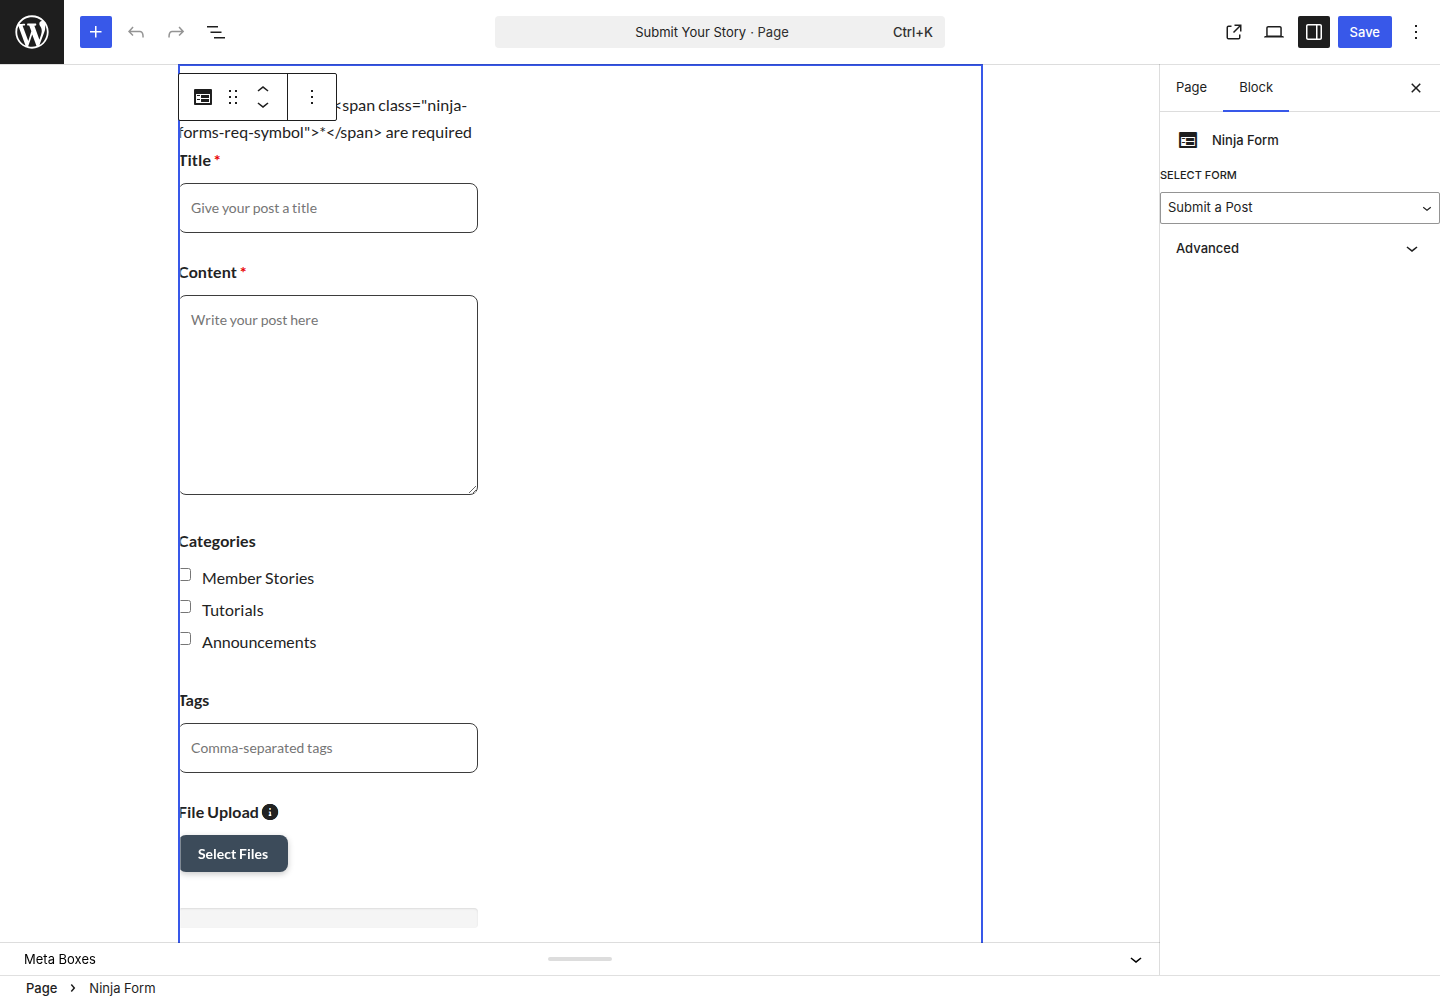
Front End Posting ships with a starter template that does most of the setup for you.
- In the WordPress admin, go to Ninja Forms > Add New.
- Pick the Create a Post template.
- Give the form a name and click into the editor.
- Adjust the default fields to fit your site. The template comes with:
- Title
- Content
- Categories
- Tags
- File Upload
- Save.
If you’d rather build from scratch, that works too: start with a blank form and use Ninja Forms’ merge tag system to map your custom fields to post properties. The starter template just saves you the wiring.
2. Set the Featured Image (the Step Everyone Misses)
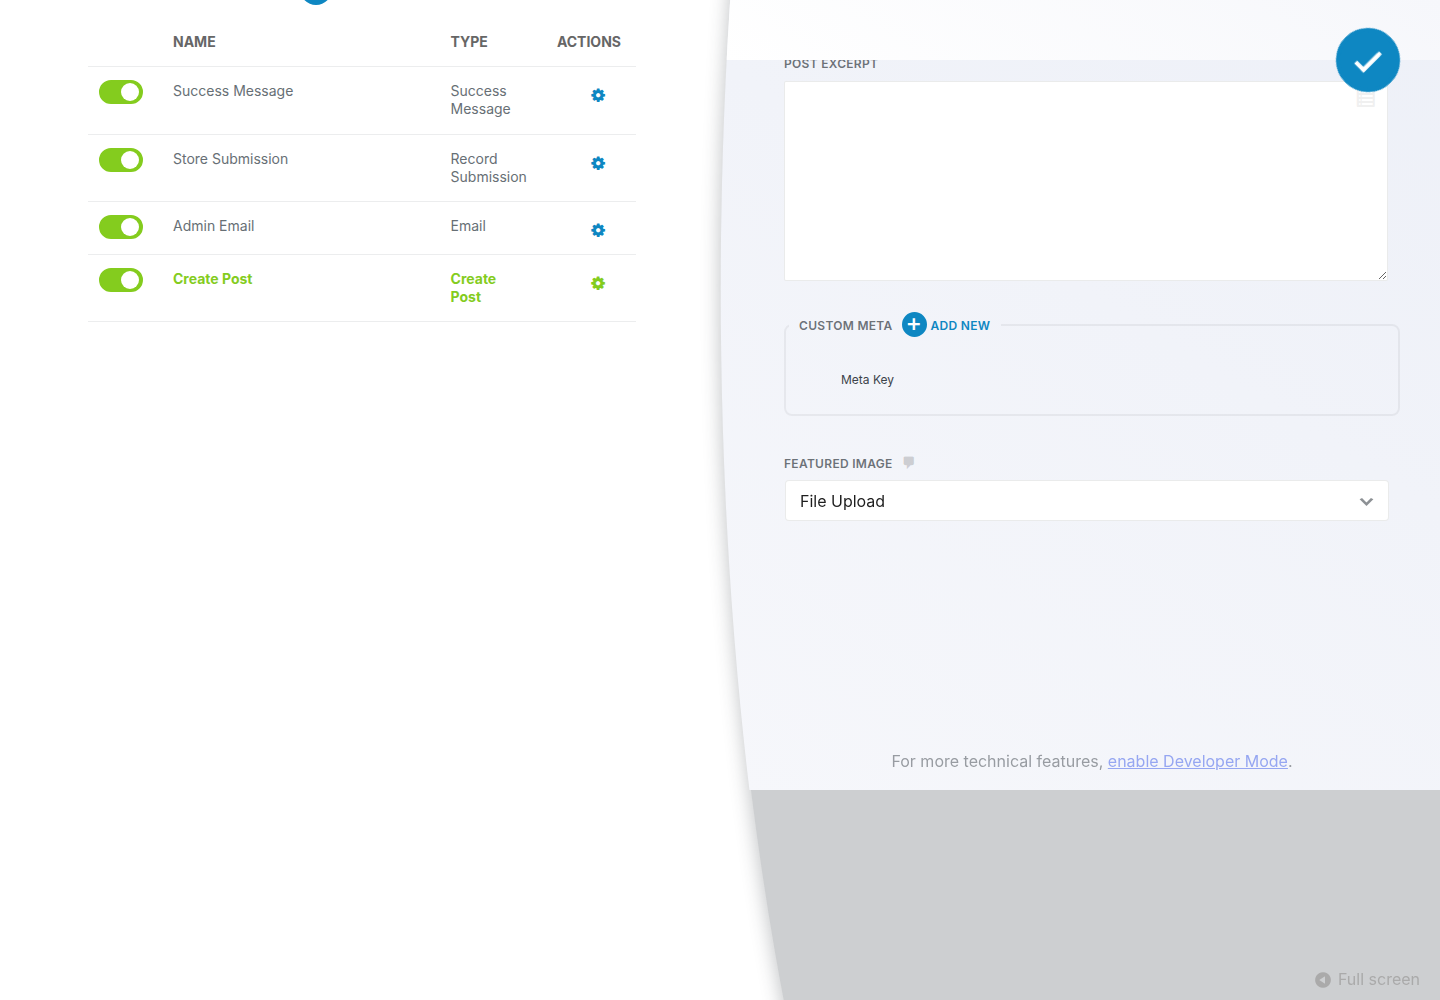
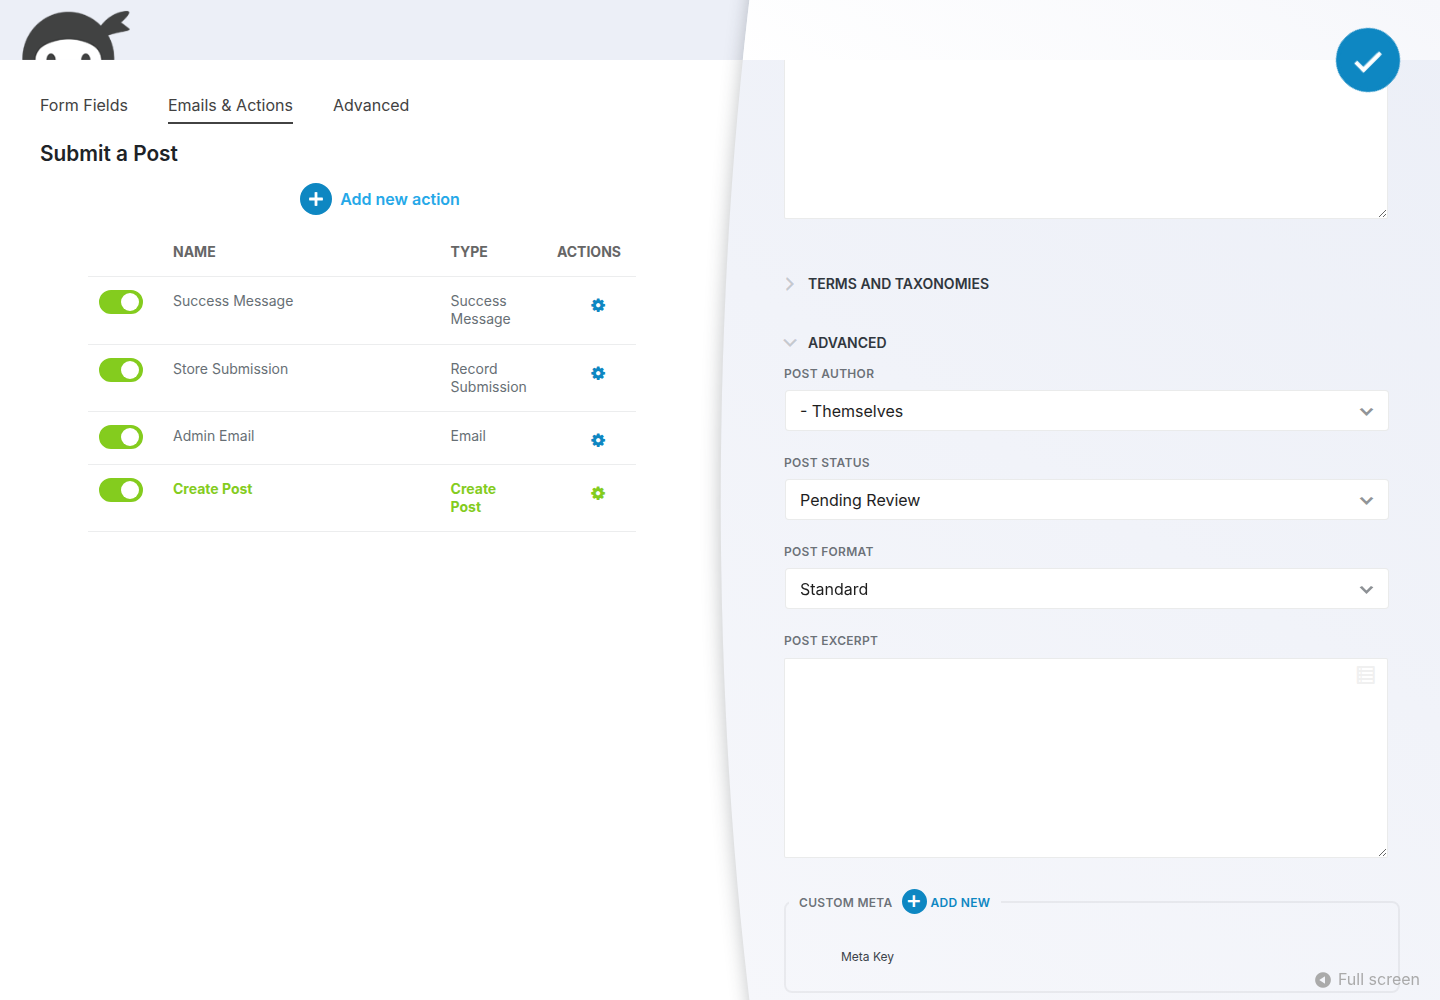
- With your form open, click the Emails & Actions tab.
- Open the Create Post action.
- Scroll to the bottom and click Advanced.
- Choose Featured Image and select the form’s File Upload field.
- Save the action.
3. Restrict the Form With PMPro
A submission form open to the entire internet is a spam magnet. We highly recommend restricting form access before you publish the page.
PMPro gives you three ways to lock the form. The first two options can be used when using the WordPress Block Editor. If you are using the classic editor or a page builder, Option C will be the best for your site.
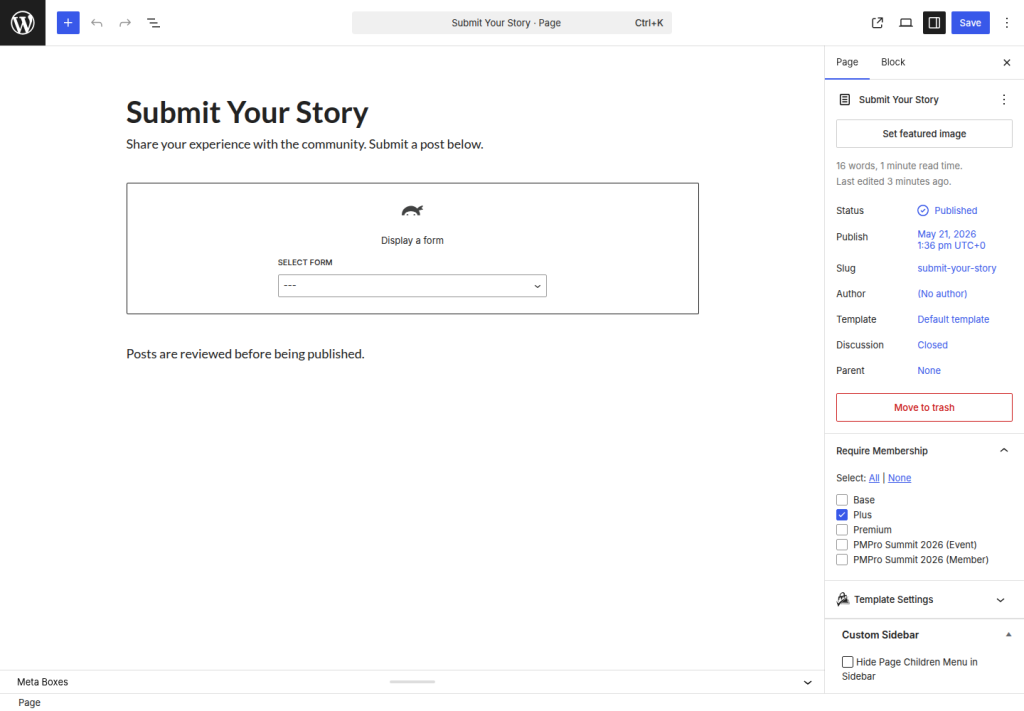
Option A: Restrict the Whole Page
This is the best approach when the submission form has its own dedicated page.
- Create a new page (e.g., “Submit Your Story”).
- Select your form with the Ninja Form block or add the Ninja Forms shortcode:
[ninja_form id=1] - Use the Require Membership meta box on the page editor to require a specific level.
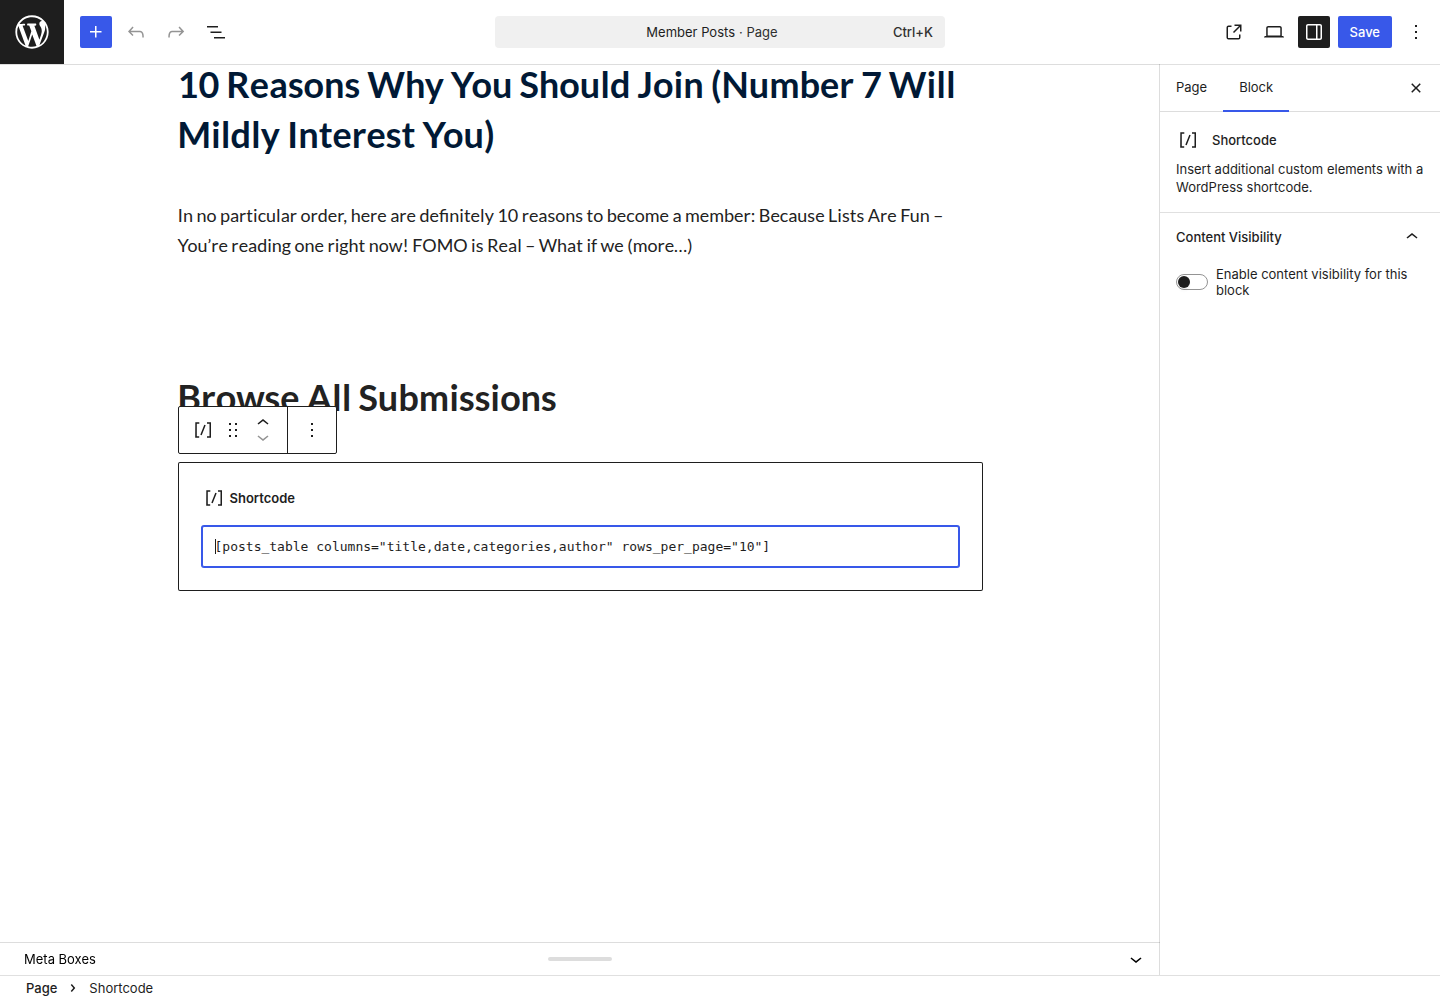
Option B: Hide the Form Block on a Mixed Page
Use this when the form lives inside a larger page (a member dashboard, a community hub).
- Insert the Ninja Forms block or paste the shortcode into a Shortcode block.
- Turn on Content Visibility in the block sidebar.
- Choose which levels can see the block.
Option C: Wrap the Shortcode
This approach uses the membership shortcode and will work in the classic editor, page builders, or anywhere shortcodes render.
[membership level="1"]
[ninja_form id=1]
[/membership]
4. Run the Flow Yourself First
A test submission is the cheapest QA you’ll ever do. Take ten minutes to walk through what you have set up:
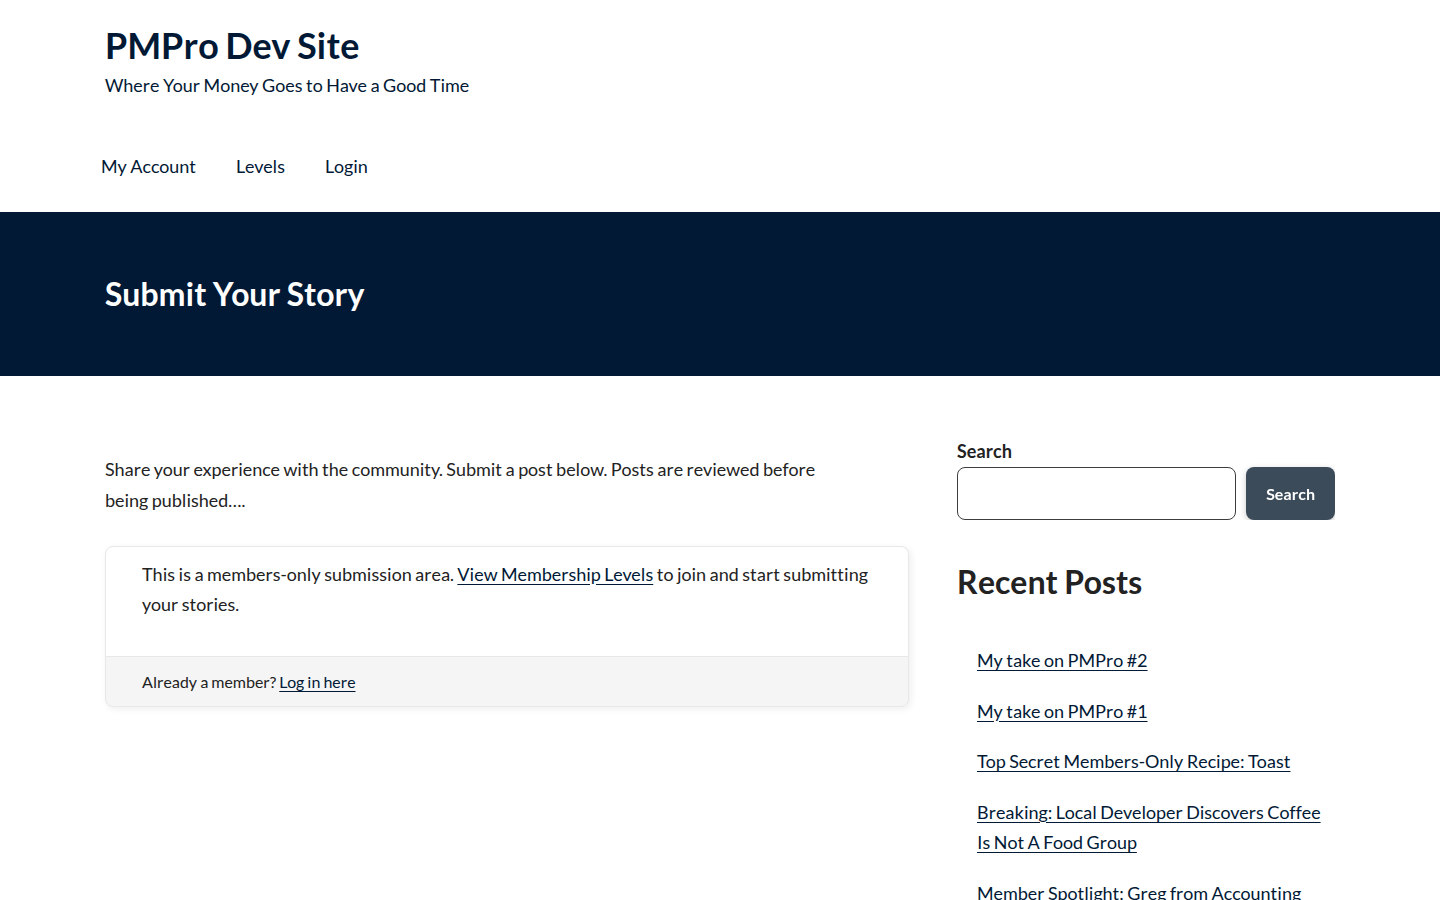
- As a non-member, visit the submission page. The form should be hidden and the Membership Required message should appear.
- As a new member, sign up at the right level and return to the form.
- Submit a real post. Fill every field. Upload an image. Submit.
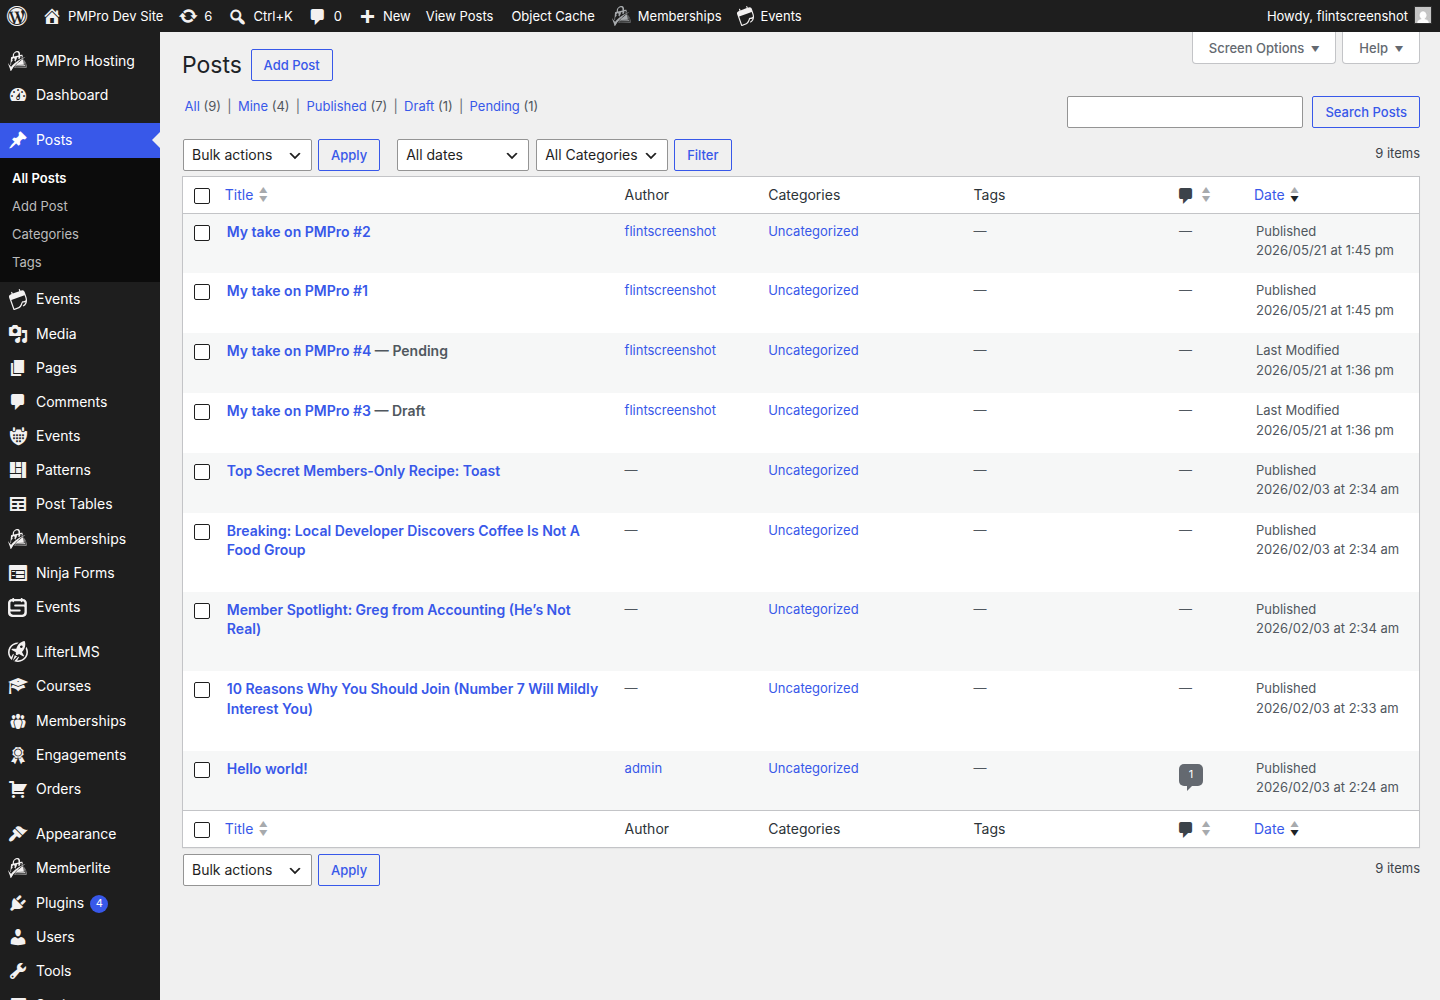
- Check the result. If the form publishes immediately, view the post on the frontend. If it goes to Draft or Pending, log back in as admin and confirm the submission landed where you expected, including the featured image. If the featured image is missing, go back to step 2.
- Try a broken submission. Skip a required field. Upload the wrong file type. Make sure the error messages are helpful, not confusing.

Power Your Publishing with a Platform You Can Control
Paid Memberships Pro is the best tool for online publishers: an open source WordPress plugin that transforms your blog or news site into a revenue-generating platform.
Tailor your site to engage readers, monetize content, and grow a loyal subscriber base. Give your subscribers the premium content they seek and earn a reliable income with a totally independent online business.
Tightening the Setup
Now that the minimum-viable version is live, the rest of this guide covers deeper customizations to make the submission flow fit your membership model.
Choosing the Right Default Post Status
This is the setting most worth getting right on day one. The default determines whether a member’s submission goes live the moment they hit “Submit”, or whether it waits in your moderation queue (recommended).
- Open your form and click Emails & Actions.
- Edit the Create Post action.
- Find the Post Status field.
- For most membership sites, choose Pending Review or Draft. Reserve Publish for content types and member tiers where you trust the submission to go live without review.
- Save.
A pragmatic middle path is to start with everything on Pending Review. After a month of moderation, look at how many submissions you’ve actually rejected. If the answer is “almost none,” loosen the default. If it’s “a lot,” your member onboarding probably needs to set clearer expectations about what you publish.
Limiting How Often Members Can Submit
Without limits, a single enthusiastic member can flood your site. Navigate to Form Settings > Restrictions. Here you can require login to submit and cap total form submissions. The login requirement is non-negotiable if the form isn’t gated by PMPro. The total cap works for time-bound calls for entries.
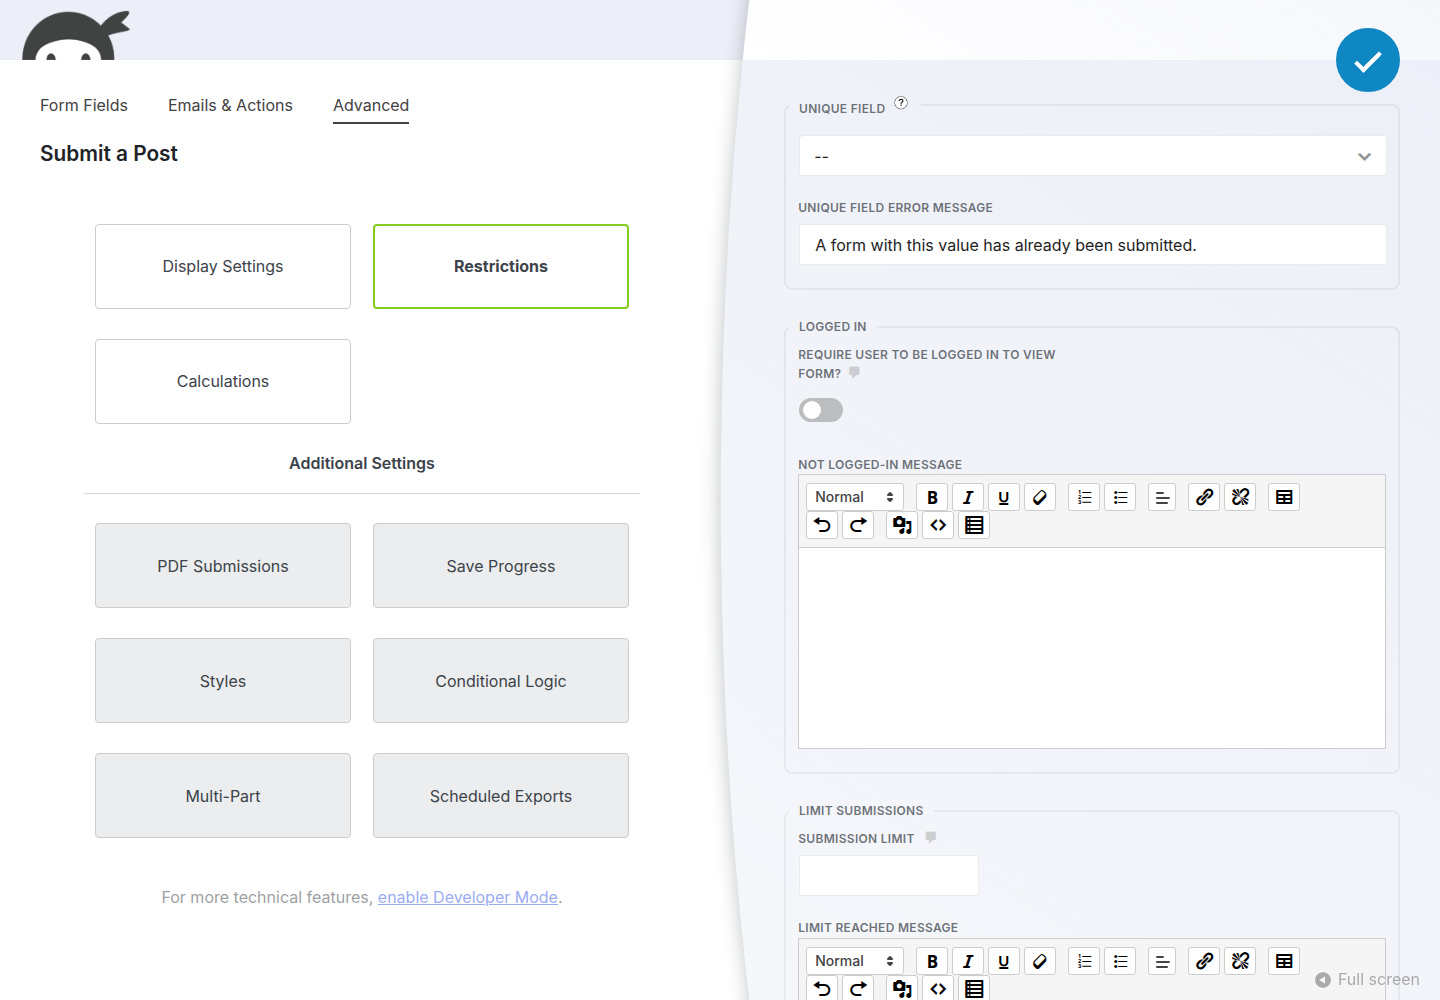
Ninja Forms’ built-in cap is a single number that applies to everyone and doesn’t reset on a schedule. If you want different submission allowances for different membership levels (and a limit that resets each month), you’ll need a code recipe.
The snippet below sets a per-month submission limit for each membership level. When a member reaches their limit, the form is replaced with a message until the next calendar month. A few things to know before you use it:
- Set your limits per level. Edit the $level_limits array to map each membership level ID to the number of posts that level can submit per month (for example, level 1: 2 posts, level 2: 5 posts).
- Members on an unlisted level fall back to a default of 1 submission per month. Adjust this default to fit your site.
- If a member holds more than one level, the highest matching limit applies.
- Edit the two placeholders. Change the page ID in is_page( 123 ) to your submission page, and update the post_type if your submissions use a custom post type instead of standard posts.
Limit the number of Ninja Forms post submissions per month recipe
Putting Member Posts in Front of Your Readers
Members should be able to easily find (and be proud of) any content they have submitted to your membership site. If their content disappears into the void, they will be far less likely to create for you.
- Use the post type archive you already have. Standard posts get a
/blog/archive automatically. Custom post types may need an archive template depending on your theme. - Build a Query Loop block. The Block Editor’s Query Loop is the no-code way to make a “Submitted by Members” feed: filter by category, post status, or author and style it to match your site.

- Highlight individual posts. Whatever archive view you use, every item should link cleanly to the single post. The detail page is where members see their work treated like real content.
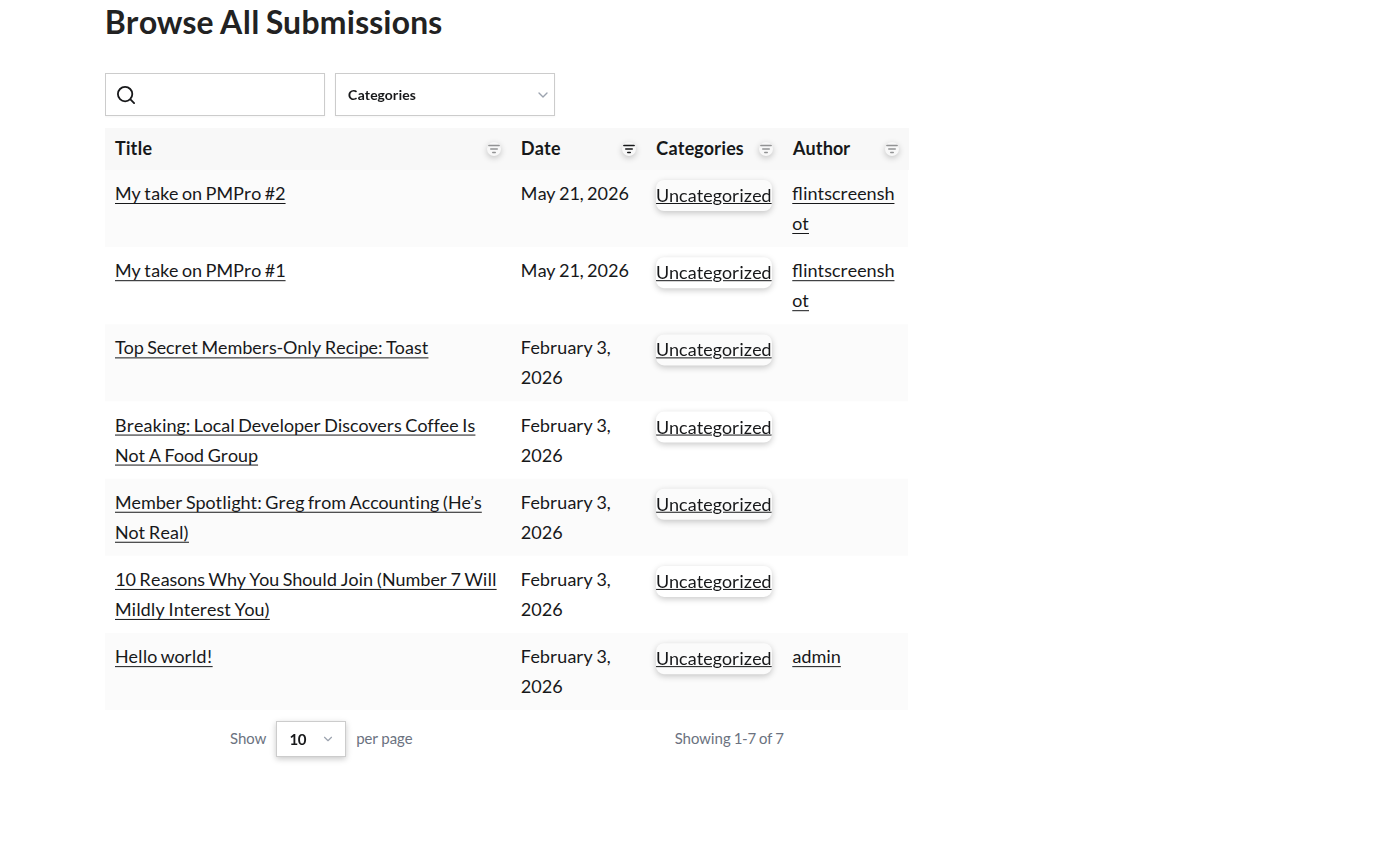
- Try Posts Table by Barn2. A sortable, filterable table view that takes about ten minutes to set up. The Pro version supports custom post types and custom fields, which is the right move if your submissions carry structured data beyond title and body.
The Real Work Starts After Submission #1
Providing your members the form is the easy part, the lasting work is editorial: figuring out which submissions to feature, how to credit members, when to nudge a quiet member to share, when to thank a prolific one publicly.
A few things to watch in the first month:
- The first submission tells you what your prompt is unclear about. If the inaugural submission is off-topic or off-format, your form copy or your member onboarding needs work.
- Reply to every submission, at least at first. A single comment from the site owner on a member’s submitted post does more for retention than any automated email.
- Spotlight what you want more of. Members submit what gets seen. If you feature thoughtful, longer pieces on the homepage, the next batch will look more like that.
You’re not just adding a feature. You’re inviting members into the editorial side of your site. That changes the relationship for the better, when you do it well.
Questions on this setup? Our support team and the wider PMPro community are around to help.
Related Resources
Free Download: The AI-Powered Membership Site Blueprint
Download the free guide: Learn how to plan, build, and grow a membership site using AI as your strategic partner: from buyer persona to launch and beyond.


