After you have successfully activated the PMPro Plugin, you will be redirected to set up your new membership site using the Setup Wizard.
The wizard performs the key setup steps for Paid Memberships Pro, including setting up your first free and paid level (optional) and reviewing advanced settings related to content filters and spam protection.
In 5 steps, you can have your membership site up and running to accept new members.
Video: Setup Wizard
Step-by-Step Documentation
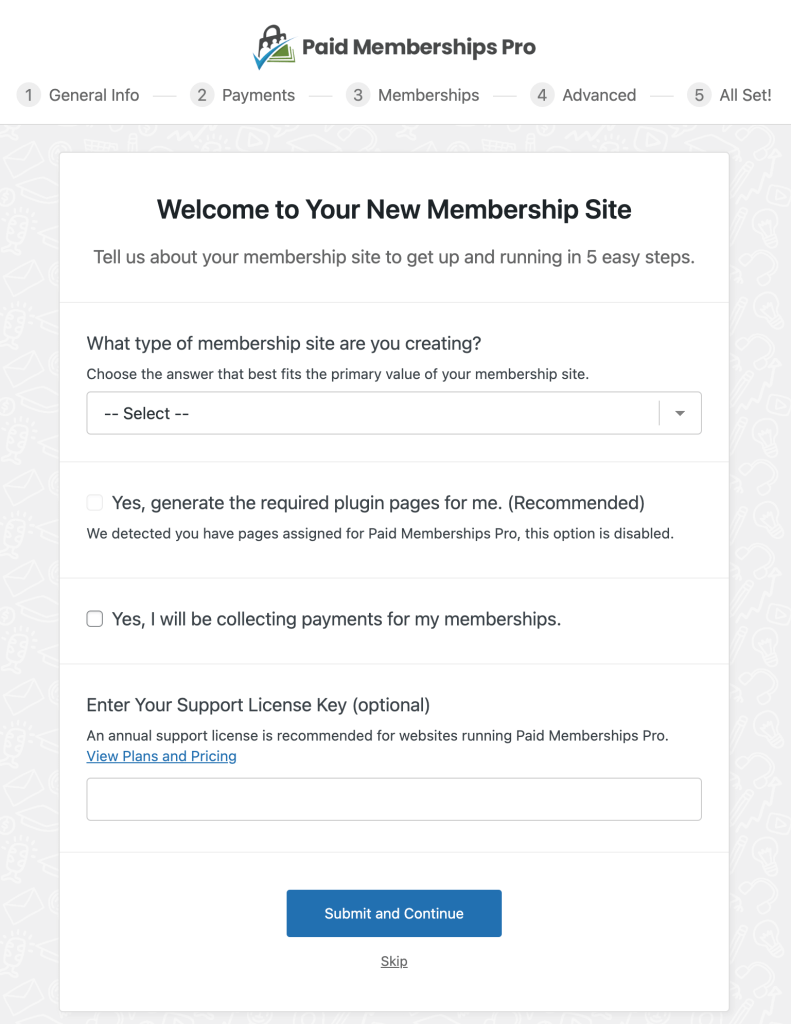
Welcome to Your New Membership Site
In Step 1, you will identify the main purpose of your new membership site and set up the basic structure for your site.
- What type of membership site are you creating? Select the primary type of site you are building. This answer helps later steps in the wizard show you the top Add Ons and settings that benefit your type of site.
- Generate required plugin pages. Check this box to auto-generate the membership pages and prefill them with required frontend content. You can edit these pages later as needed.
- Collecting payments. Check the box if any of your membership levels are paid. If you are setting up a free membership site only, leave this box unchecked. You will connect your payment gateway later in the process.
- Support license key. PMPro is 100% free and open source. There are no limits on the free core plugin, including all built-in payment gateways, and a license key is not required. If you are already a premium PMPro member, input your license key in this step. View pricing »
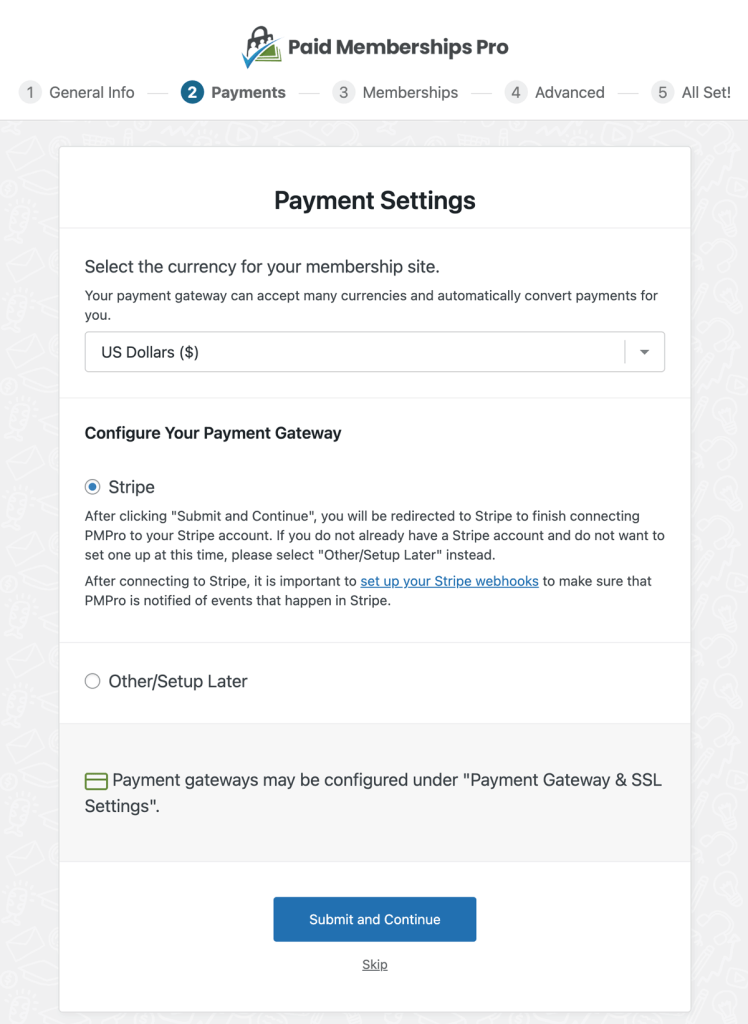
Payment Settings
In this step, you can choose a default currency for your payments and choose to enable Stripe or another payment gateway later.
If you are setting up a free membership site, this step is automatically skipped.
- Select the currency for your membership site. Your payment gateway can accept many currencies and automatically convert payments for you.
- Configure Your Payment Gateway. We recommend using the Stripe payment gateway for your membership site. If you select Stripe in Step 2, the setup wizard will automatically connect to your gateway at the end of the setup process.
- If you do not already have a Stripe account and do not want to set one up at this time, please select “Other/Setup Later” instead.
Note: after connecting to Stripe, it is important to set up your Stripe webhooks to make sure that PMPro is notified of events that happen in Stripe.
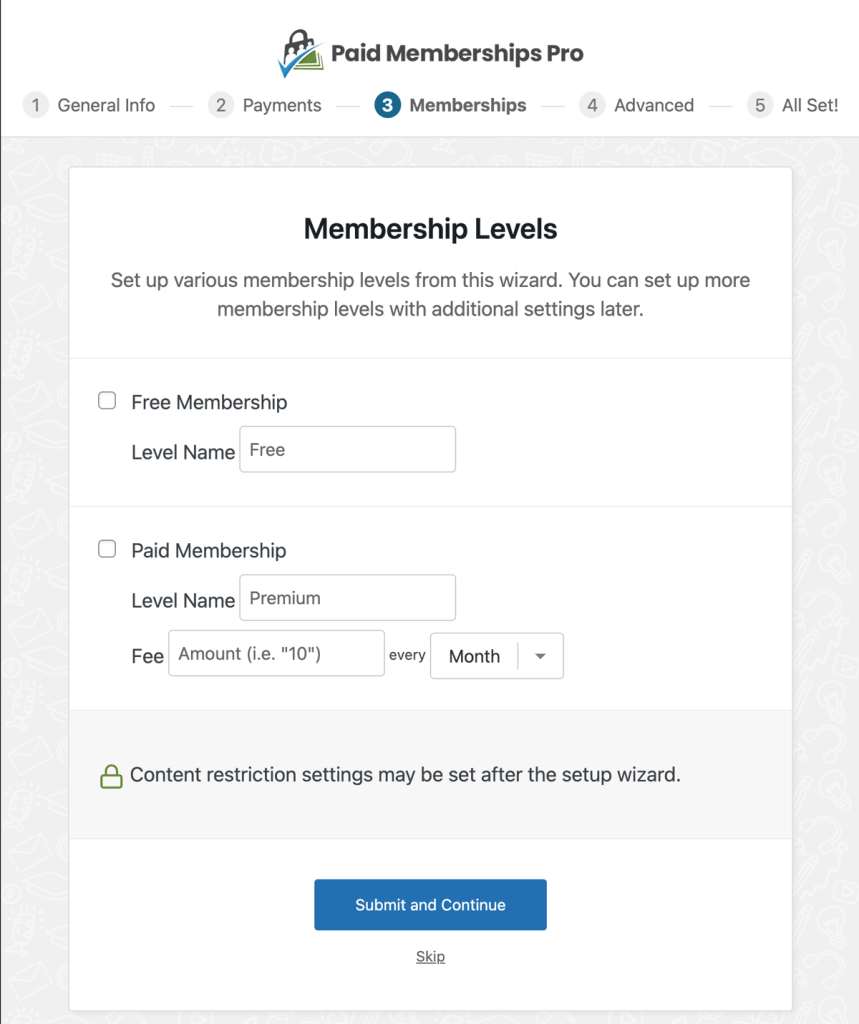
Membership Levels
In this step, you can create a basic Free and Paid Membership Level. Both of these are optional steps in the setup process.
- Enter the name of your Free or Paid membership level. We have a companion guide on how to name your membership levels if you are not sure what names to use.
- For your paid level, set the subscription price per period. Click here for more documentation on level pricing or check out our post with four example pricing setups and video tutorial.
If you need to add more levels after completing the wizard, navigate to Memberships > Settings > Levels in the WordPress admin.
The wizard does not include settings for content restrictions, so be sure to do that after completing setup. For help with this step, click here to access a guide on how to protect access to anything in your WordPress site.
Advanced Settings
Step 4 configures advanced settings for your membership site. You can access these advanced settings and more on the Memberships > Settings > Advanced screen after you exit the Setup Wizard.
- Install Update Manager: The Update Manager is a required plugin that enables automatic updates for Paid Memberships Pro and its Add Ons, delivered securely from our official license server. You can download Update Manager via Memberships > Add Ons or our Downloads page if you do not download during the Setup Wizard process.
- Filter Searches and Archives: Optionally hide members-only content from appearing in an archive view (category, tag, author, etc.) or in search results.
- Show excerpts to non-members?: WordPress auto-generates an excerpt from the first 55 words in your post. Select whether to show or hide excerpts to logged out visitors or non-members. It is a good idea to show excerpts on member pages as a teaser for new members to sign up and keep reading or for SEO to index a portion of your content.
- Enable Spam Protection: It is highly recommended that you enable this built-in checkout feature. This setting blocks bad users from repeatedly attempting checkout from the same IP address. After setup, we also recommend setting up other methods to prevent spam, including reCAPTCHA or Akismet.
- Enable Tracking?: Optionally disable usage tracking for PMPro. This tracking feature sends us information about the type of membership site you are building and how you have configured Paid Memberships Pro on your site. By choosing to share this data, you are helping us make PMPro better for everyone. When we understand how people are using PMPro, we can create more helpful features, write better documentation, and make PMPro a more useful platform.

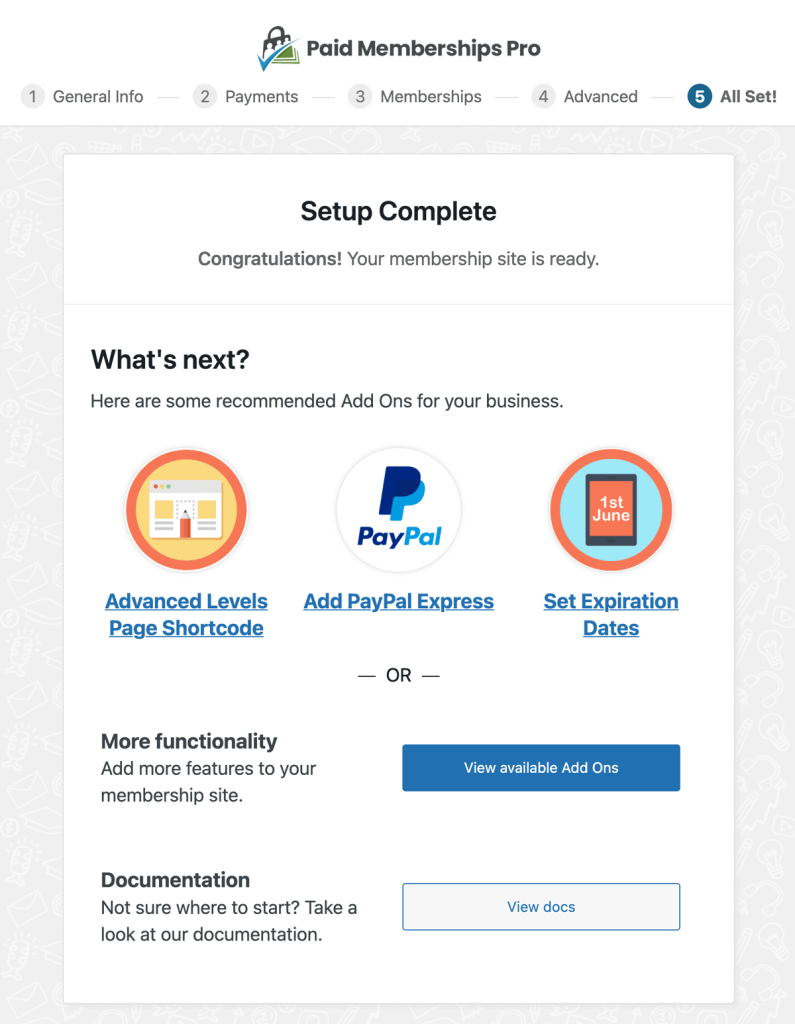
Setup Complete
Yay! The confetti is falling! You have completed the basic setup steps to start accepting free or paid membership checkouts in your WordPress site.
So what is next?
- Continue to Step 3 in our Setup Guide, or
- Explore the recommended Add Ons and Documentation
Get Support From Our Team of Experts
Have a question about how to use this feature? Our Support Page outlines three ways to get support.
Our Max plans include hands-on help customizing your membership site and implementing new features. Upgrade to PMPro Max now »
Last updated on July 21, 2026

