Migrating from one membership platform to another can be intimidating—even for the most tech savvy among us. We created a streamlined step-by-step guide to help you move membership date and successfully migrate from s2Member to Paid Memberships Pro.
Note: This guide is specifically written to support someone migrating active subscriptions and members from s2Member to Paid Memberships Pro.

How to Migrate from s2Member to Paid Memberships Pro
Due to the nature of eCommerce, your live site will continue to bring in new data—new orders, new members, new comments and posts in your forum, for example.
The goal is to interrupt your live money-making site as little as possible.
That said, if you are operating a small membership site and you can afford it, take your site down for a day or two. This process can be infinitely simpler if you just close your site to the public.
There are two important parts to completely migrate from s2Member to Paid Memberships Pro:
- Migrating your members and their subscriptions
- Migrating the content protections from the previous system to the new system
Related: Paid Memberships Pro vs s2Member
We’ll cover both of these processes. If you follow all of the advice and instructions in this guide, you’ll end up with:
- A WordPress membership site powered by Paid Memberships Pro.
- A clean uninstall of s2Member (no lingering data in your database or settings).
- Seamless ongoing payments from past customers (if recurring).
- New member payments powered by Paid Memberships Pro.
Let Us Handle It: Migration with PMPro Max
If doing this yourself feels overwhelming, PMPro Max includes hands-on migration support as part of the service. We handle the move from these platforms and many others, with the goal of getting you up and running on PMPro with as little disruption to your business as possible.
Here’s our honest commitment on what that looks like:
- When we can preserve your active member subscriptions, we will. For most WordPress-to-WordPress migrations and some gateway-to-gateway transitions, your members keep paying without interruption and without needing to re-enter their billing info.
- When we can’t preserve subscriptions, we’ll be upfront about it and give you a clear plan. Some platforms (WooCommerce Subscriptions, most SaaS tools) create subscriptions in ways that can’t be transferred to another system, even with the same payment gateway. In those cases, we’ll help you set appropriate expiration dates, craft the member communication, and use PMPro’s renewal flow to bring members back into an active subscription on the new platform.
- Either way, you keep your members and your revenue. The goal isn’t just to move data, it’s to land you on a membership platform built for where your business is going, not where it started.
Part 1: Migrating Members and Subscriptions
1. Backup Your WordPress Website
In our post Backup Your WordPress Site: The Complete Guide to Site Backups, we talk about the importance of regular site backups and how to create your own site backup. This is especially important for membership sites, since they deal with customer accounts and sensitive information
Create a backup of your site before continuing the migration process.

DOWNLOAD NOW
We have a downloadable version of this setup guide with the specific steps you need to convert s2Member to PMPro members—without affecting current active subscriptions.
2. Pause Your Live Website
Data can get out of sync very quickly during a migration. You don’t want any new member data to be created or altered while you complete the process, so we recommend temporarily pausing your live website.
This means:
- Disconnecting your s2Member payment gateway
- Turning off all new membership signups
- Putting your main website in “Coming Soon” or “Maintenance” mode
You can use a plugin like WP Maintenance Mode & Coming Soon to add a maintenance post to your blog, or a coming soon page to your website.
3. Install and Set Up Paid Memberships Pro
The next step is to install Paid Memberships Pro onto your website or staging site.
Note: If you can’t turn off your main website, or you just want to test out PMPro to see how it works, we strongly recommend using a staging site or even a local development site.
However, when you create a staging site, your live site and development site become out of sync. If you go this route, note that there will be some data on your new site that you will need to migrate immediately before it goes live.
If You’re Installing PMPro on Your Main Website
In our Initial Setup guide, we talk about how to install Paid Memberships Pro.
Once you have PMPro installed, you’ll need to replicate your s2Member memberships as membership levels in Paid Memberships Pro.
To do this, navigate to Memberships > Settings > Membership Levels in the WordPress admin. You can refer to the Initial Setup guide linked above for more information.
Be sure to save your membership level IDs for later. Don’t connect your payment gateway just yet.
If You’re Installing PMPro on a Staging Site
Once you have your staging site up and running, make sure that it’s not connected to your payment gateway in both s2Member and Paid Memberships Pro.
Note: It’s possible that certain actions you take on your staging site could trigger a system email from WordPress, s2Member, or Paid Memberships Pro while you are going through the migration process. Our Developer’s Toolkit Add On has a feature to redirect all site emails to a specific address. You can also use a third-party plugin like Disable Emails to protect yourself from mistakenly sending messages from your staging site.
4. Set Up User Fields (If Applicable)
Does your membership have custom user fields configured in s2Member? Do you want to add new user fields?
Paid Memberships Pro includes custom User Fields to collect additional checkout fields and user profile information for members and admins.
Navigate to Memberships > Settings > User Fields to configure your custom fields. You can use the same Field Name as any custom field you had created in s2Member so that the data is seamlessly converted and used in the PMPro members list, exports, and frontend user profile forms.

5. Prepare Your Data For Import
Export Your Members List From s2Member
- Navigate to s2Member > Import/Export in the WordPress admin.
- Click “Export to CSV”.
You now have the full export of your s2Member data that you can use to build the import spreadsheet for Paid Memberships Pro.
You will need the PMPro Import Members From CSV Add On.
The plugin includes a starter import template file. Navigate to Users > Import Members in your WordPress admin. You’ll see a link to download the example CSV file from this page.
The table below shows the s2Member data fields you should map to the required PMPro Import fields:
| PMPro | Description |
|---|---|
| user_email | The email address of the user. |
| membership_id | Populate this column with the membership level ID from Paid Memberships Pro for their corresponding s2Member level/role. You can locate the PMPro level ID on the Memberships > Settings > Levels screen in the WordPress admin. |
| membership_enddate | For recurring members, leave this field blank. For members on a fixed-term membership (one time payment or with a future expiration date) set to the EOT date from your s2Member export in the format YYYY-MM-DD. |
| membership_gateway | Enter paypalstandard, paypalexpress, or paypal depending on which version of PayPal you used with s2Member. |
| membership_susbcription_transaction_id | The PayPal subscription transaction id. |
Export the file to CSV and Test the Import
We recommend testing the import with a subset of your data (the first 10 records) to ensure that everything works as expected.
- First, export the first few rows CSV file With your exported .csv file, adjust the rows to only include the first 5 or 10 records.
- Run that import by following the directions on the Import Users from CSV Add On documentation page.
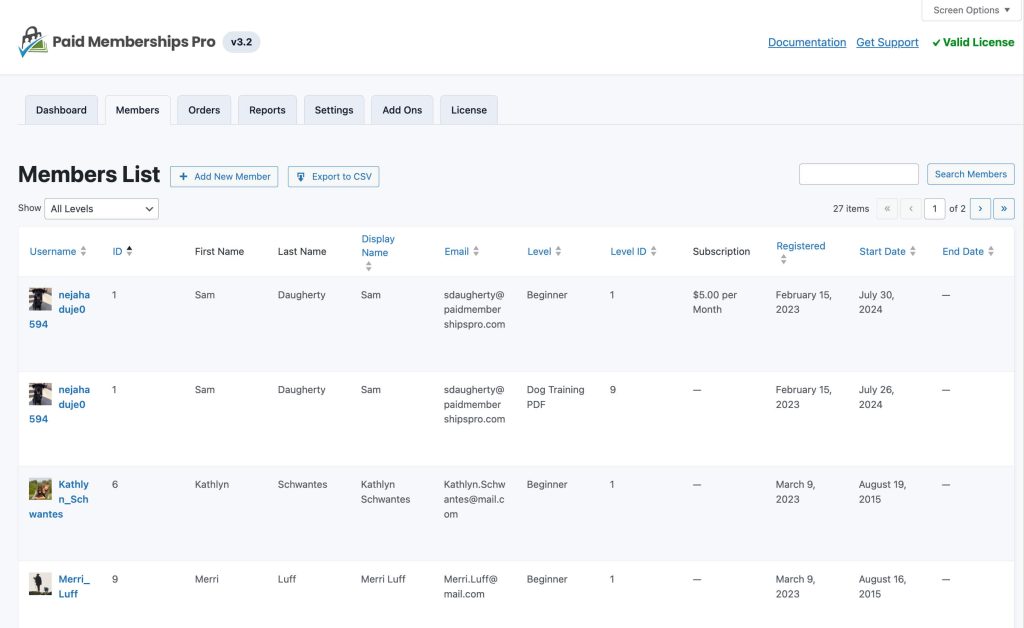
- Double check the data to be sure everything looks correct. You can check your Members List under Memberships > Members.
If everything looks correct, you are ready to do the full and final import. To do this, repeat the process from your test above using the full set of data (minus those test members already imported).
6. Backup Your Database
If you didn’t backup before beginning this process, now is the critical time to do so.
In our post Backup Your WordPress Site: The Complete Guide to Site Backups, we talk about the importance of regular site backups and how to create your own site backup. This is especially important for membership sites, since they deal with customer accounts and sensitive information.
If your host provides access to phpMyAdmin, you can download a full “dump” of your site’s database through this interface.
Alternatively, we recommend installing Database Backup for WordPress by Delicious Brains, which gives you on-demand database backups within the WordPress admin.
You can download the plugin directly from the WordPress.org Plugin Repository or through the Plugins > Add New interface in the WordPress admin.
- Log in to your WordPress dashboard.
- Go to Plugins > Add New
- Search for Database Backup for WordPress by Delicious Brains
- Click Install Now. Enter your FTP credentials if needed.
- Activate the plugin.
Please don’t forget to create a backup of your site before continuing the migration process.
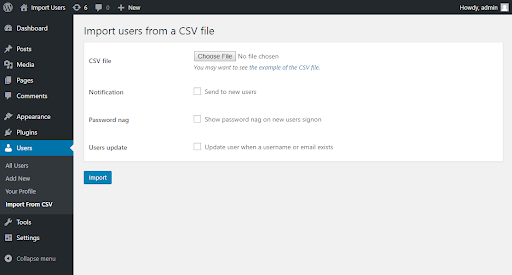
7. Complete Your Member Import
Navigate to Users > Import From CSV in the WordPress admin.
- CSV File: Select the new CSV import file you prepared based on the s2Member® export.
- Notification: Leave this unchecked; This functionality allows you to send notification to newly created members. Since you are only updating meta information for existing WordPress Users you do not need any notification.
- Password nag: Leave this unchecked; This functionality is used when new users are added via import and a random password is assigned to their account. It would then prompt any new user to set a new password during their initial sign on.
- Users update: Check this box! This will apply your new meta information per the CSV file being uploaded to existing users.
A Note About Importing Large Member Lists
The limits of this CSV import method depend on your server power. On a mid-range VPS server, you can typically process 250-500 members at a time. This means breaking your import file into chunks. If you have a beefier server, test progressively larger lists until you hit the limit for your server.
It’s also good to test a smaller CSV of just 1-3 rows before tackling a full import to make sure everything is updating as intended.
After importing this test group of 1-3 members, navigate to Memberships > Members in the WordPress admin to verify your newly migrated members.
8. Resume Your Live Website
You’re almost done! Now it’s time to delete s2Member and connect your payment gateway in PMPro.
Remove s2Member Roles
For a totally clean uninstall, you need to remove the custom s2Member roles from your WordPress site. If you only deactivate and and delete s2Member, these custom roles will remain active in your WordPress site.
There are two methods to delete the custom roles created by s2Member:
- Use the User Role Editor plugin to delete custom roles.
- Run the script in the code snippet below in your WordPress admin.
Delete Custom Roles With User Role Editor Plugin
- Install and activate User Role Editor (free plugin available in the WordPress.org plugin repository).
- Navigate to Users > User Role Editor in the WordPress admin.
- Click the Delete Role button in the right column. This action brings up a modal window with a dropdown field.
- Select the role you would like to delete.
- Click Delete Role.
- Any user with the custom role is now reset to your WordPress site’s default role (set on the Settings > General screen in the WordPress admin).
Delete Custom Roles With a Custom Script in the WordPress Admin
To use a custom script in your WordPress site, refer to our guide on making customizations to your membership site. This tutorial explains two methods for adding custom code to adjust your membership site functionality: creating a custom plugin or using the Code Snippets plugin available for free in the WordPress repository.
- Set up this code gist using your preferred method to make customizations to your membership site:
- Code Recipe: Remove s2Member roles from WordPress: https://gist.github.com/strangerstudios/fc455c86697c213c83f6
- Log in to your WordPress dashboard as administrator then navigate to https://YOURDOMAIN.com/?s2cleanup=1. This will update users with s2member_level1 role to subscriber role.
- You must repeat this process for all used roles:
- https://YOURDOMAIN.com/?s2cleanup=2 updates users with s2member_level2 role
- https://YOURDOMAIN.com/?s2cleanup=3 updates users with s2member_level3 role
- https://YOURDOMAIN.com/?s2cleanup=4 updates users with s2member_level4 role
- Then, navigate t https://YOURDOMAIN.com/?s2cleanup=removeroles to delete the roles.
Remove the script from your WordPress site after you complete the role removal process.
Deactivate and Delete s2Member
Once you are sure everything is working properly, you can now safely deactivate and delete s2Member, as well as any s2Member plugins from your site’s /wp-content/plugins/ folder.
9. Activate Payments in Paid Memberships Pro
PMPro has only one settings page to configure the payment gateway for all memberships. Just navigate to Memberships > Settings > Payment Settings. The process of setting up a payment gateway is also outlined in the Initial Setup guide.
Your subscription site relies on messages from the payment gateway to confirm that recurring payments have been received. Stripe refers to this as a “Webhook.” PayPal calls it an “IPN.”
As part of the gateway setup, be sure to update your Stripe Webhook or PayPal IPN within your merchant account. Instructions on how to configure this are available for both gateways in the documentation area: Stripe Webhook Setup and PayPal IPN Setup.
If you need more help with webhooks or IPN, please open a ticket in our members support area so that our team can make sure you’re properly set up to receive the recurring payment messages from your connected gateways.
Redirect s2Member IPN Traffic
If your memberships were recurring, PayPal will continue to send information via IPN to the s2Member handler.
We have written a custom function to redirects this IPN (Instant Payment Notification) message to the correct location for Paid Memberships Pro to process.
Code Recipe: Redirect the s2Member IPN URL to the PMPro IPN URL:
https://gist.github.com/strangerstudios/cccf8144ca2f2a1e41d2
To use the custom function in your WordPress site, refer to our guide on making customizations to your membership site. This tutorial explains two methods for adding custom code to adjust your membership site functionality: creating a custom plugin or using the Code Snippets plugin available for free in the WordPress repository.
Part 2: Configuring Content Protection
Every membership plugin handles content restrictions in a different way. With Paid Memberships Pro, you can restrict individual pages, posts, or entire categories of posts.
Browse our documentation on restricting content to learn more about the various ways you can protect your content with PMPro.
This includes:
- Pages
- Posts and Categories
- Other content types including CPTs
- Courses
- Community features like bbPress and BuddyPress
It’s Time to Celebrate
You did it! You’ve successfully migrated from s2Member to Paid Memberships Pro. Your active subscriptions and members are in place and you’ve configured your content protection so that your membership site is officially ready for action.
If you’re still in need of additional help, be sure to check the Frequently Asked Questions section below, or contact our support team if you’re a premium member.
You have made a great choice by switching to Paid Memberships Pro, the most trusted membership platform that grows with you. We are here by your side as you take your membership business to new heights.
Thinking about switching to PMPro? Our How to Migrate to Paid Memberships Pro guide provides a general overview of the migration process.
Frequently Asked Questions
What is a Staging Site?
A staging site is essentially a duplicate of your website, where you can test out new features and make changes without affecting your live website.
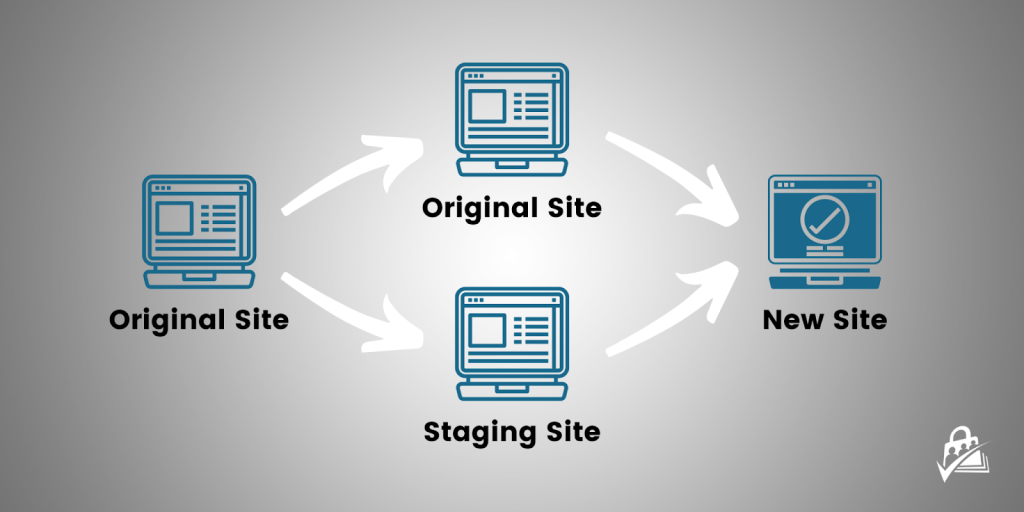
Creating a staging site allows you to get all of your membership data in place before merging it with your live site.
Do I Need a Staging Site?
A staging site is a non-public version of your site’s code that powers your live membership site. Your membership’s staging site, if set up properly, will allow you to add and test all kinds of things before releasing them on your live site.
With a staging site, you can test things like:
- Code recipes
- New features
- New plugins
- Plugin updates
To determine whether or not you need a staging site, here are a few questions to consider:
- How big is your membership site and how often are people logging in to use it? If you have a very active membership site that receives a lot of traffic, using a staging site may be a wise choice.
- How many new subscribers do you get per day? If it’s less than 10, you can probably migrate from s2Member to Paid Memberships Pro without using a staging site.
- If you temporarily paused your site, could you put up a contact form and still gather responses? If so, you might not need a staging site.
- Do you have minimal development experience? A staging site can help to avoid issues that you can’t fix.
- Do you just want to experiment? A staging site is a safer bet if you want to play around without killing your live site.
This seems really complicated.
If this is all too overwhelming or confusing for you, consider upgrading to PMPro Max. Our support team will facilitate your migration for you.
More Migration Guides
- Migrate from MemberPress to PMPro: Preserve active Stripe and PayPal subscriptions, map custom fields, and retire MemberPress cleanly.
- Migrate from Restrict Content Pro to PMPro: A developer-focused walkthrough for moving members, subscriptions, and gateway data out of RCP.
- Migrate from s2Member to PMPro: Convert s2Member roles and subscriptions to PMPro levels, including scripts to fully remove s2Member’s custom role data.
- Migrate from Ultimate Member to PMPro: Bring your user profiles, custom fields, and member directory into PMPro, with an option to skip the CSV import entirely for simpler sites.
- Migrate from WooCommerce Subscriptions to PMPro: Transition off WooCommerce Subscriptions’ database-driven billing to PMPro’s gateway-native recurring payments.
Don’t see your platform? You’re not stuck. Our team has a general process that works for any migration, and PMPro supports imports from any system that can export member data to CSV. If you’re coming from a SaaS platform like Kajabi, Memberful, Substack, Patreon, Squarespace, or Mighty Networks, the core steps are the same, you’ll just need to adapt the export process to your current tool. Reach out to our support team to chat through how we can facilitate the migration process for you.
Free Download: The AI-Powered Membership Site Blueprint
Download the free guide: Learn how to plan, build, and grow a membership site using AI as your strategic partner: from buyer persona to launch and beyond.


