The default courses module organizes your course content, protects access by membership level, and tracks lesson completion.
- Create an unlimited number of courses and lessons
- Organize courses by category
- Protect lesson content by membership level
- Allow members to track lesson completion
Set Up Courses and Lessons
Here’s how to set up the default courses module for Paid Memberships Pro (no third-party LMS plugin required):
- Install and Activate Plugins
You will need Paid Memberships Pro and our Courses for Membership Add On (free) installed and activated on your site.
- Navigate to Memberships > Courses
Check the box for Default to enable the course and lesson post types bundled with this plugin.
- Save Settings
Save the module selection.
- Create Lessons
Navigate to Courses > Add Lesson to create your lessons. Individual lessons in a protected course are not accessible for non-members. For help outlining your course structure, check out the Courses Hub here.
- Optional: Set Up Course Categories
Navigate to Courses > Course Categories to create or manage course categories.
- Create a Course
Navigate to Courses > Add Course to create a course. The course content is, by default, visible to anyone browsing your site. Imagine this page content is the sales copy that entices people to purchase access. Assign the course to categories (optional).
- Organize Lessons in the Course
In the Lessons metabox (below the post editor), add the lessons you want to offer in this course. Reorder lessons by clicking Edit and changing the numeric order. This order is not shown to members, so you can leave gaps like 10, 20, 30 in case you want to squeeze in lessons later.
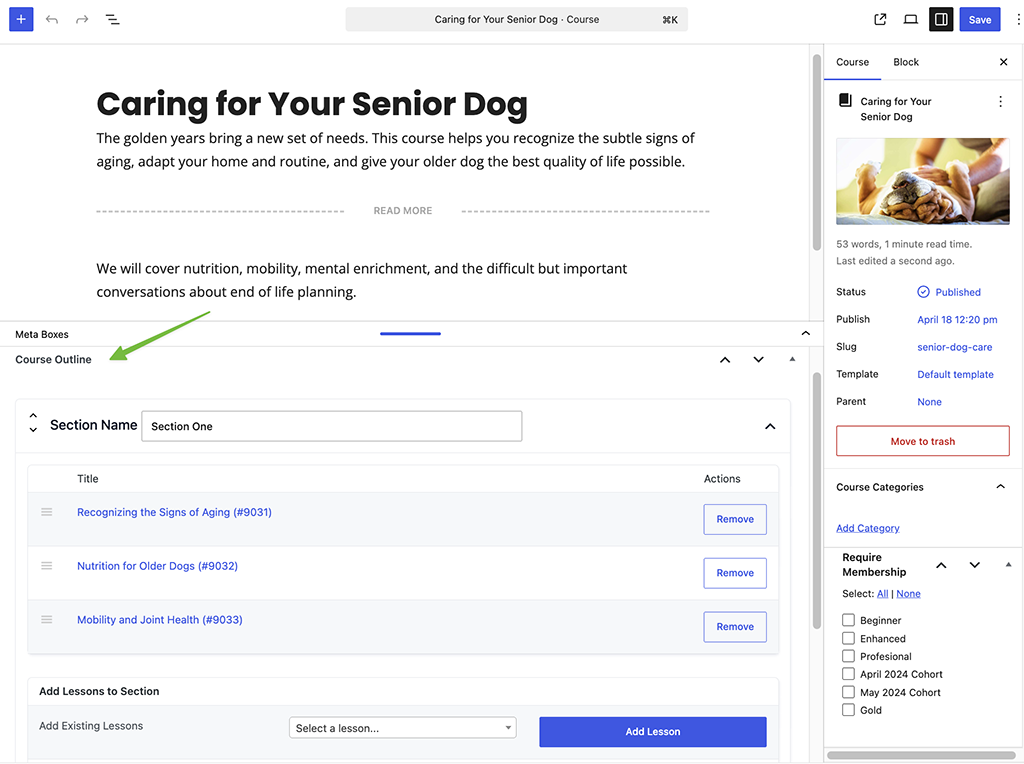
- Organize Lessons into Sections (Optional)
To group lessons under named headings, use the Course Outline metabox. Add a section title and assign lessons to it. Sections are collapsible on the frontend and help members navigate longer courses without scrolling through a flat list.
- Protect Course Access
In the Settings sidebar, locate the Require Membership metabox. Check any membership levels that you want to allow access for this course.
- Save Changes
Save and update your course. That’s it. The course is now protected for the chosen memberships levels.
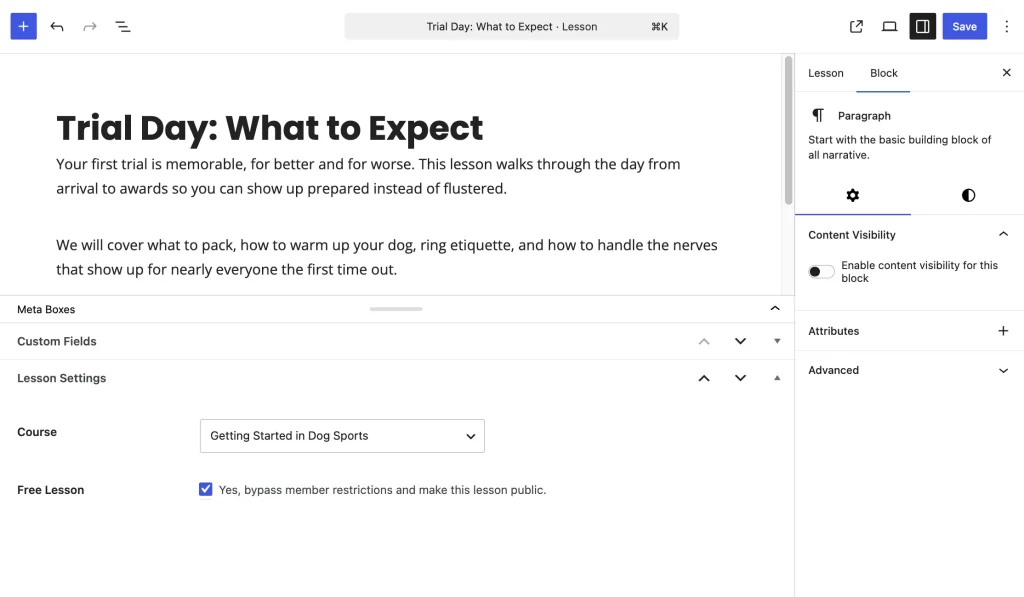
How to Mark a Lesson as Free (Public Preview)
By default, every lesson inside a protected course is restricted to members only. You can mark individual lessons as free so non-members can view them — useful for offering a preview lesson that encourages visitors to sign up.
To make a lesson as free:
- Navigate to Courses > All Lessons and open the lesson you want to make public.
- In the Lesson Settings section, check the Free Lesson option to make the lesson publicly accessible.
- Save the lesson
Non-members who visit a free lesson will see the full content. If they navigate directly to any other lesson in the same protected course, they will be redirected to the course page as usual.
How to Rebuild Permalinks
Note: You may initially see a ‘404: Page Not Found’ error when trying to view a built-in Course or Lesson post type. Here’s the steps to fix that:
- Navigate to Settings > Permalinks.
- Click “Save Changes“
This step “flushes the rewrite rules” in your WordPress site and allows the Course and Lesson custom post types to use your default rewrite rules.
Courses Catalog Archive Page
The default module has an option to enable to disable the archive page for your courses. This archive will use your theme’s default post archive layout.
- Navigate to Memberships > Courses in the WordPress admin.
- Choose a setting for the Enable Archive Page for the Default Courses CPT? option. If checked if, your site will show an archive of all courses at
yoursite.com/courses/
Note: It’s useful to disable this archive if you are building your own catalog page some other way or have another LMS plugin active at the same time and want to allow that other plugin to control what shows up at this URL.
Course and lessons can be public or require membership. When a course requires membership, every lesson within that course is automatically protected. Non-members cannot view a single lesson page in a protected course. If they happen to know a lesson’s URL, the logic in this plugin redirects them to the course page.
Lesson Progress Tracking
The default module includes built-in progress tracking for members.
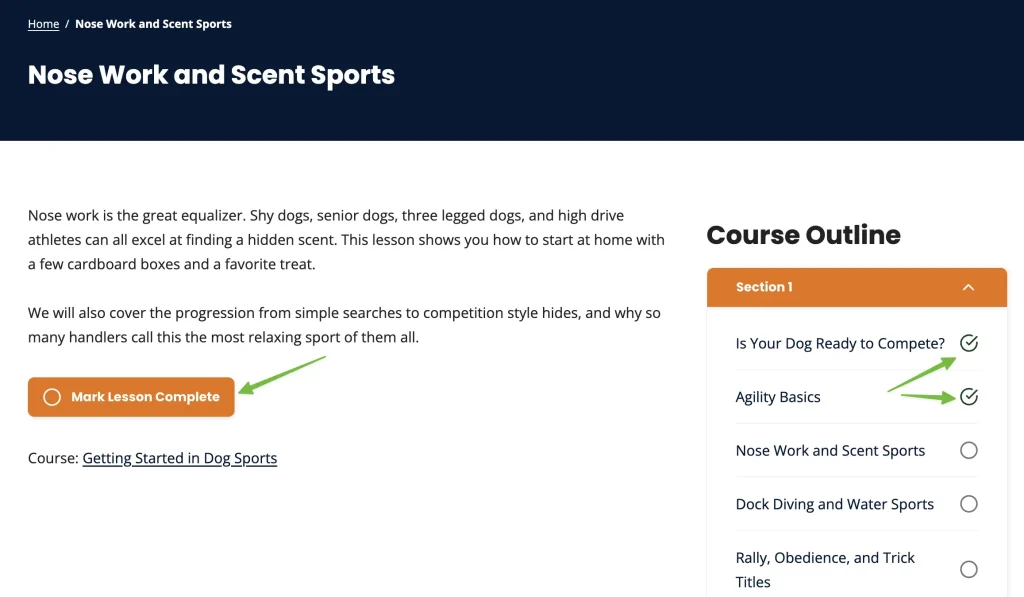
- On each lesson page, logged-in members with access will see a Mark Lesson Complete button. After clicking it, the button changes to Lesson Completed, and members can toggle the lesson status back at any time.
- Completed lessons are marked with a check icon in the course outline, and logged-in members can view their lesson completion progress. Completion data is stored per user, per lesson.
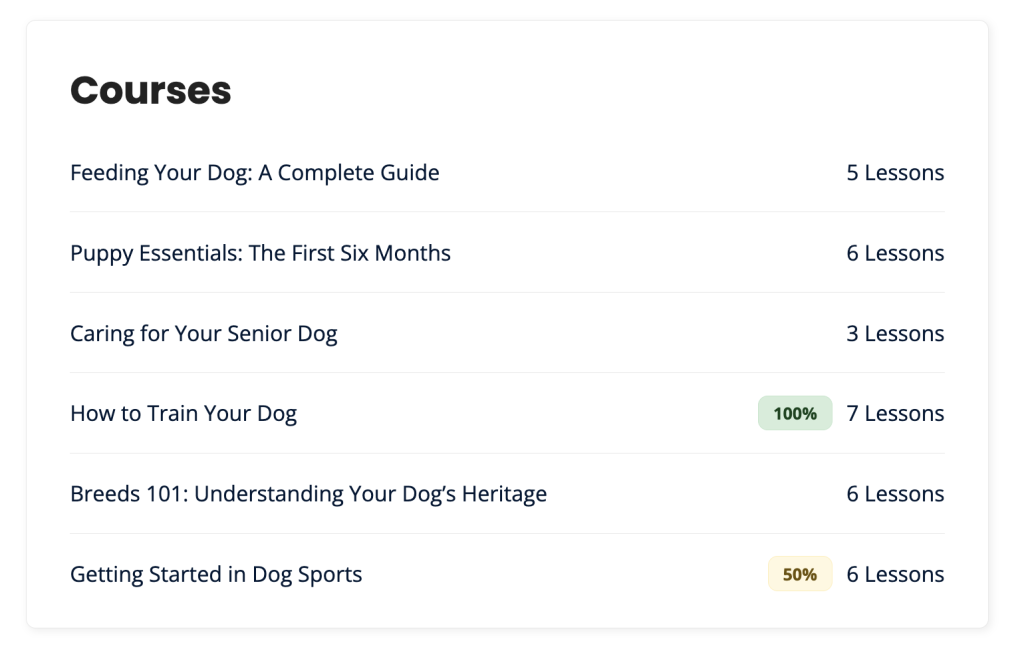
- To display a course progress percentage, use the [pmpro_my_courses] shortcode or the My Courses block. We recommend adding this to the Membership Account page or another member-facing area of your site.
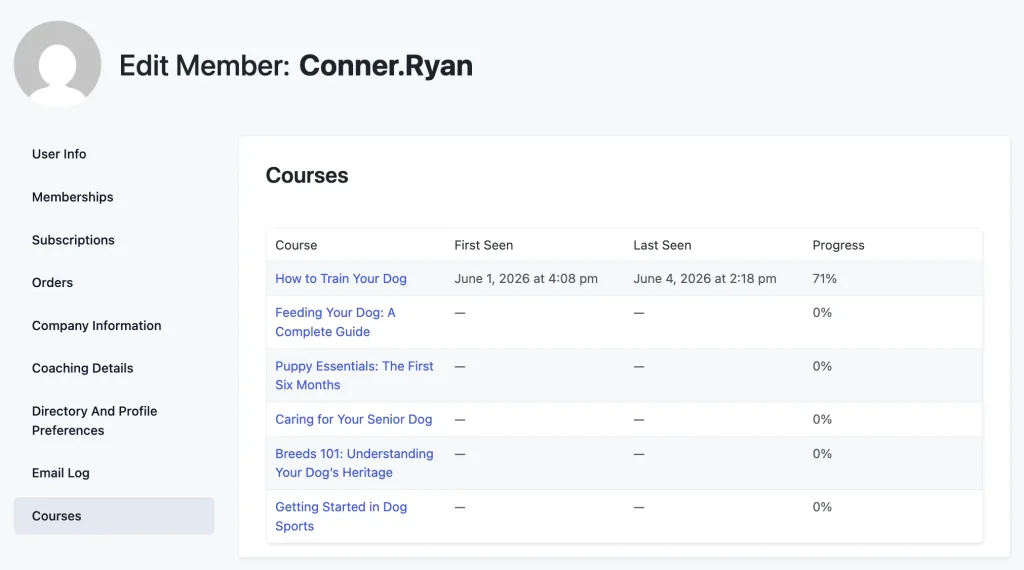
Member Progress (Admin View)
When the default module is active, a Courses panel is added to each member’s edit screen. This lets you see how any member is progressing through your courses without a separate reporting tool.
To view a member’s course progress:
- Navigate to Memberships > Members in the WordPress admin.
- Click the member’s name to open their edit screen.
- Scroll to the Courses panel.
The panel shows a table of all courses the member currently has access to, including:
- Course name
- Date of first lesson activity
- Date of most recent lesson activity
- Overall completion percentage for that course
Get Support From Our Team of Experts
For more help with this PMPro feature, check out our Support Page with three ways to get support as a free or premium member.
Last updated on June 16, 2026

