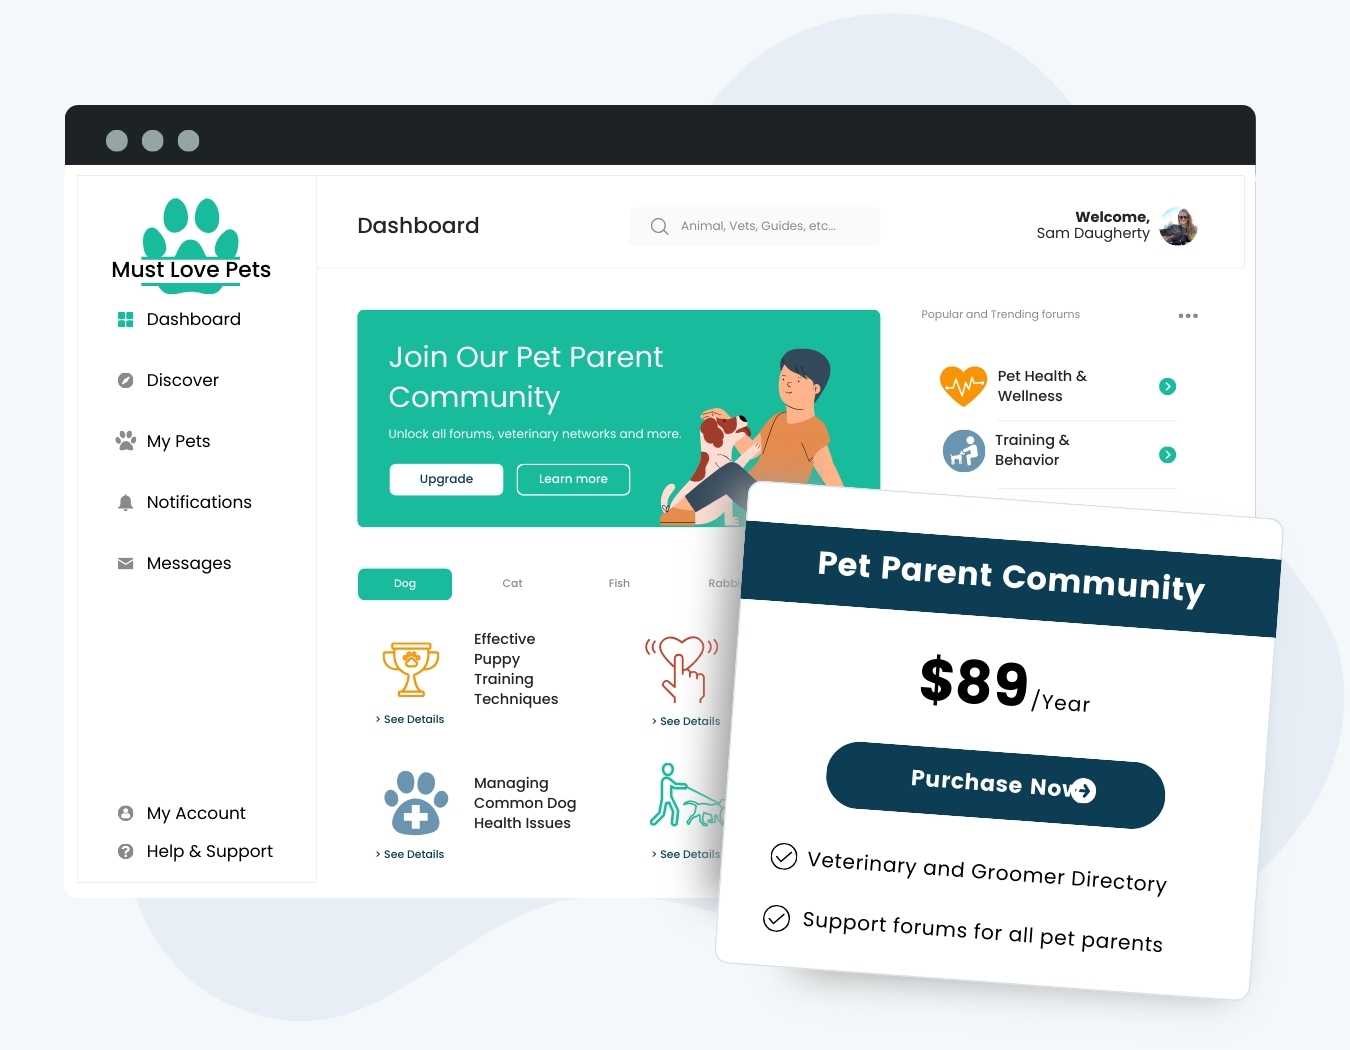
Build and grow an online community that you control. Communities bring together like minds and niche groups of people, while helping you earn a reliable income through a fully customizable online business.
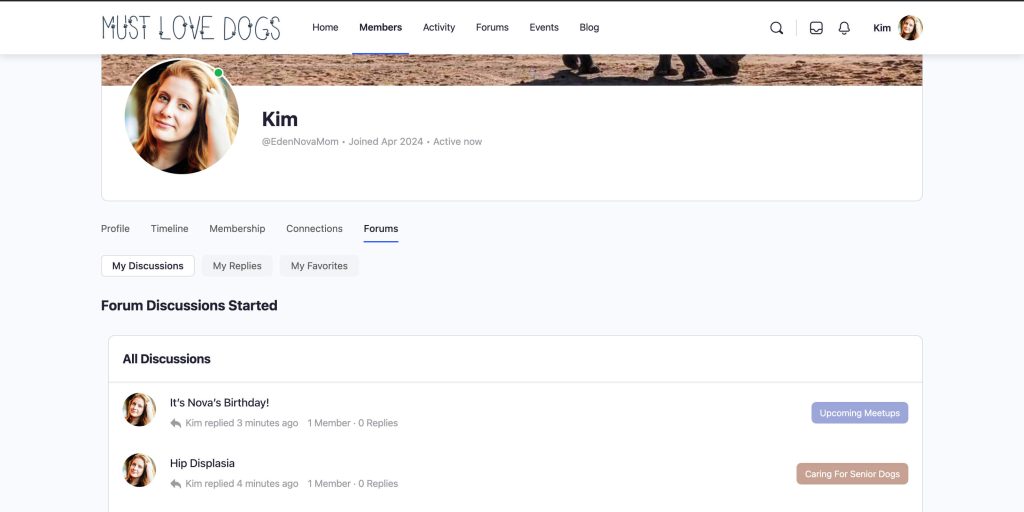
- Protect any members-only community feature like Member Profiles, Forum Participation, Activity Streams, Direct Messaging, Notifications, and more.
- Works with BuddyPress, the original open source community plugin for WordPress, or BuddyBoss, a next generation community plugin with premium themes and features.
- Use PMPro to power user registration, member approvals, accept recurring subscription payments for community access, and more.
Try a Demo: View the Communities demo site or launch a free private demo now.
With Paid Memberships Pro, you can restrict access to specific features of your community by membership level, allowing you to build a custom, private, and flexible members-only community.
Installation
You must have the Paid Memberships Pro plugin installed and activated to use this Add On.
- Navigate to Memberships > Add Ons in the WordPress admin.
- Locate the Add On and click “Install Now“.
- Or, to install this plugin manually, download the .zip file above.
- Upload the compressed directory (.zip) via the Plugins > Add New > Upload Plugin screen in the WordPress admin.
- Activate the plugin through the Plugins screen in the WordPress admin.
Note: To use this Add On, you must also install either BuddyPress or the BuddyBoss Platform.
Settings: Community Access and Membership Restrictions
1. Edit Your PMPro Page Settings
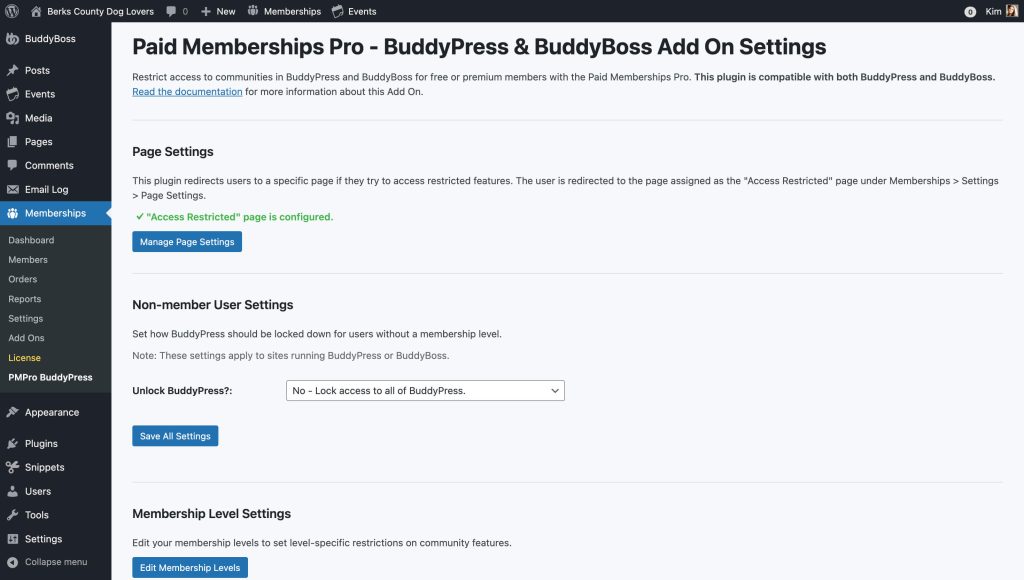
This plugin redirects users to a specific page if they try to access restricted community features. The system redirects the user to the page assigned as the Access Restricted page under Memberships > Page Settings.

- Navigate to Memberships > Settings > Pages.
- Under Additional Page Settings, generate or select an existing page for the Access Restricted page.
- If you are using an existing page, be sure to include the
[pmpro_buddypress_restricted]shortcode in the page content. - Save Settings.
2. Customize Settings Per Membership Level
With PMPro, you have a few choices for how you give members-only access to community features on WordPress.
- You can choose to give members of a level access to all of BuddyPress (and thus lock all other users without that level from accessing BuddyPress features), or
- You can choose specific features that require that membership level and leave other features open to visitors or logged-in users.
Lock or Unlock BuddyPress
If you are planning to restrict your community for more than one level, the plugin will check if the user has ANY level giving them access to those features.

- Navigate to Memberships > Settings > Levels.
- Select a level to edit or create a new level.
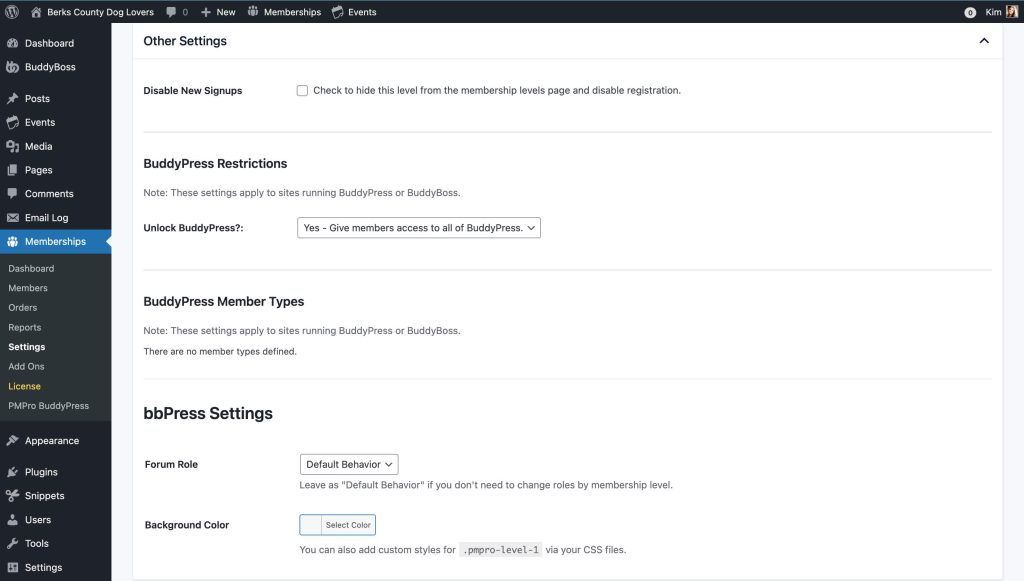
- In the Other Settings section, locate the BuddyPress Restrictions section.
- Adjust the setting for Unlock BuddyPress? to your desired option.
- Save Settings.
If you do not restrict access to all of BuddyPress/BuddyBoss, you can set up specific areas of the community and restrict them by Membership Level.
Specific Membership Access Settings For Your Community
| Feature | Description |
|---|---|
| Group Creation | Can members of this level create Groups? |
| Single Group Viewing | Can members of this level view individual Groups? |
| Groups Page Viewing | Can members of this level view the Groups page? |
| Joining Groups | Can members of this level join Groups? |
| Public Messaging | Can members of this level send public messages to other members? |
| Private Messaging | Can members of this level send private messages to other members? |
| Send Friend Requests | Can members of this level send friend requests to other members? |
| Include in Member Directory | Should members of this level be included in the member directory? |
Adjust Groups Membership
On the Edit Level screen, you can also control Group Membership. Your community’s groups can help you create separate member directory views of people from the same group.
- Navigate to Memberships > Settings > Levels.
- Select a level to edit or create a new level.
- In the Other Settings section, locate the BuddyPress Restrictions section.
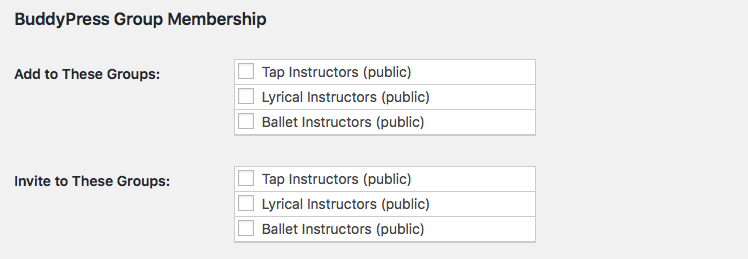
- Under BuddyPress Group Membership, select the groups you would like to add or invite members to.
- The system automatically adds members to any group checked in the Add to these Groups option.
- Users will be invited (can manually choose to join) any group checked in the Invite to these Groups option.
- Save Settings.
3. Customize Non-Member (User) Settings
Some of your WordPress users may not have a membership level in Paid Memberships Pro. This plugin allows you to set how the community should be locked down for these users without a membership level.
- Navigate to Memberships > PMPro BuddyPress.
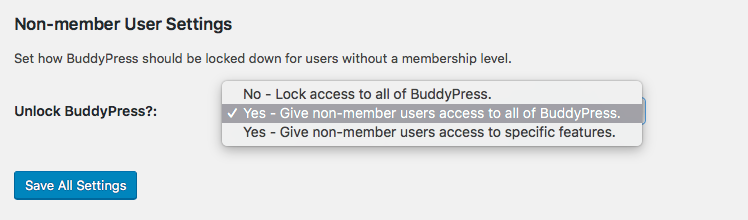
- Under the Non-member User Settings section, change Unlock BuddyPress? to your desired option.
- You can choose to:
- Lock access to all of BuddyPress
- Give non-member users access to all of BuddyPress
- Choose specific features that they can access.
- Save Settings.
4. Decide on Your Default User Registration Process
Most sites will want to force community members to register through the default PMPro Membership Checkout process.
In a few small cases, sites may want to allow users to register through BuddyPress or BuddyBoss’ user registration process. Here’s how to turn on the community plugin’s registration option:
- Navigate to Memberships > PMPro BuddyPress.
- Select your desired setting under Registration Page. Most sites will want to keep this set to Use PMPro Levels Page.
- Save Settings.
It is important to note that the community plugin’s registration process (BuddyPress or BuddyBoss) will not automatically apply a membership level to the user, nor will it allow you to process a paid membership checkout.
- If you are allowing users without a membership level access to some portion of BuddyPress, you can select the Use BuddyPress Registration Page.
- This will only work if you have set the Non-member User Settings to allow access to some features of BuddyPress.
- If you’d like to apply a default membership level (free / non-paid) as part of user registration, please refer to this tutorial.

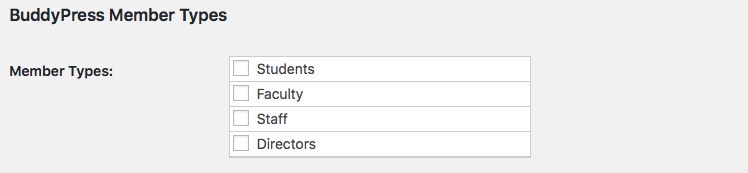
5. Creating and Assigning Member Types by Membership Level
- Navigate to Memberships > Settings > Levels.
- Select a level to edit or create a new level.
- In the Other Settings section, locate the BuddyPress Restrictions section.
- Under BuddyPress Member Types, select the member types you would like to assign for members of this level.
- Save Settings.
Note that BuddyPress Member Types must be created through custom code. This post explains how to add Member Types to BuddyPress.
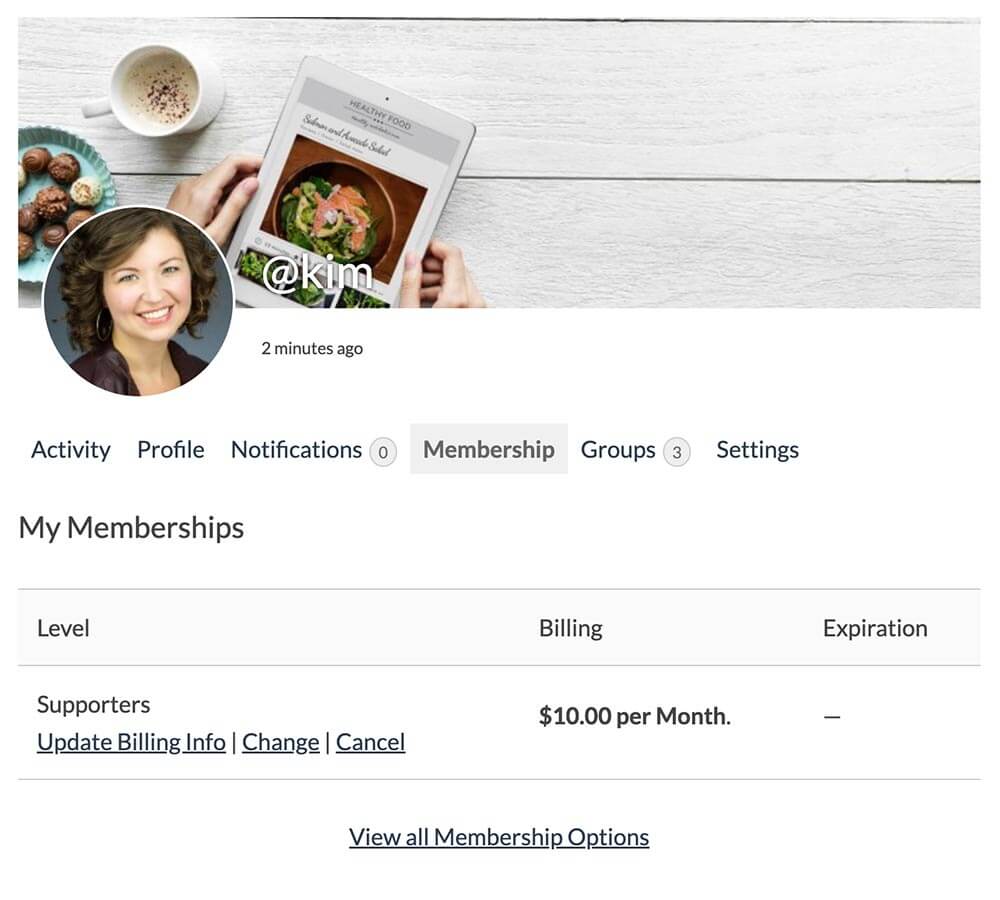
6. Confirm the Membership Tab on BuddyPress Profile
This integration adds a new “Membership” tab to the BuddyPress or BuddyBoss frontend profile.
- This tab is only shown if the logged-in user is viewing their own profile.
- The tab contents, by default, load the entire Membership Account page shortcode.
- You can filter the output of this tab using the
pmpro_buddypress_profile_account_shortcodefilter.
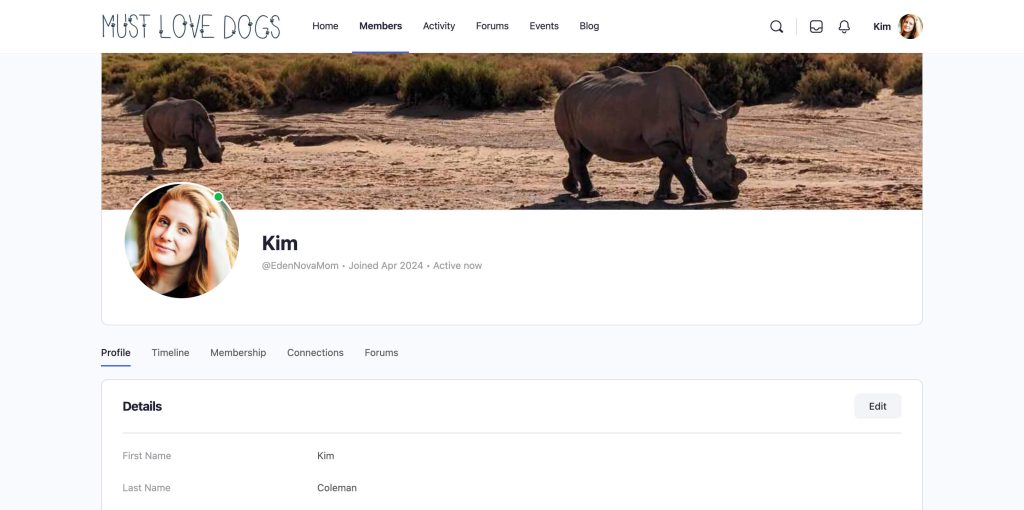
7. Setting to Show the Member’s Level Name on BuddyPress Profile
- Navigate to Memberships > PMPro BuddyPress in the WordPress admin.
- Select “Yes” under “Show Membership Level on BuddyPress Profile?“
- Save Settings.
8. Synchronize User Fields With XProfile Fields
When defining custom user profile fields, you can also set up custom code that will duplicate the field to your BuddyPress XProfile Fields.
- Set up your user fields in Memberships > Settings > User Fields screen.
- Set up your fields in the BuddyPress Extended Profile.
- Note the name of your User Fields and the name of your XProfile fields.
- Create custom code, like the example below, to match each User Field name you want to connect to an XProfile field name.
Once this code is in place, the BuddyPress Integration for PMPro will keep XProfile Field updates in sync with user meta fields. Any update to the user meta field will also update the XProfile Field.
Here is an example of some User Fields fields defined with the buddypress option:
Video: Build a Complete Community Site
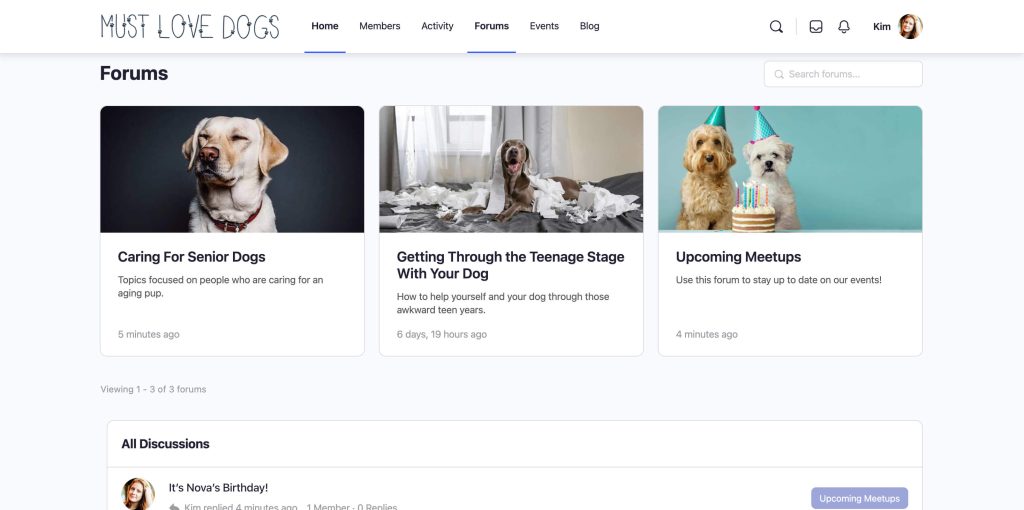
Forums With BuddyPress
If you enable Forums and want to protect them by membership level, you must also use the bbPress Integration Add On here. This allows you to protect access and adds additional membership site features to your community’s forums and topics.
Please note: BuddyBoss is not the same as BuddyPress
We have an article about using BuddyBoss with Paid Memberships Pro on our blog. The post details what is unique to the BuddyBoss platform and how to use PMPro to protect areas of your BuddyBoss site.
- The BuddyBoss Theme is a premium theme that works with either BuddyPress or their BuddyBoss Platform. Our BuddyPress Integration Add On is developed specifically for the BuddyPress plugin and may not fully integrate with the extended features that the BuddyBoss Theme offers. The BuddyBoss Theme does offer a Paid Memberships Pro integration, and we advise that you test how far this integration allows you to use the specific PMPro features you are interested in.
- The BuddyBoss Platform is a free platform that is meant to replace BuddyPress. Our BuddyPress Integration was not created to integrate with this platform directly, but BuddyBoss advertises that anything you can do with BuddyPress can also be done with BuddyBoss. Read more about the BuddyBoss platform here.
- You can also find more information about the differences between BuddyBoss & BuddyPress in their comparison guide.
- Forums included with BuddyBoss are a fork of the bbPress forums. You must also use the bbPress Integration Add On here to restrict access.
Action and Filter Hooks
apply_filters( 'pmpro_buddypress_profile_account_shortcode', '[your_custom_shortcode]' );
Customize the output of the Membership tab on the BuddyPress single user profile.
apply_filters( 'pmpro_bp_get_user_options', $pmpro_bp_all_options, $user_id );
Dynamically adjust BuddyPress features based on the user’s membership level via custom code.
apply_filters( 'pmpro_bp_user_can', $can, $check, $user_id );
Adjust whether a given user has access to a specific BuddyPress features by checking their membership level options. Defaults to permitting access if global permissions are set to ‘give all access’.
do_action( 'pmpro_bp_redirect_to_access_required_page' );
Hook to change default behavior right before a user is redirected (when access is restricted based on their membership level).
apply_filters( 'pmpro_bp_directory_sql_parts', array $sql_parts, array $include_levels );
Filter each SQL part to allow for extended queries in the directory.
Screenshots
This is a Free Add On.
Create a free account or log in to gain access to downloads and documentation.

