When you edit a page, post, or supported custom post type in the block editor, Memberlite adds panels to the Settings sidebar so you can change how that one item looks. These settings override the site-wide defaults you set in the Customizer.
Where to Find These Settings
- Open the page or post in the block editor.
- Click the gear icon in the top-right corner to open the Settings sidebar, then select the Page (or Post) tab.
- Scroll down to find the Memberlite panels described below.
- Click Save or Update to apply your changes.
| Panel | Shows On | What It Controls |
|---|---|---|
| Layout | Pages, posts, and supported custom post types | The layout for this item, plus custom sidebar settings when the layout has a sidebar |
| Banner Image | Every post type | The image used as the masthead background |
| Page Settings | Pages | The masthead banner, page title, breadcrumbs, text alignment, and prev/next navigation |
| Template Settings | Pages | Header and footer variation overrides, or hiding the header or footer |
Layout
Memberlite has five layouts: Right Sidebar, Left Sidebar, Narrow (a single centered column, about 800px wide), Contained (a single wider column, up to 1230px), and Full Width (edge to edge, pages only). You set the default layout for each part of your site in the Customizer. Read more about the layouts and their defaults in Layout Settings.
Choose a Layout for a Single Page or Post
The Layout panel lets one page, post, or supported custom post type use a different layout than your Customizer default.
- Open the item in the block editor and find the Layout panel in the Settings sidebar.
- Leave it on Default to follow your Customizer setting. The panel shows which layout that is, with a link to change the default in the Customizer.
- Or, select Right Sidebar, Left Sidebar, Narrow, Contained, or Full Width to override the default for this item only.
- Click Save or Update.
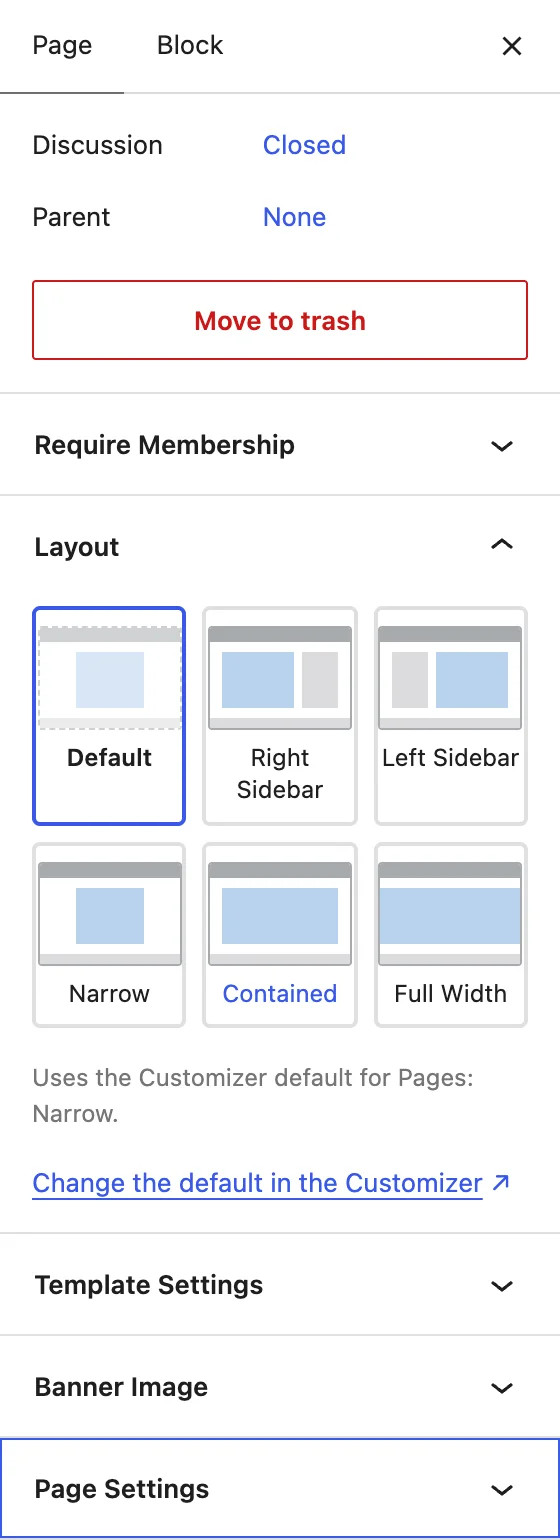
A few things to know:
- Your homepage uses Contained unless you pick a layout for it.
- The page set as your Posts page (under Settings > Reading) uses the blog and archive layout. Its Layout panel changes the layout of your blog index.
- Full Width is only offered on pages.
- If a page uses a page template from a child theme or plugin, that template controls the layout. The Layout panel tells you so. Switch the page back to the default template to pick a layout.
Custom Sidebar Settings
When the layout has a sidebar, the Layout panel also shows your custom sidebar settings:
- Custom Sidebar: Choose a custom sidebar to show on this item. The help text below the field tells you which sidebar shows by default.
- Default Sidebar Behavior: Once you pick a custom sidebar, choose Show Default Sidebar Above, Show Default Sidebar Below, or Hide Default Sidebar.
- Hide Page Children Menu in Sidebar (pages only): Hides the menu of child pages that Memberlite shows at the top of the sidebar.
Create custom sidebars under Memberlite > Custom Sidebars. The Manage Custom Sidebars link in the panel takes you there.
Page Settings Panel
The Page Settings panel controls the masthead banner at the top of a single page and the navigation at the bottom. It shows on pages only.
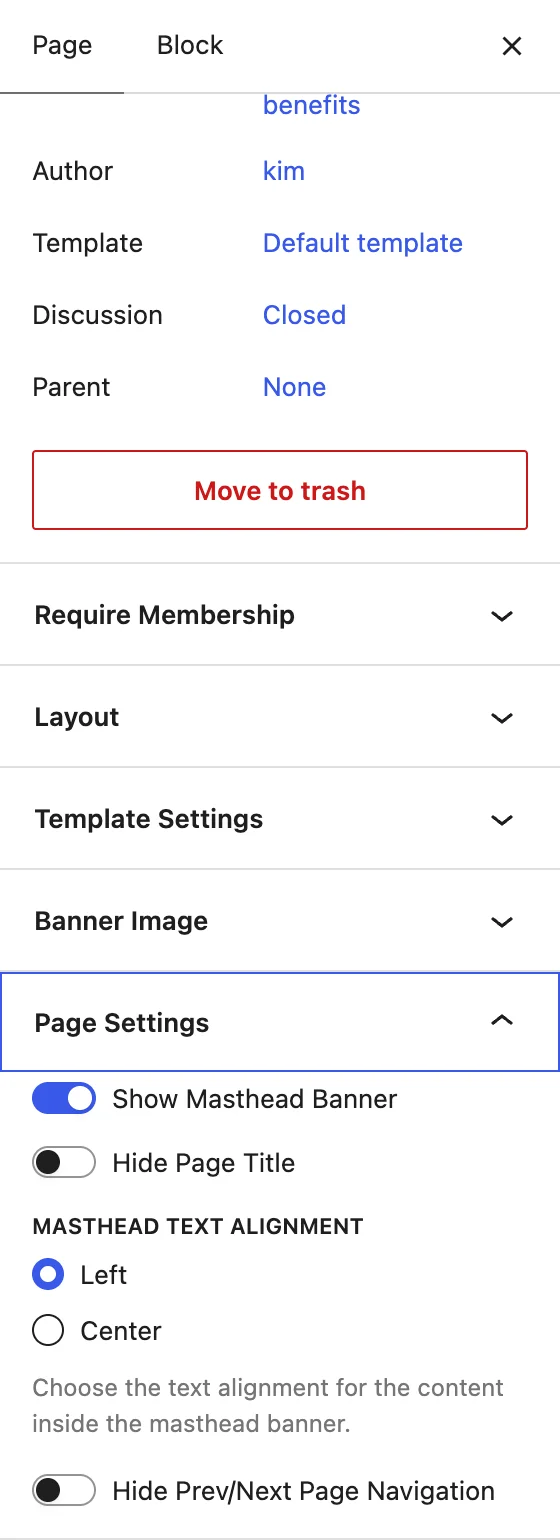
- Show Masthead Banner: Turn this off to remove the masthead banner from this page. The other masthead settings are hidden while it is off.
- Hide Page Title: Hides the page title in the masthead banner.
- Hide Page Breadcrumbs: Hides the breadcrumbs on this page. This only shows when breadcrumbs on pages are turned on in the Customizer.
- Masthead Text Alignment: Choose Left or Center for the title in the masthead banner.
- Hide Prev/Next Page Navigation: Hides the previous and next page links at the bottom of this page. This only shows when Show Prev/Next on Single Pages is turned on under Appearance > Customize > Pages.
Page Navigation
Prev/next page navigation is set for all pages in the Customizer. Read more about Prev/Next Navigation. To turn it off on a single page, use the Hide Prev/Next Page Navigation toggle in the Page Settings panel.
Template Settings Panel
Individual pages can use a different header or footer than the rest of your site. These overrides are set per page in the block editor and take priority over the global header and footer variations you assigned in the Customizer.

To change the header or footer on a single page:
- Open the page in the block editor.
- In the Settings sidebar, find the Template Settings panel.
- Use Override Header Variation to select a header variation for this page, or leave it on — No Override — to use your Customizer assignment.
- Use Override Footer Variation to select a footer variation for this page, or leave it on — No Override —.
- Click Update to save.
Hide the Header or Footer on a Page
You can also hide the header or footer entirely on a single page. In the same Template Settings panel, turn on Hide Header or Hide Footer.
These settings only apply to pages. They are not available on posts, archive pages, or other content types. For more about creating and assigning variations, see Header and Footer Variations.
Featured Image and Banner Image
Featured Images and Banner Images are graphics that represent your content. Where they show depends on your Customizer settings.
Featured Images
Every page and post can have a Featured Image, set in the Featured Image panel in the Settings sidebar. This is the image used when your content is shared on social media, and in other places on your site depending on your settings.
- The Featured Image can show on your blog, archive, and search pages. Choose how under Appearance > Customize > Posts & Archives > Featured Images. Read more about Featured Image settings.
- The Featured Image is the graphic used in the
[memberlite_subpagelist]output. - The Featured Image is the graphic used in the
[memberlite_recent_posts]output.
Banner Images
A Banner Image is used as the masthead background on a single page or post. Set it in the Banner Image panel in the block editor sidebar. The panel shows on every post type.
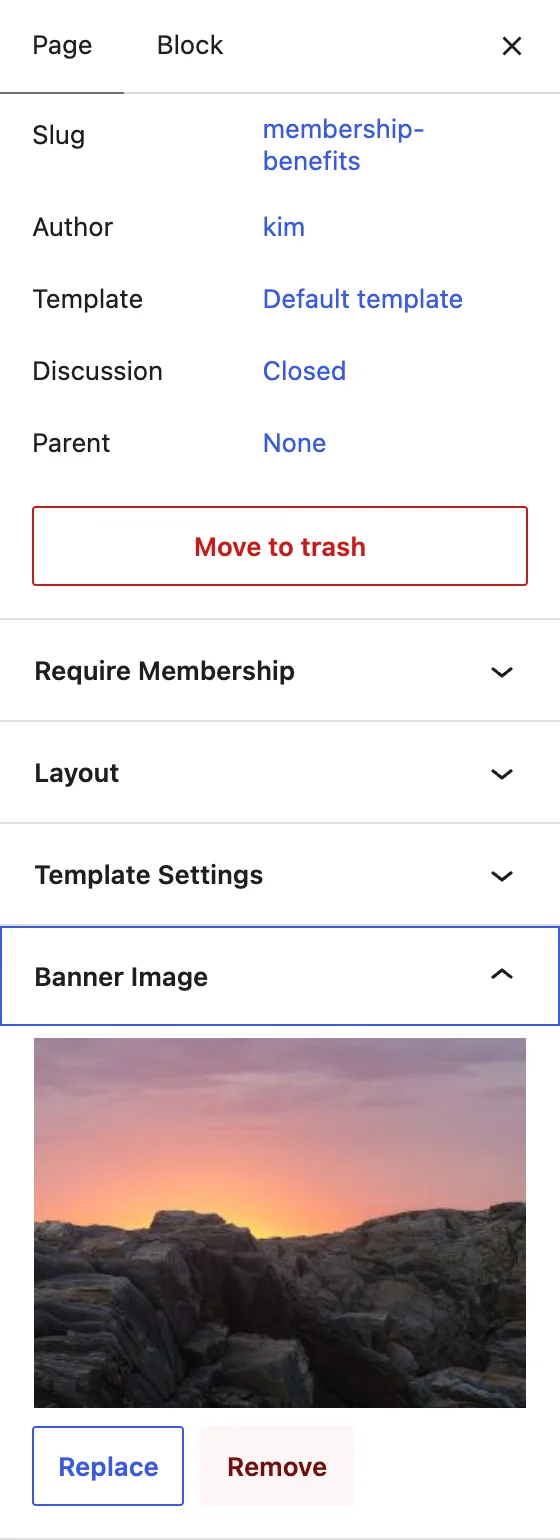
Banner Images can also show on your blog, archive, and search pages. Choose Show Banner Only or Show Banner and Thumbnail under Appearance > Customize > Posts & Archives > Featured Images.
Page Settings From Older Versions of Memberlite
Memberlite 8.0 removed the classic Memberlite Settings meta box that used to sit below the editor, and the layout page templates (Content/Sidebar, Sidebar/Content, Narrow Width, Full Width, Fluid Width, and Landing Page). When you update, Memberlite moves your existing settings for you:
| Old Setting | Where It Is Now |
|---|---|
| Page templates (Content/Sidebar, Narrow Width, and so on) | The Layout panel. Pages are moved to the matching layout on update. Landing Page pages move to Right Sidebar. |
| Show Page Banner, Hide Page Title, Hide Breadcrumbs | The Page Settings panel |
| Banner Image meta box | The Banner Image panel |
| Custom Sidebar meta box | The Layout panel, when the layout has a sidebar |
These fields don’t have a new home: Banner Description, Banner Right Column, Page Bottom Banner, Add Extra Banner Padding, Page Icon, and the Landing Page level, checkout button, and upsell fields. If you set any of them, the values are kept as custom fields on the page (for example, memberlite_banner_desc), but Memberlite doesn’t display them.
Go to Memberlite > Alerts to see which pages had these fields set. Read more about Memberlite Alerts. To show any of these fields again, use the Memberlite legacy page settings code recipes.
Add a Banner Below Your Content
The Page Bottom Banner field is gone. To show a banner below your content, you can:
- Add a Group or Cover block to the end of the page, or insert one of Memberlite’s call to action patterns.
- Use the Page Bottom Banner code recipe to show the content you saved in the old field.
- Use the
memberlite_before_footerhook to show a banner on several pages at once, or based on whether the visitor is a member. Here is an example that uses this hook to set a sitewide membership signup banner.
Get Support From Our Team of Experts
Have a question about how to use this feature? Our Support Page outlines three ways to get support.
Our Max plans include hands-on help customizing your membership site and implementing new features. Upgrade to PMPro Max now »
Last updated on October 28, 2026